Microsoft's Windows 11 operating system includes several user accounts, including an administrator account, that are disabled by default. Users who start Windows 11 for the first time need to create a user account to start using the operating system. The user account is of the administrative class, and other user accounts can be regular user accounts or also administrative.
It is recommended to use standard user accounts on Windows 11, as it limits what malicious code can do on the system, as it runs with the same rights as the user account.
Tip: you can check out our guides for Windows 10 and Windows 8 here.
The Windows 11 administrator account
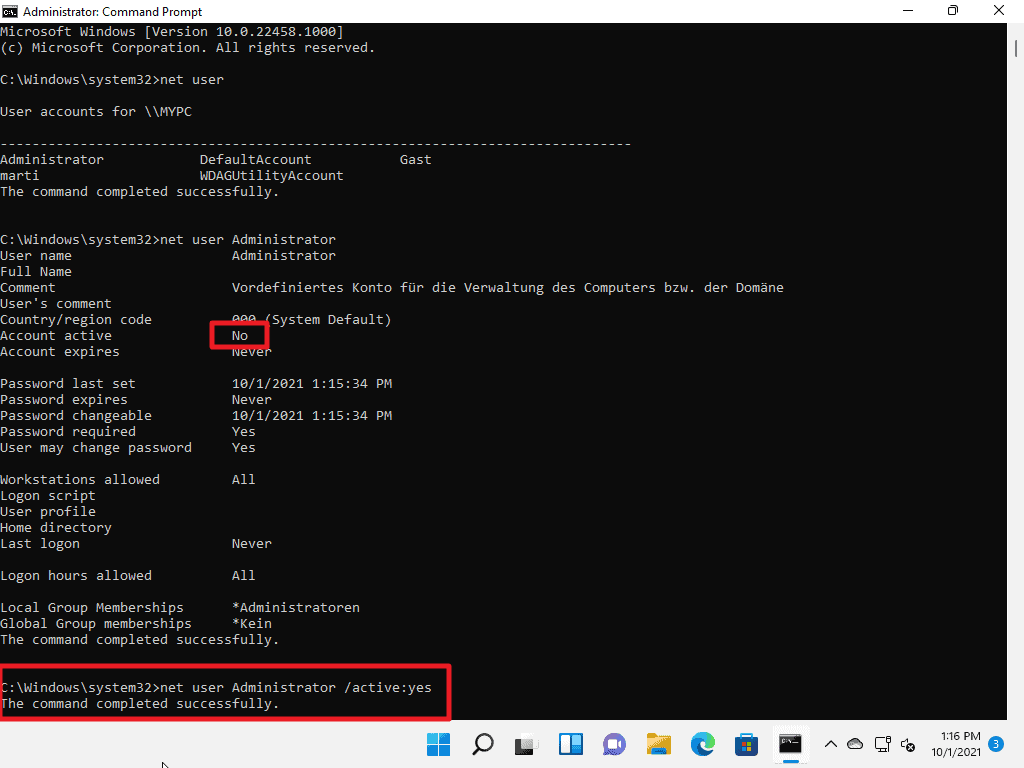
The Windows 11 administrator account is disabled by default. Administrative privileges are required to enable it on the device.
You may ask yourself why you would want to enable the Administrator account if you have administrative rights already. One of the main differences between a user's account that is of the administrator group and the Administrator account that is included by default, is that the latter does not receive UAC prompts.
It may also be a handy backup account in case things go wrong, and you have locked yourself out of the system.
How to enable the default Administrator account on Windows 11
The process requires just a few commands, in fact just one command if you are in a hurry, that is executed from an elevated command prompt window.
Here are the steps:
Step 1: launch an elevated command prompt window
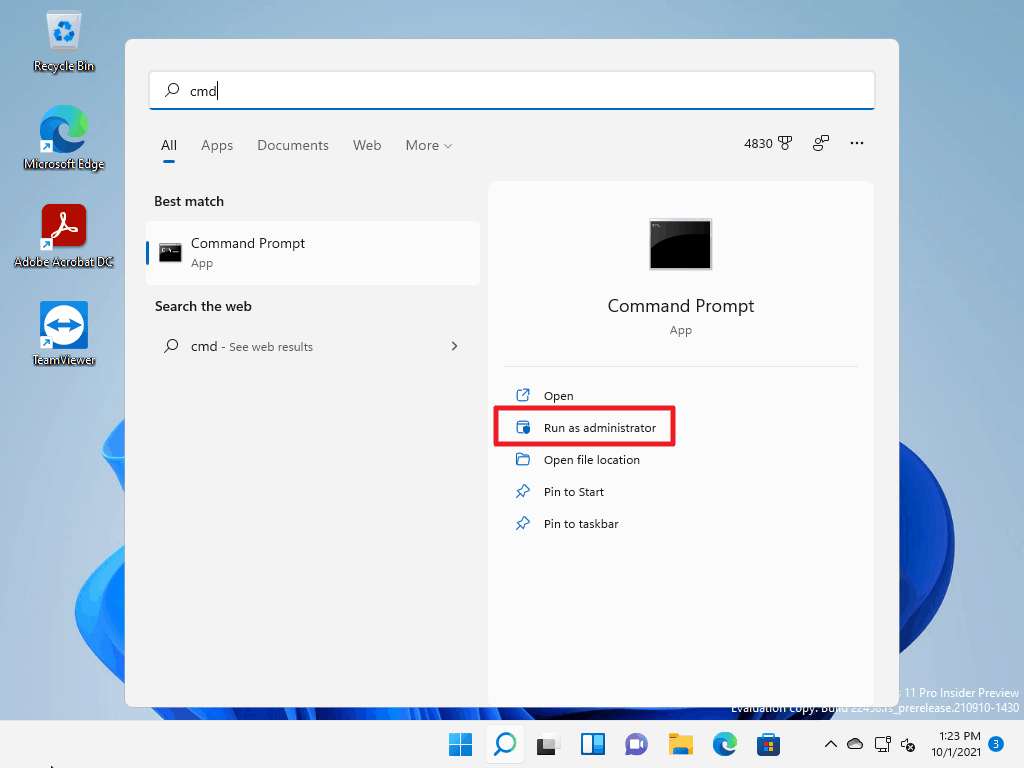
Launch an elevated command prompt window, e.g. by opening the Start menu, typing CMD, and selecting "run as administrator" from the context options that Windows 11 displays. You need to confirm an UAC prompt to launch the elevated command prompt window.
Step 2: check the list of user accounts on the system

Run the command net user to display the list of all accounts that are available on the system. Note that the listing does not reveal if accounts are active or disabled.
Step 3: check the status of the Administrator account
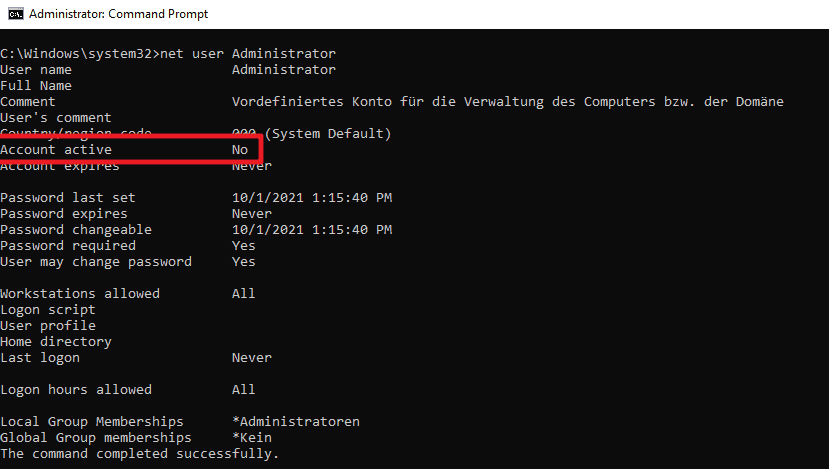
Run the command net user Administrator to display information about the Administrator account. Check the "account active" status to find out if the account is active (yes) or not (no).
Step 4: Enable the Windows 11 Administrator account

Run the command net user Administrator /active:yes to enable the Administrator account. Verify that the command executed successfully by running the command from step 3 again.
Tip: to disable the account, run the command net user Administrator /active:no.
Step 5: Change the administrator password

The default administrator account of Windows 11 is not password protected. You may sign in without typing a password. While that is useful in same cases, it is usually better to set a password to protect it.
Run the command net user administrator * and hit the Enter-key. Type the password that you want to set and repeat the password after you have hit the Enter-key. If the passwords match, the new password is set and is required to sign-in to the account.
Note: the password is not displayed when you type.
Enable the Windows 11 Administrator account in Local Users and Groups
Administrators may use the Local Users and Groups administrative interface to manage the built-in Administrator account.
Step 1: Open Local Users and Groups
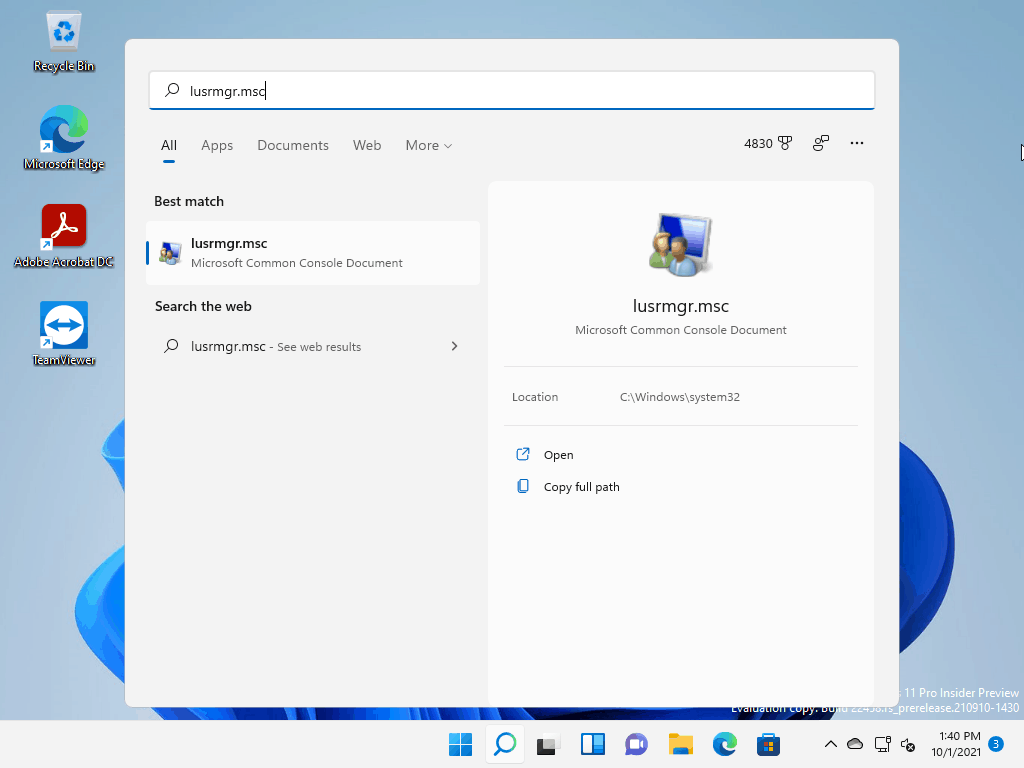
Open the Start interface, type lusrmgr.msc and hit Enter on the keyboard to load the management interface.
Step 2: Display User accounts
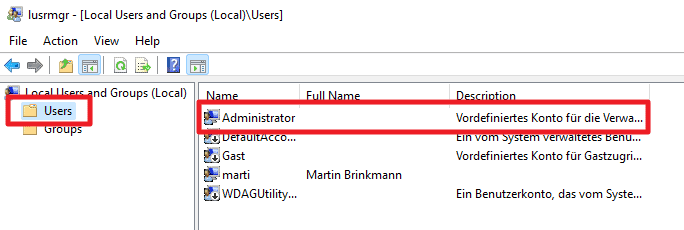
Expand the Users folder displayed on the left to display all accounts that are known on the system.
Step 3: Enable the Windows 11 administrator account
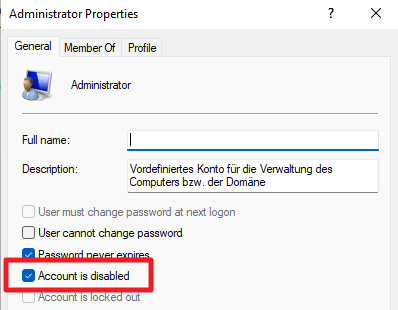
Right-click on the Administrator account in the middle column and select Properties from the context menu. To enable the account, remove the checkmark from "Account is disabled", select apply and then ok to complete the process.
The account is now active.
Step 4: Set a password for the native administrator account
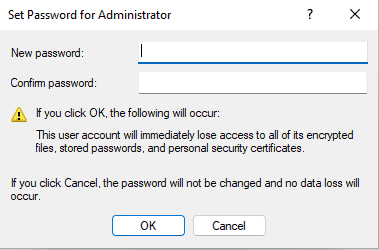
Right-click on Administrator again and select "set password" from the context menu. A warning is displayed, select Proceed to continue.
Type the password twice and select the OK-button to set it.
Now You: do you use a regular user account or an administrator account when you work on your devices?
Thank you for being a Ghacks reader. The post How to enable the hidden Windows 11 administrator account appeared first on gHacks Technology News.


0 Commentaires