There will be an end to the Windows 10 service in the very near future, and Microsoft is becoming increasingly pushy about asking users to upgrade. In case your device meets the Windows 11 requirements, Microsoft will begin to install Windows 11 automatically.
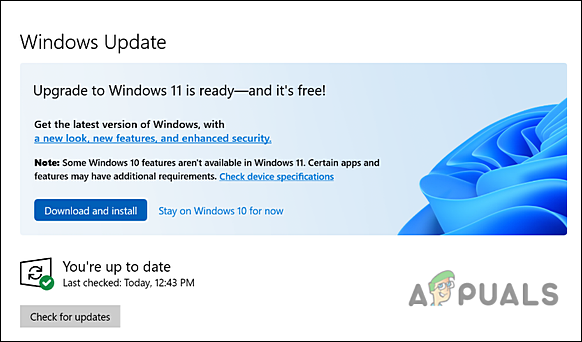
In the event you are not prepared to upgrade to this new Windows version yet, we have provided detailed instructions below on how you can cancel Window. Let’s get started!
Temporarily Pause the Update via Windows Settings
In case you only want to pause the Windows 11 update for a short time, the easiest method to do so is via Windows Settings. This method will allow you to put the update on hold for 7 days or more.
Here is what you need to do:
- Press Windows + I keys simultaneously on your keyboard to open Windows Settings.
- In the Settings window, click on Update & Security, and in the next window, select Windows Update from the left panel.
- Your screen should now display if Windows 11 is ready to be installed on your PC. If it is, you can click on Stay on Windows 10 for now.
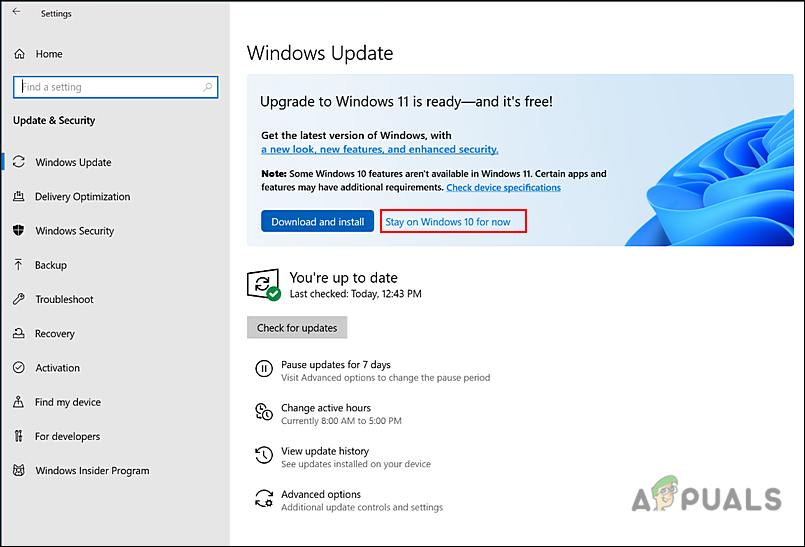
Select the ‘Stay on Windows 10 for now’ option - Alternatively, you can click on Pause updates for 7 days. This should temporarily put the updates on hold for a week.
- If you want to pause them for more than a week, click on Advanced options, and in the next window, expand the dropdown menu under Pause updates.
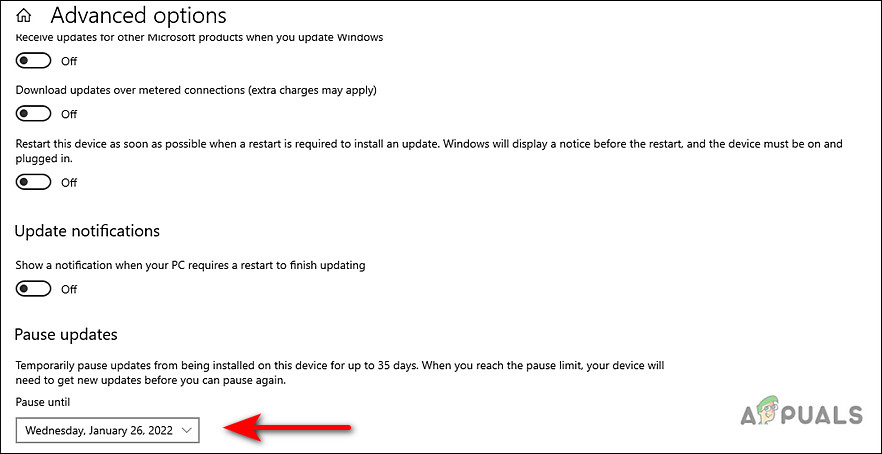
Pause Windows 11 update until a fixed time - You can now select a date of your choice.
Turn Off Windows Update Service
Another easy way to cancel Windows 11 update is by turning off the Windows Update Service.
However, it is essential to keep in mind that this will stop any and all Windows updates (including security and cumulative update patches) from installing on your PC. You will have to turn the service back on manually when you are ready to install the updates in the future.
- Press Windows + R keys simultaneously on your keyboard to open a Run dialogue box.
- In the text field of the dialog box, type services.msc and hit Enter.
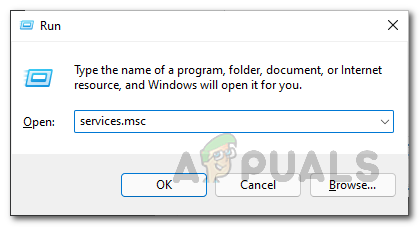
Opening up Services Window - Once you are inside the Service window, locate and double-click on the Windows Update service.
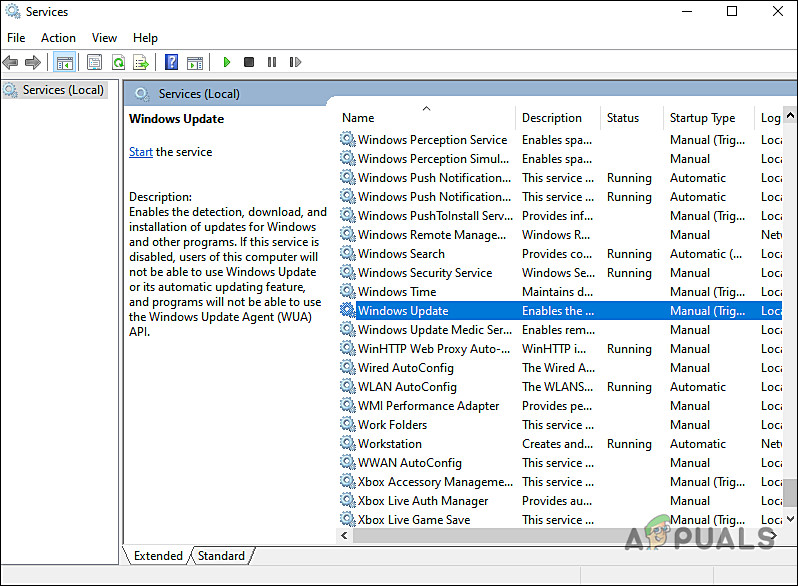
Launch Windows Update Service Properties dialog box - In the Windows Update Properties dialog box, expand the drop-down menu against Startup type and select Disabled.
- Now click on the Stop button under Service status and hit Apply/OK to save the changes.
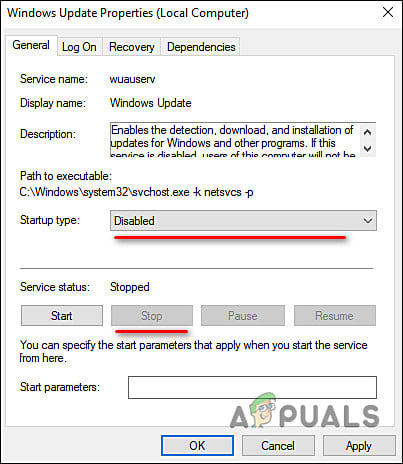
Click on the Stop button to disable WU service
Doing so will cancel Windows 11 update. If you want to resume the update service in the future, simply follow the steps mentioned above again and choose Automatic as the Startup type. Then click on the Start button and hit OK.
Modify Windows Registry
In case you only want to cancel Windows 11 update, you can modify the Registry Editor in Windows. However, we recommend creating a Registry backup before you proceed, just to be safe.
- The first step is to check the current version of Windows that you are using. For that, press Windows + I keys simultaneously on your keyboard to open Windows Settings.
- In the Settings window, select System from the list of options available.
- Now select About from the left panel and scroll down to the ‘Windows specifications’ in the right window.
- You can now check the current version of Windows 10. Here, you have the choice to keep using the same version or upgrade to the latest one if one is available.
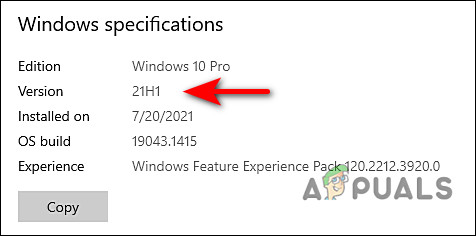
Note down your current Windows version - Press Windows + R keys simultaneously on your keyboard to open a Run dialogue box.
- In the text field of the dialog box, type regedit and hit Enter to launch Windows Registry.

Open up the Registry Editor - Once you are inside the Registry Editor, navigate to the location mentioned below.
Computer\HKEY_LOCAL_MACHINE\SOFTWARE\Policies\Microsoft\Windows\WindowsUpdate
- If you cannot locate the WindowsUpdate key, then right-click on the Windows key and select the New > Key option.
- Rename this newly created key as WindowsUpdate.
- Now double-click on WindowsUpdate and right-click anywhere in the right pane.
- Select the New > DWORD (32-bit) Value option and rename this value as TargetReleaseVersion.
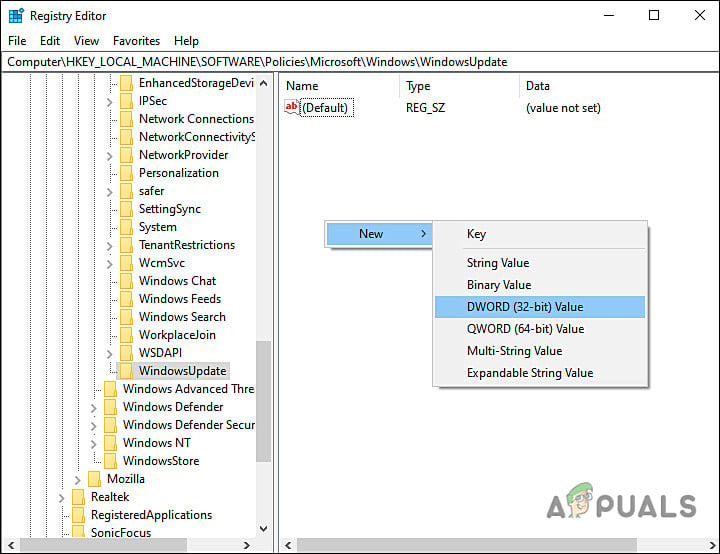
Create new Dword value - Next, double-click on the TargetReleaseVersion value, and under Value data, type 1.
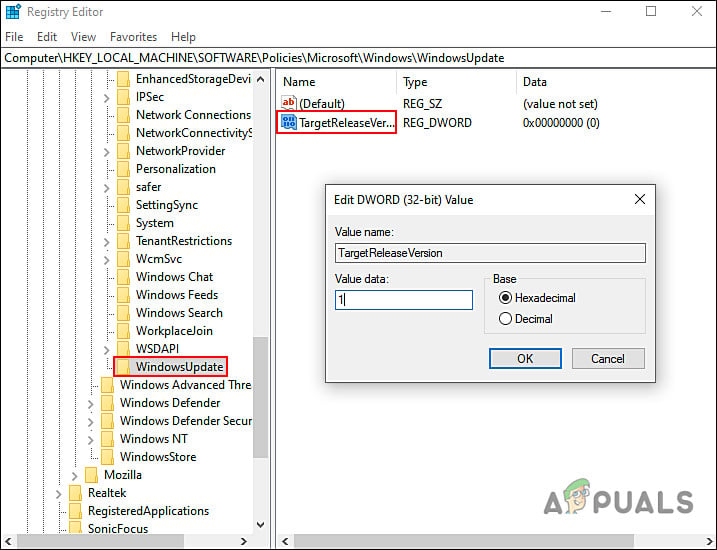
Edit your Dword value - Once done, right-click anywhere in the same window again and this time, select the New > String Value option.
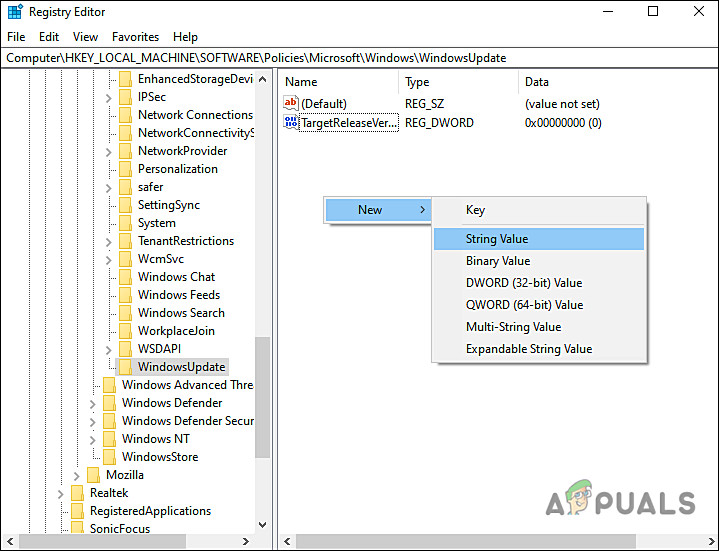
Create new string value - Rename this value as TargetReleaseVersionInfo and double-click on it.
- If you are on Windows 10 version 21H2, then type 21H2 under Value data and hit Enter.
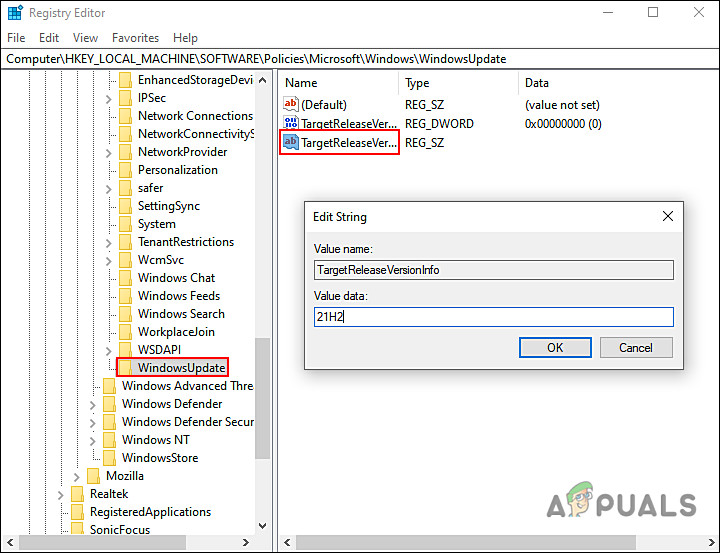
Edit your String Value - If you are on Windows 10 version 21H1, then type 21H1 under Value data and hit Enter.
- Once done, restart your computer to cancel Windows 11 update.
Modify Group Policy Editor
If you find using the Registry Editor hard, then try canceling the Windows 11 update using the Group Policy Editor.
In the Group Policy Editor, administrative-level information about the Windows programs and processes is stored in the form of policies, and by modifying the relevant policies, we can customize the operating system processes. In this method, we will be modifying a Windows update policy to make the desired changes.
Here is all that you need to do:
- Press Windows + R keys simultaneously on your keyboard to open a Run dialogue box.
- In the text field of the dialog box, type gpedit.msc and hit Enter to launch the Group Policy Editor.
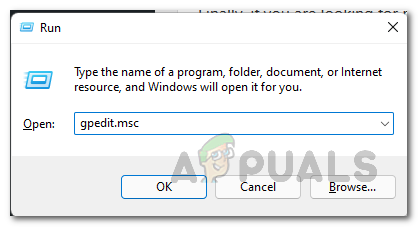
Opening up Local Group Policy Editor - Once you are inside the GPE, navigate to the location mentioned below.
Local Computer Policy > Computer Configuration > Administrative Templates > Windows Components > Windows Update > Windows Update for Business
- Locate and double-click on Select the Target Feature Update Version.
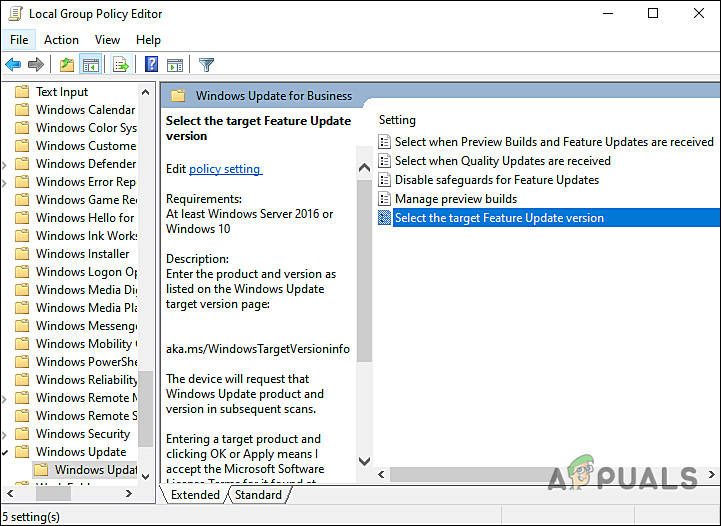
Double-click on the highlighted policy - Here, select the Enabled option. Then, under Target Version for Feature Updates, type your preferred version.
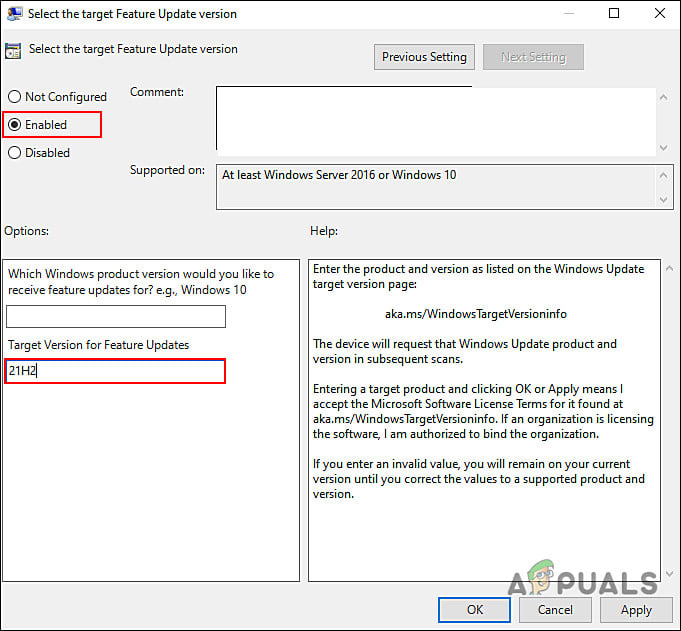
Configure policy - Finally, click on Apply and then OK. This should cancel Windows 11 update.
The post How to Cancel Windows 11 Update and Stay on Windows 10? appeared first on Appuals.com.


0 Commentaires