Windows Update KB5014019 is not installed on windows 11 because of bugs and corrupt system files. This problem usually occurs when the windows update components and the Background Intelligence Transfer & Windows Update services are corrupt or stopped.
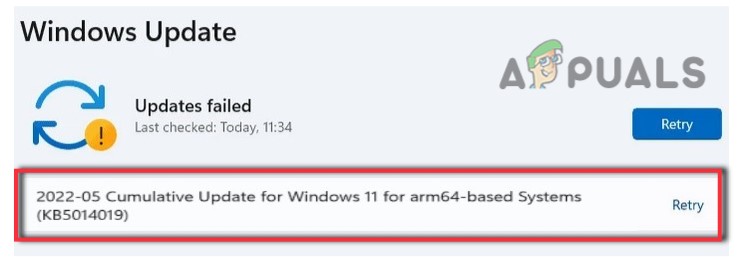
This error affects the update installation, which can lead to several other issues such as the user can lose important data, software damage, identity loss, and malware attacks.
Here are some reasons why are the windows update KB5014019 not installing on windows 11;
- Bugs and Glitches: When your system has a virus or some of the systems files have bugs, it won’t work properly and hinders the installation of the update. It usually occurs when the update services are corrupt or the Windows Update components are damaged. So, scan your system files and then try to install the windows updates.
- Corrupt BITS and Windows Update Service: These services help download and transfer the system update files efficiently. So, when these services are stopped or corrupt, users face windows update installation issues. So, restart these services and then check if the problem fixes or not.
- Corrupt windows update components: These update components help windows in protecting it from malicious attacks. When they get damaged, they stop the users from installing updates and using several Windows features, so resetting them will repair the components and resolve the installation issue.
- Unstable Build: When the windows version is unstable, the chances of bugs and malicious attacks increase, ultimately affecting the system functioning and the users facing issues in update installation.
After analyzing the possible reasons for this error, here are some methods you can apply to install windows updates KB5014019 in your system;
1. Run the Update Troubleshooter
When the user tries to install the windows update but gets an error, the Windows update troubleshooter helps resolve the issue and fix it. So, here are some steps you can follow to run the windows update troubleshooter;
- Go and right-click on the Start Menu. Now select the Settings option
- Click on System from the left menu and then navigate to Troubleshoot.
- So, click on the Other Troubleshooters. Then Go to Windows Update and press the Run option. It will start to detect the problem and will fix it.
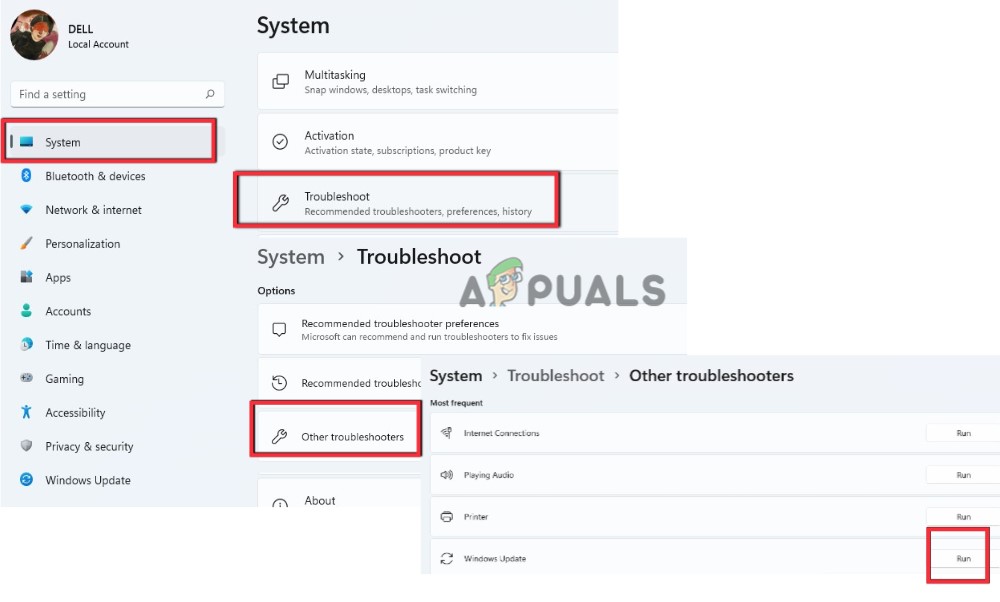
Run The Windows Update Troubleshooter
2. Restart Your Windows Update and BITS
When you are not able to install updates on your system, there is a possibility that your window update services and Background Intelligence Transfer services are stopped. These features allow the users to download the new software update files without harm.
So, if you are facing an issue in the installation of windows update files, restart both services and check if the Windows updates are installed in your system or not. So, follow these steps to continue these services;
- Press the Windows key + R to open the Run Dialogue Box.
- Now type Service. msc and press the ok option.
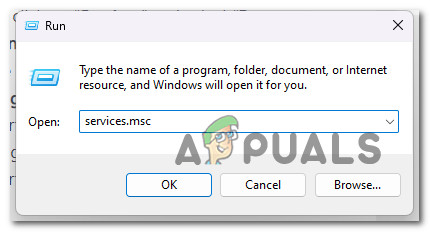
Accessing the services screen - Now first navigate to Windows Update and double-click on it.
- Adjust the startup type to Automatic then click on start and press Apply option. Now click on Restart the services.
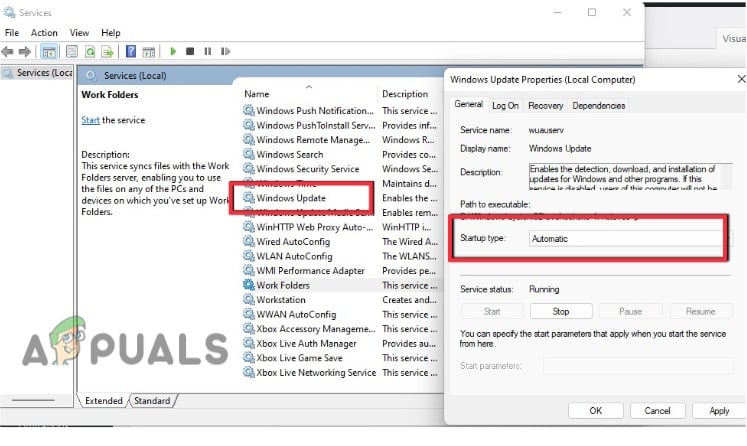
Restart the Windows Update Services - So, after the windows update, double click on Background Intelligent Transfer Service.
- Adjust the Startup type to Automatic and then click on Start. Press Apply option and then click ok.
- Now click on restart the services and wait until the whole process is done.
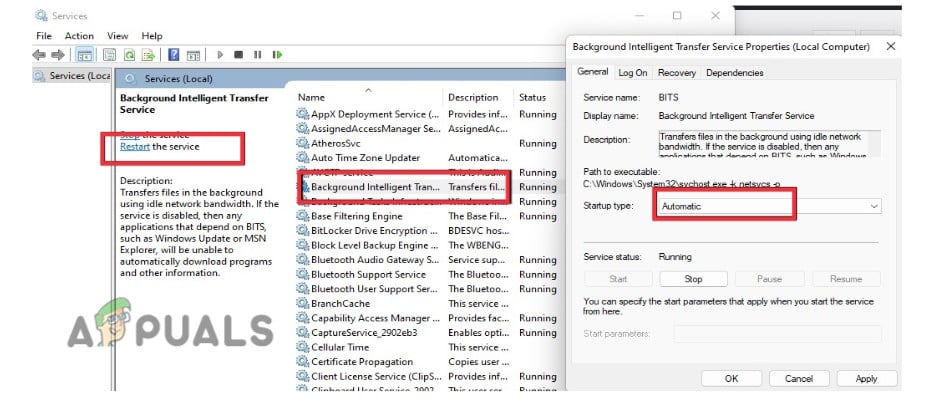
Restart Background Intelligent Services - Now close the Services window and Restart your computer. Try to install the update and check if the problem fixes or not.
3. Use Microsoft Catalog
Microsoft provides its users with a facility with a Microsoft catalog. Here they can access several updates. The users can get a one-stop location for Microsoft software updates, hotfixes, and drivers. They can download the updates easily to enjoy the latest features.
So, if windows update KB5014019 is not installed on windows 11, they can install them from Microsoft Catalog and run them on their system. So, follow the below steps in sequence;
- Open the Web Browser and search for Microsoft Update Catalog. Now open its official website.
- Now go to the search bar and type KB5014019 and press Enter. You will find out two updates.
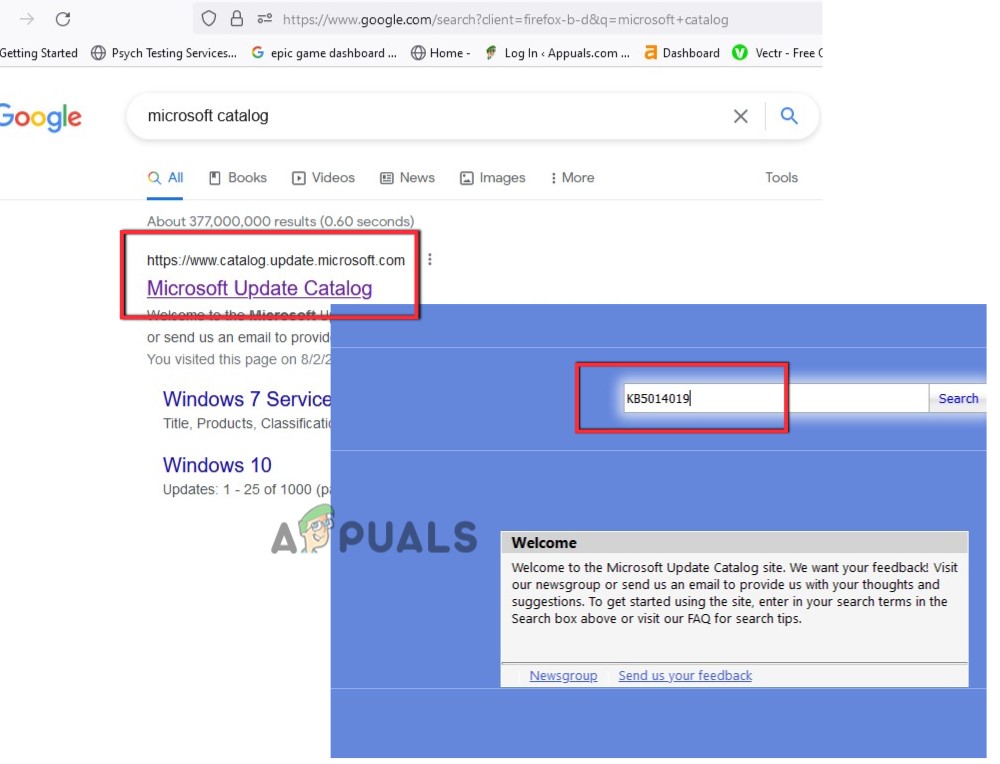
Microsoft Update Catalog - Click on Download, click on the Link of an update, and install it in your system. Hopefully, it will install the updates. But if you still face the same issue, you can switch to the next method.
4. Reset the Windows Update Components
When you reset the windows update component, it will remove the outdated windows update folders and re-register the windows update files. Moreover, it also resets the network connection. So, here are some steps you can follow to reset the windows update;
- Open the Notepad in your system and place the following command in it.
SC config trustedinstaller start=auto
net stop bits
net stop wuauserv
net stop msiserver
net stop cryptsvc
net stop appidsvc
Ren %Systemroot%\SoftwareDistribution SoftwareDistribution.old
Ren %Systemroot%\System32\catroot2 catroot2.old
regsvr32.exe /s atl.dll
regsvr32.exe /s urlmon.dll
regsvr32.exe /s mshtml.dll
netsh winsock reset
netsh winsock reset proxy
rundll32.exe pnpclean.dll,RunDLL_PnpClean /DRIVERS /MAXCLEAN
dism /Online /Cleanup-image /ScanHealth
dism /Online /Cleanup-image /CheckHealth
dism /Online /Cleanup-image /RestoreHealth
dism /Online /Cleanup-image /StartComponentCleanup
Sfc /ScanNow net start bits
net start wuauserv
net start msiserver
net start cryptsvc
net start appidsvc
- Save the file with “Wufix.bat” on your desktop. Change the file type to All Files.
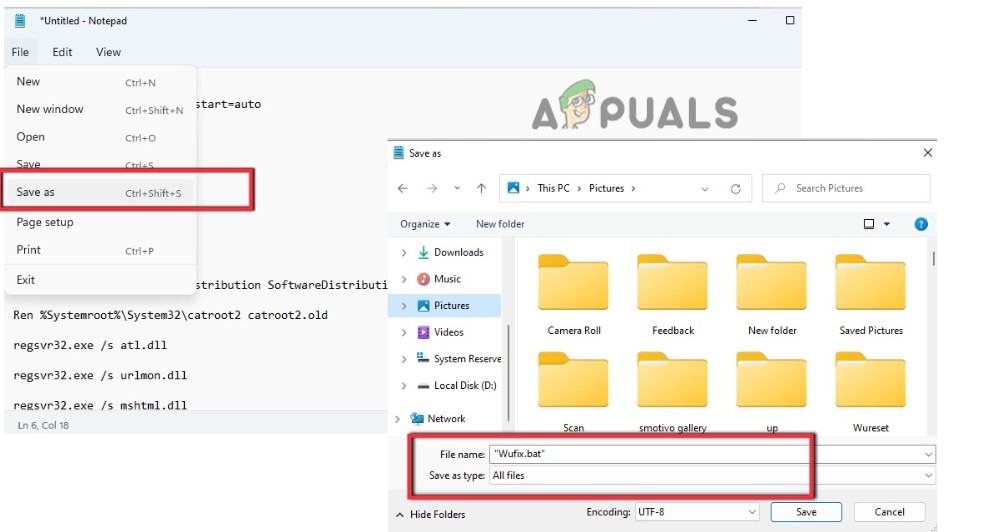
Reset the Windows Update Components - Now go on Desktop, right-click on the “WUfix.bat” file, and click on Run as an Administrator.
- Wait till the Task completed successfully appears on the screen. It will reset the Windows Updates. Now restart your PC and go to install the update. Check if the problem fixes or not.
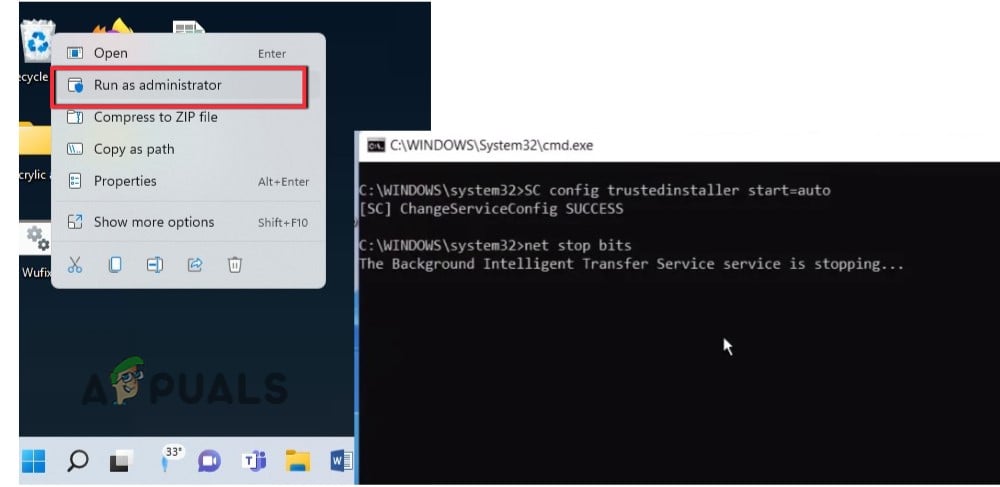
Run the Wufix.Bat file to Reset the Windows Update Components
5. Use Windows Installation Assistant
When you fail to install Windows updates, you can use Windows Installation Assistance. It will help in the quick installation of windows 11 on your system. It is the fastest way to set your PC on the new windows 11 operating system. So, follow the below steps to install it in your system.
- Open your web browser and search for Microsoft Software Download. Then go to its official website.
- Select your Windows Version, such as Windows 11. Here you will get Windows Installation Assistant.
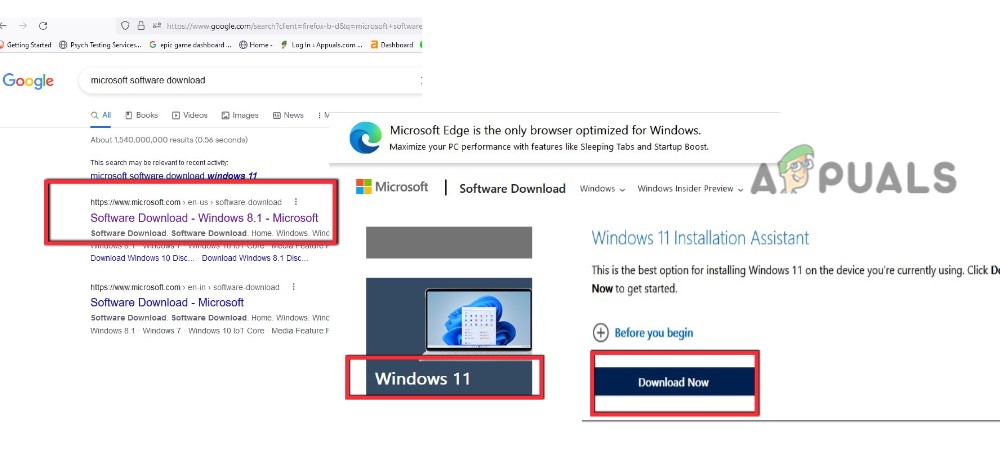
Download Microsoft Installation Assistant - Click on Download and then run its Exe File. Click on Yes to allow. Click on Accept and Install. After this, your windows will be up to date.
6. Use Windows Media Creation Tool
If you are still unable to install the windows update, install Windows Media Creation Tool in your system. It will reinstall the windows or clean install on your device. Here are some steps you can follow to install and run the windows media creation tool on your computer;
- Again go to Microsoft Software download and navigate to Create Windows 11 Media Installation.
- Click on Downloads and run its exe file in your system. Click on yes to allow.
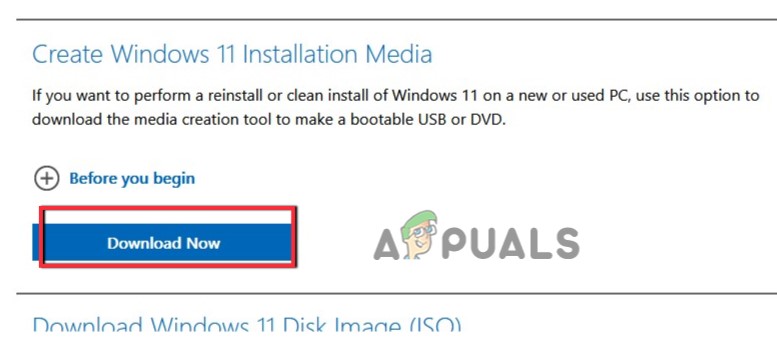
Download Microsoft Media Creation Tool - Now click on Accept. It will select windows 11 by default. So, click the Next button.
- Now select ISO File and press Next. Save the ISO file on the Desktop.
- Once the installation is finished, go to the desktop and double-click on the ISO file.
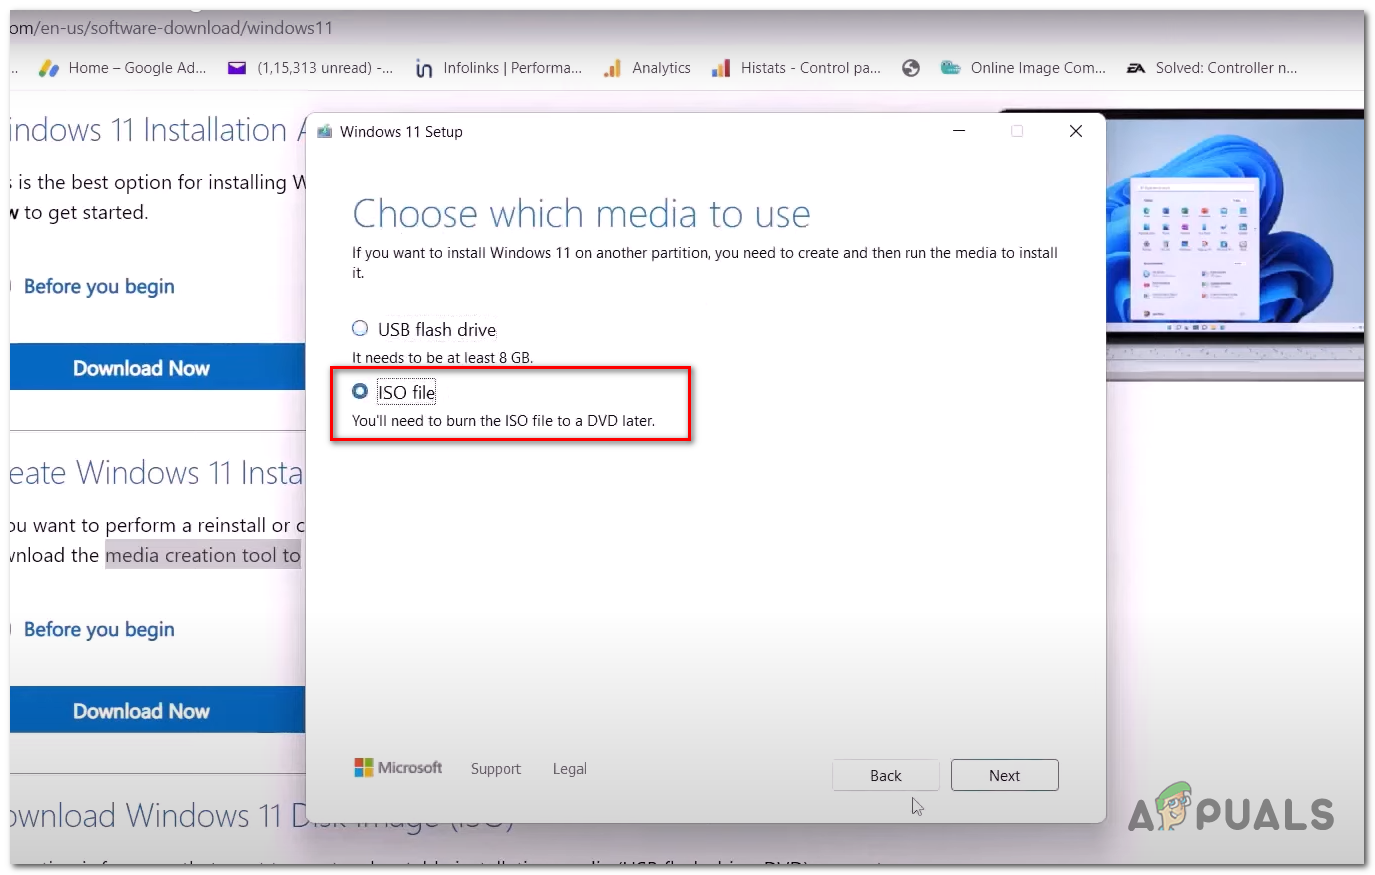
Updating Windows 11 using the Media Creation Tool - Again, double-click on Setup and run it in your system. Click yes and it will load windows 11.
- So, click next. It will check the window updates. So, once it is done, go to windows update and install them again. Hopefully, it will resolve the issue.
The post Fix: KB5014019 Not Installing on Windows 11 appeared first on Appuals.com.


0 Commentaires