We’ve recently seen an increasingly higher number of Valorant players reporting that they frequently see the ‘VAL 19‘ error code as the game crashes. The error message accompanying the error is ‘There was an error connecting to the platform. Please restart your game client. This error typically occurs when players attempt to establish a connection with a Riot Client.

After investigating this issue thoroughly, we realized several common instances would directly or indirectly produce this error. Here’s a list o potential scenarios that might end up causing this problem:
- Underlying server issue – You do not influence the server-side fault that could cause this issue. Consider whether the source of the issue is a server problem now affecting players in your area before taking further action.
- Patch 3.12 related glitch – Since patch 3.12, many gamers have seen the Valorant Error Code 19. When the issue code appears, the Riot Client malfunctions and Valorant won’t let you load up a game. In this situation, restarting all RIOT processes will resolve the problem.
- Corrupted game installation – As it turns out, this particular issue can occur due to corruption currently affecting the game installation. You can fix this issue by reinstalling Valorant & the Riot client. It is advised that you first uninstall Valorant and then swiftly delete the Riot Client.
- Network-related issue – You should anticipate witnessing this behavior due to a network anomaly since several Valorous gamers have stated that we are also experiencing this issue. Reset every appropriate network component to resolve this problem. In other circumstances, you should be able to fix the problem by performing a network reset.
- 3rd party program or antivirus interference – Particularly if they employ the IPV6 protocol, some third-party services are known to cause this issue. Obtain a clean boot state and check to see if the problem is now resolved to identify the cause. If you’re using an antivirus, disable it temporarily or uninstall it before attempting to launch valorant once again.
Now that we have gone over every potential cause that might trigger this error let’s go over a series of confirmed fixes that other affected users have successfully used to get to the bottom of this issue.
1. Check for a server issue
It turns out that this problem could occur from a server-side error that is entirely beyond your control. Before taking further action, take some time to determine whether the root of the problem is a server issue now affecting players in your area.
Because error number 9 is most suggestive of a widespread server issue, you should start this troubleshooting process by ensuring that Valoran’s servers are not currently down or undergoing maintenance.
To determine whether the error is now occurring on all Valorant servers or is only impacting your PC, Riot maintains a directory where you may check the status of each server.
If you believe a server issue may cause your Valorant problem, open your favorite browser and go to Riot Games’ status page.
After entering, select your preferred language, then choose Valorant from the list of Riot games.

While on Valorant’s status screen, pick Continue before selecting your connection’s location and language.
The server should then display a list of all its current problems. If there are any signs of a connectivity issue, you must change the server from which you’re connecting.

If every server you try to connect to returns the same error code, the only viable option is to wait for the developers to fix the issue on their end.
On the other hand, if the investigation mentioned above did not reveal any underlying server problems, continue to the next option below.
2. Restart all Riot processes
Many players have experienced Valorant Error Code 19 with patch 3.12. The Riot Client malfunctions, and Valorant won’t let you load up a game when the problem code occurs. Valorant’s error number 19 is typically brought on by the Riot Client, not the game itself.
The Riot Client should be restarted to resolve most problems. Valorant frequently acts up and displays the error code when there are awaiting upgrades for the Riot Client.
Follow the instructions below for specific steps on how to restart all RIOT processes:
- First, press Ctrl + Shift + Esc to open Task Manager.
- If you’re prompted by the User Account Control (UAC), click Yes to grant admin access.
Note: If Task Manager opens with the simple Task Manager interface, click on Show more details to expand to the expert interface.
Access the More details menu - Once you are inside the expert Task Manager interface, go to the Processes tab and go ahead and close all processes related to Riot Games or Valorant.
Note: To end a task, right-click on each process and choose End Task from the context menu that just appeared.
If you already followed the instructions above and you’re still dealing with the same issue, move down to the following method below.
3. Reinstall Valorant & the Riot Client
The Riot Client is connected to your game and cannot be downloaded separately. However, you can delete it, and the next time you try to start Valorant, it will automatically reinstall itself.
Several affected users have confirmed that they managed to fix the issue by reinstalling Valorant first, then the Riot Client, before reinstalling them both once again.
Note: Our recommendation is to start by uninstalling Valorant, then uninstall the Riot Client in quick succession.
If you haven’t tried this method yet, follow the instructions below:
- Press Windows key + R to open up a Run dialog box. Next, type ‘appwiz. cpl’ and press Ctrl + Shift + Enter to open up the Programs and Features menu with admin access.

Open up the Programs and Features menu. - Click on Yes to grant admin access at the User Account Control (UAC).
- Once inside the Programs and Features menu, scroll down through the list of installed programs and locate your Valorant installation.
- After you locate the Valorant installation, right-click on it and choose Uninstall from the context menu.
- After Valorant is uninstalled, use the same Programs and Features menu to locate the Riot Client installation. Once you see it, right-click on it and choose Uninstall from the context menu.
- Once Valorant and the Riot Client launcher have been uninstalled, reboot your PC and wait until the next startup is complete.
- Reinstall Valorant from the official website and see if the problem is now fixed.
If you’re still dealing with the same Val 19 error code when opening the game, move down to the following method below.
4. Clear the DNS Cache & Temporary ISP Data
Many Valorant players have indicated that we are also seeing this problem. Therefore you should expect to observe this behavior due to a network anomaly.
This situation calls for employing a set of Powershell commands to update Winsock, the IP data, the DNS data, and the firewall cache.
Open an elevated Powershell command and perform a sequence of commands, pressing Enter to see if this scenario is accurate.
How to do it is as follows:
- To bring up the Run dialog box, press Windows key + R. To open an elevated Powershell window with admin access, put “powershell” into the text box and then press Ctrl + Shift + Enter.

Access the PowerShell menu - Click Yes to enable admin access when requested by the UserAccount Control (UAC).
- To successfully update Winsock, the IP data, the DNS data, and the firewall cache on your Windows PC, enter the following instructions into the elevated CMD prompt and hit Enter after each command:
netsh winsock reset
netsh int ip reset
netsh advfirewall reset
ipconfig /flushdns
ipconfig /release
- Reboot your computer after properly processing the above commands to determine if the issue has been resolved.
Continue to the next technique below if the issue is still not solved or if you’re using a third-party firewall.
5. Achieve a Clean boot State
Remember that if you’re using a low-end PC, there’s a possibility that you’ll have this issue as a result of the game’s lack of sufficient free system resources to render the game.
Along with insufficient system resources, a scenario in which a system resource optimizing program or even an optical burning program conflict with the Riot installation is another potential issue that could prevent Valorant from launching correctly.
The best course of action would be to do a clean boot procedure because numerous potential offenders (processes and startup items) could be to blame for this issue.
If you perform a clean boot operation, your Windows will be forced to boot up without any intervention from third parties (only essential startup services and processes will be permitted to run).

If getting to a clean boot state doesn’t resolve the problem, go to the proposed solution below.
6. Restart or reset the router
Several Valorant players have reported that this issue can also be brought on by a situation in which erroneous DNS and IP information prevents the installation from happening.
Most impacted users who have dealt with this issue have indicated that the problem was resolved, and they could finally play Valorant, usually after rebooting or resetting their router.
Start easy with a straightforward reboot. Without altering any previously created custom settings, this action will update the IP and DNS that the PC is now using.
Turn off your router, unplug it from the outlet, and wait for at least 30 seconds to ensure the power capacitors are discharged before attempting a reset.
The next step is to connect your router back in, wait for Internet access to be restored, and then check to see if Valorant can again be launched without any problems.
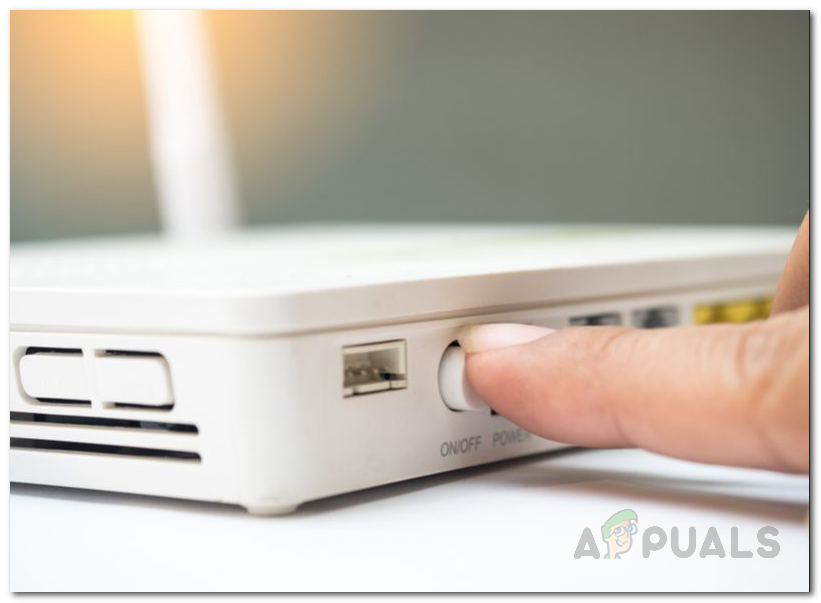
To accomplish this, press and hold the special button on the rear for at least 10 seconds or until you notice the front LEDs blinking simultaneously.
Necessary: This process may reset some customized settings that you previously specified, such as forwarded ports or personalized router login information.
Continue to the next possible solution below if you’ve tried rebooting and resetting your router but are still unable to play Valorant.
7. Disable antivirus
In some cases, you can also anticipate seeing this error if your AV program obstructs the data transmission and the Riot install agent cannot acquire admin access.
You should be able to fix the problem by turning off real-time protection before starting Valorant and trying to install the pending update again if you’re using a 3rd party suite and you’re confident that the application you’re trying to open or install doesn’t constitute a security danger.
Important: Depending on the third-party suite you’re using, the procedures will vary, but most antivirus applications let you turn off real-time protection from the taskbar menu.

Restart your computer and repeat the installation once you turn off real-time protection.
If you’re using a third-party solution and the issue is still present, you should consider removing the security suite.
Remove any leftover files that might continue to impose the same security rules after uninstalling the security program.
Continue to the next suggested solution below if the issue is still present.
8. Install Pending Windows updates (if applicable)
If you haven’t updated your Windows build in some time, Windows update may be the root of this problem.
To fix this issue, open the Windows Update component and install each pending Windows update until your system is current.
Install all pending updates first and check to see if the issue goes away on its own before attempting any of the other likely solutions below.
If the issue stems from a known flaw, the steps listed below should repair it because Microsoft has already provided a remedy for every version of Windows 11. (including the N version).
To install every upcoming Windows update, follow these steps:
- Windows Update can be started by using the Run dialog box. Press Windows + R on your keyboard simultaneously to do this. Thus, the Run dialog box will show up.
- Next, enter the text “ms-settings:windowsupdate” in the box. The Windows Update area of the Settings app will then be displayed to you.

Access the Windows Update component Note: If you haven’t changed the UAC settings, you can receive a prompt asking for your permission to continue. Clicking Yes will indicate your agreement with this.
- Select Check for Updates from the option on the right after launching the Windows Update pane.

Checking for updates - Select Install Now to start a local installation after downloading the update.
- Check to see if the problem has been fixed by restarting your computer.
The post How to Fix “VAL 19” Error on Valorant? appeared first on Appuals.com.


0 Commentaires