The Windows 11 operating system is designed to provide a stable and seamless user experience, but several users have reported frequent and unexpected crashes. This issue can be caused by both hardware and software-related issues within the system.
Hardware issues (most commonly Event ID 6008) can result from outdated drivers, faulty memory, or a damaged hard drive while corrupt system files and malware can cause software-related problems.
By taking the time to address the underlying cause of the constant crashing issue, you can restore the stability of your Windows 11 device and enjoy a seamless user experience. Below, we have listed different troubleshooting methods that you can try to fix the issue for good.
Before You Begin
Performing troubleshooting methods can be challenging if Windows crashes frequently, as the system may not remain stable for long enough to complete the procedure. In this case, before you get started with the troubleshooting methods, we suggest launching the system in Safe Mode.
Safe Mode is a boot option in Windows that starts the system with a minimal set of drivers and services. When troubleshooting, it can be used to identify and fix issues that may be causing problems with the system.
Once you are in Safe Mode, you can proceed with the troubleshooting methods we have listed below in this guide.
1. Perform System Scans
The first thing that we recommend doing is scanning your system for issues using the built-in troubleshooting utilities.
The System File Checker (SFC) and the Deployment Image Servicing and Management (DISM) are two tools that can help resolve issues with system stability and performance that may be causing the constant crashing of Windows.
SFC works by scanning for and replacing corrupted or missing system files with fresh ones stored in a cache on your computer. With DISM, you can repair and check the health of the entire Windows image, including system files and registry settings. DISM can help fix issues with the operating system image that may be causing crashes.
Here is how you can use these tools:
- Press the Windows + R keys together to open a Run dialog.
- Type cmd in the text field of Run and click on the Ctrl + Shift + Enter keys together. This will open Command Prompt as an administrator.
- Click Yes in the User Account Control prompt.
- Once you are inside the Command Prompt, type the command mentioned below and hit Enter:
sfc /scannow

Performing SFC Scan - Once the command is executed, proceed with the following command:
DISM.exe /Online /Cleanup-image /Restorehealth
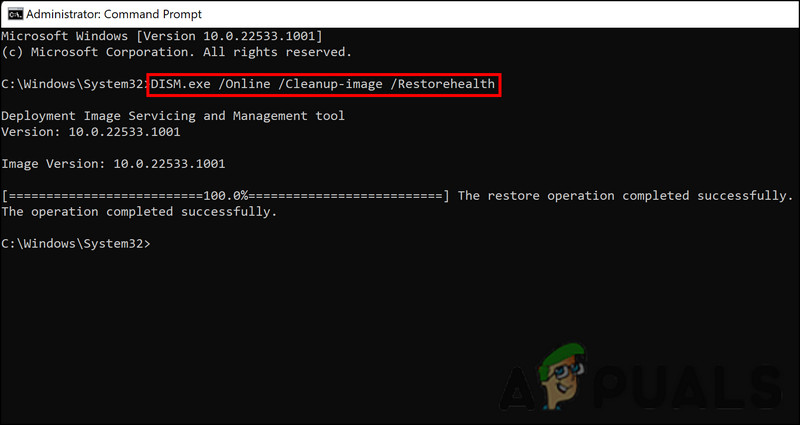
Run the DISM scan
In the event that either tool finds any issues, it will try to fix them. If successful, the crashing will be resolved. You can then restart your computer to boot normally.
2. Run Memory Diagnostic Tool
A problem with the RAM, such as a malfunctioning module or a configuration issue, can also cause the computer to crash. To check if there is something wrong with the memory, we will be running the Memory Diagnostic Tool.
The Windows Memory Diagnostic Tool is a utility built into Windows that tests the computer’s memory (RAM) for errors.
It works by writing to and reading from memory as part of a series of tests. When the tool finds errors, such as incorrect data values or bad memory addresses, it will report them. Often, these errors indicate a memory issue, causing crashes, freezes, or hangs.
Upon completion of the memory diagnostic tests, the tool provides a report indicating if there are any errors. In case errors are found, you can use the report’s information to resolve the problem, such as replacing memory or troubleshooting other components.
To access the memory diagnostic tool in Windows:
- Press the Win + S keys together to open the Windows Search tab.
- Type Windows Memory Diagnostic in the search area and hit Open.
- Click on Restart now and check for problems (recommended) option to run the memory diagnostic tool. It will begin the scan when the computer restarts and provide a report on any memory errors found.
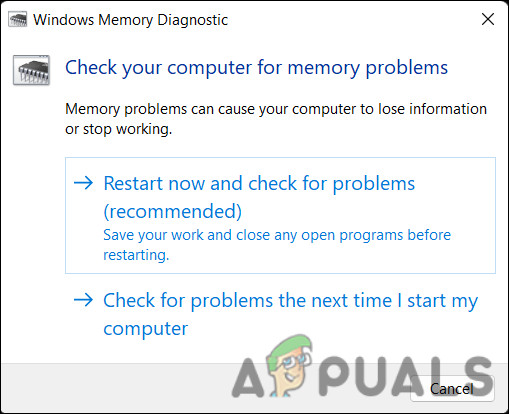
Run the Windows Memory Diagnostic tool
You must keep in mind that the Memory Diagnostic Tool will only diagnose memory problems. You will need to perform the necessary troubleshooting steps depending on the results after analyzing the report.
If you want to learn more, please visit our in-depth guide on checking and improve your RAM’s Health.
3. Update Drivers
You might also be facing the issue because of outdated drivers.
In computers, drivers control the hardware components, like graphics cards, network adapters, and sound cards. Drivers that become outdated or corrupt may no longer be compatible with the operating system and the hardware they control, leading to stability issues and frequent crashes. They can also cause conflicts with other software on the system, which can lead to crashes.
The best way to resolve the issue, in this case, will be by updating the drivers. We will be using the Device Manager utility for this purpose.
Here is how you can do that:
- Type Device Manager in the search area of the taskbar and click Open.
- Expand all the categories and look for drivers with a warning sign (yellow exclamation mark) with them. This sign indicates that the driver is either outdated or corrupt.
- Next, right-click on the faulty driver.
- Choose Update driver from the context menu and then click on Search automatically for drivers.

Search the system for drivers - Follow the on-screen instructions to update the driver.
- Perform the same steps with all the faulty drivers in the system and then restart your computer. Hopefully, the crashing issue will be resolved upon reboot.
4. Undo the Recent Changes
If you started facing the issue after introducing a new change, the recent modification is likely to be the culprit.
This can include installing new software or hardware, updating existing software, or making configuration changes. The new software or hardware might not be compatible with Windows, which is causing the crash. Similarly, changes to the configuration of the system, such as changing the network settings or modifying the system registry, can also cause crashes.
In this case, you can fix the issue by undoing the recent changes. You can do it either by using the System Restore utility or by removing the faulty program/update manually.
To perform the steps manually, follow the instructions below:
- Type control in the text field of Run and click Enter.
- Click on Uninstall a program under the Programs section.
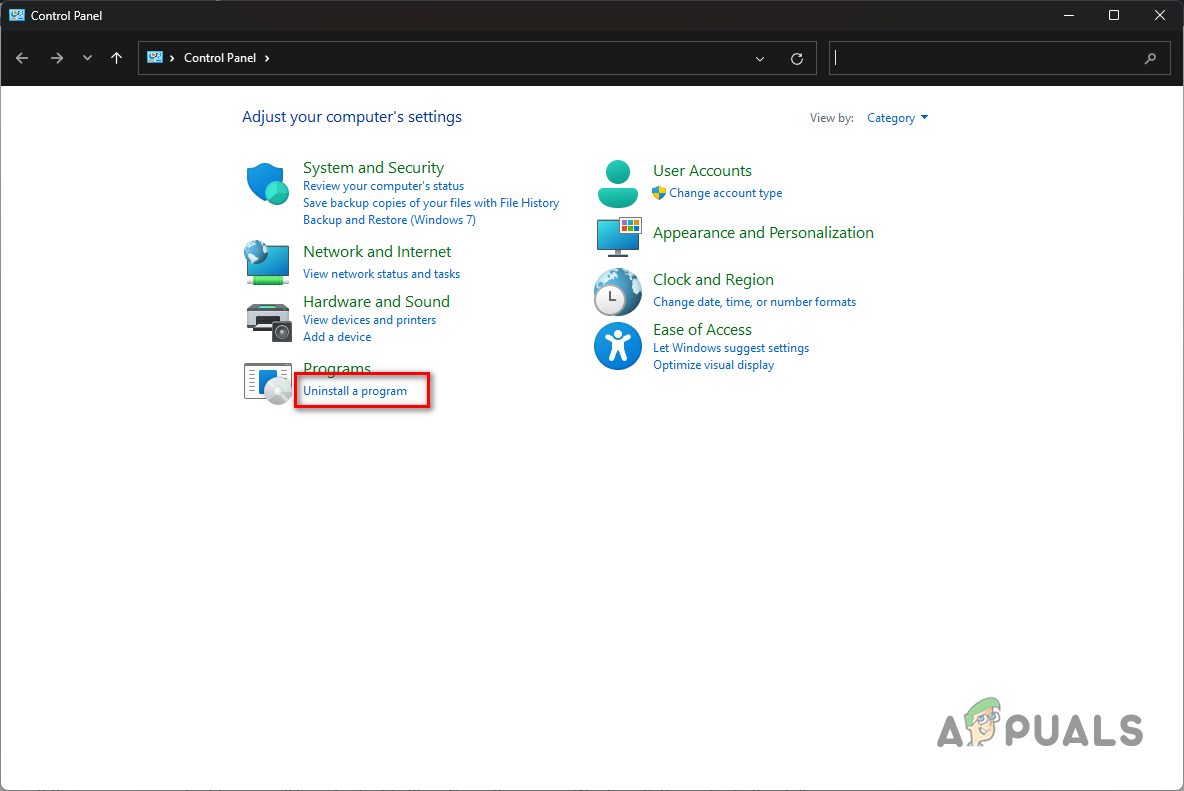
Choose Uninstall a Program - Your computer should now display a list of all the programs it has installed. Right-click on the problematic one.
- Choose Uninstall and follow the on-screen instructions to proceed with the uninstallation.
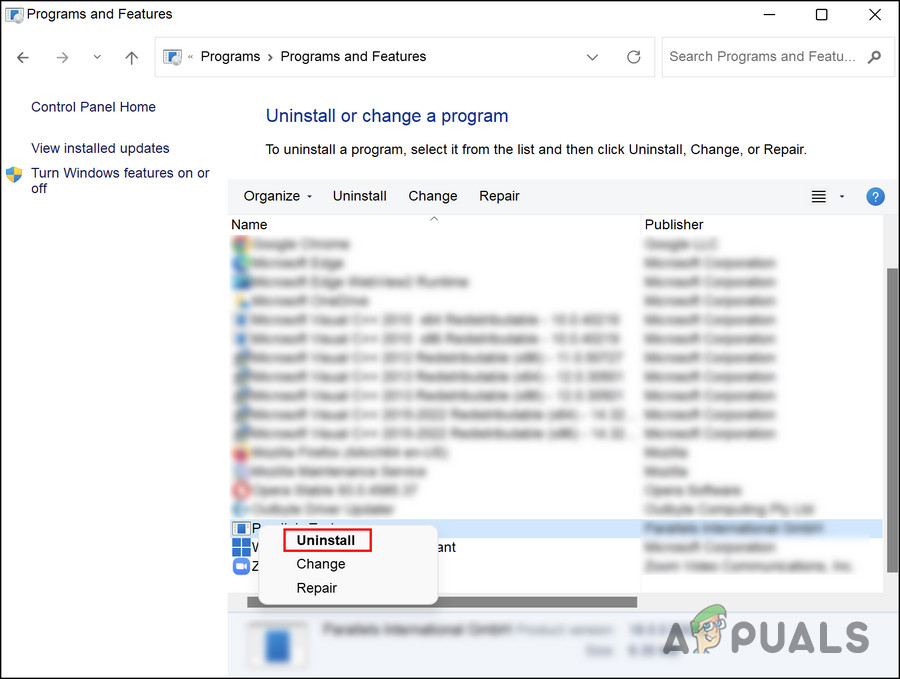
Uninstall the conflicting program
If an update is causing the problem, then follow these steps:
- Follow steps 1-3 from above.
- Choose View installed updates from the left pane.
- Select the problematic update from the list by right-clicking on it and choose Uninstall.
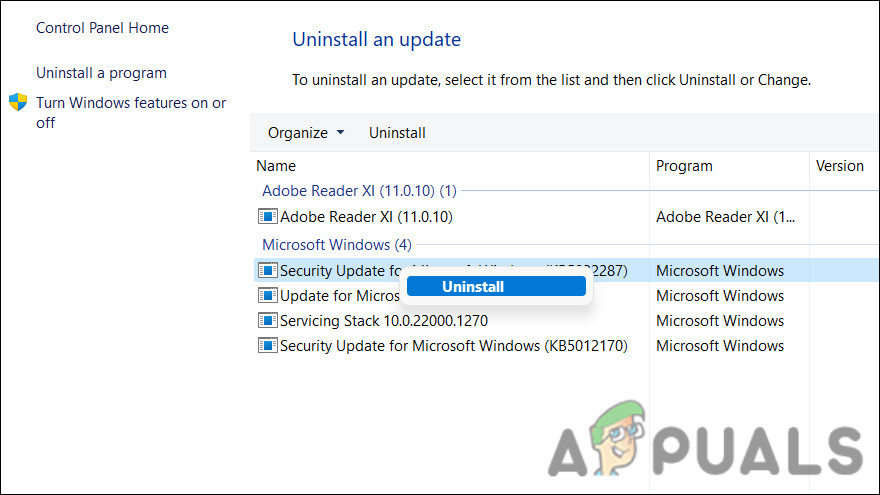
Uninstall the update - Follow the on-screen instructions to proceed.
5. Scan for Malware
You can also be facing constant crashing if the system is infected with malware or a virus.
Malware can corrupt or modify system files, affecting the stability of the operating system. Additionally, it can cause kernel-level errors, which are serious errors occurring at the core of the operating system, as well as consume a large amount of CPU and memory resources which can lead to frequent crashing.
To prevent malware from crashing Windows, it’s important to keep your anti-virus program up-to-date, as well as your operating system with the latest security patches. You can use a free or paid anti-malware program, such as Windows Defender, Avast, or Malwarebytes. Make sure to install the latest version of the program and keep it up to date.
Here is a guide on how to use Malwarebytes to scan the system for malware and eliminate it.
6. Perform a Clean Install
In case none of the methods above work, then as the last resort, you can perform a clean install of Windows.
The process of installing Windows on a computer involves deleting all the existing data, settings, and programs, and installing a new system copy. During the clean install, all personal files, programs, and apps installed on the computer will be wiped, along with any downloaded software, so it might be a good idea to create a backup of all your important data.
This process is quite time-consuming, so we recommend proceeding with it only when you have enough time on your hands.
The post Windows 11 Constantly Crashing? – Try these fixes appeared first on Appuals.com.


0 Commentaires