Apple released iOS 17.3 this week, which brought an important security feature. Here's how to enable Stolen Device Protection on your iPhone.
How does Stolen Device Protection work?
Normally, when an iPhone is stolen, a thief who knows the device's passcode, may remove the Apple ID or reset the device.
Stolen Device Protection forces biometric authentication, i.e. Face ID or Touch ID, to perform sensitive actions such as accessing the passwords or passkeys saved in iCloud Keychain, disable Lost Mode, factory reset the phone, or use the iPhone to set up a new device. The security feature also prevents access to financial data such as autofill payment methods saved in Safari, applying for a new Apple Card, and certain actions in Wallet, e.g. Apple Cash or Savings transfers.
With Stolen Device Protection, a thief will not be able to make the above changes with a passcode, a successful biometric authentication is required before allowing access to the protected settings. This will prevent thieves from reselling the phone and making money. In which case, they would likely strip it for parts. That's a shame, but at least they are not going to trick someone into buying a stolen phone. That is why this feature is very important.
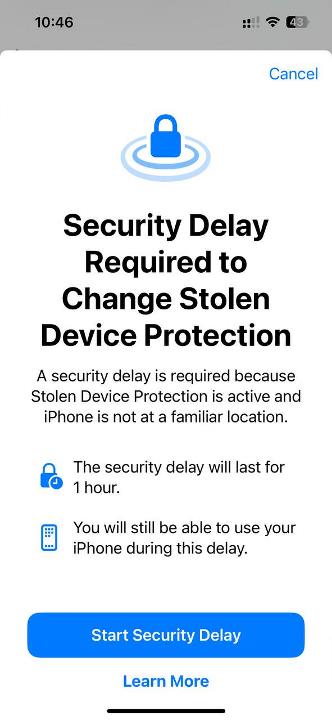
When Stolen Device Protection is enabled, you will need to wait an hour before making some changes. Apple calls these restrictions as Security Delay, these apply to changing the Apple ID password, signing out of the Apple account, adding or removing a trusted device, Recovery Key or Recovery Contact.

The Security Delay also restricts adding or removing Face ID or Touch ID, changing the iPhone passcode, and reset all Settings. You will not be able to turn off Find My or Stolen Device Protection when the Security Delay is in effect.
These restrictions do not apply when an iPhone is in a Trusted Location aka familiar location, i.e. where you use your device frequently. For example, your home, office, etc. Your iPhone learns your familiar locations when Significant Locations is enabled in Privacy and Security > Location Services > System Services. Disabling or deleting Significant Location history will also make the phone forget the familiar locations.
For example, a user will be required to provide a successful biometric authentication when using the iPhone away from a familiar location. This is when the Security Delay kicks in, and after an hour, a second successful biometric authentication.
Note: Stolen Device Protection is only available on iOS 17.3 or newer versions. It is supported on iPhone XS and later.
How to enable Stolen Device Protection on iPhone
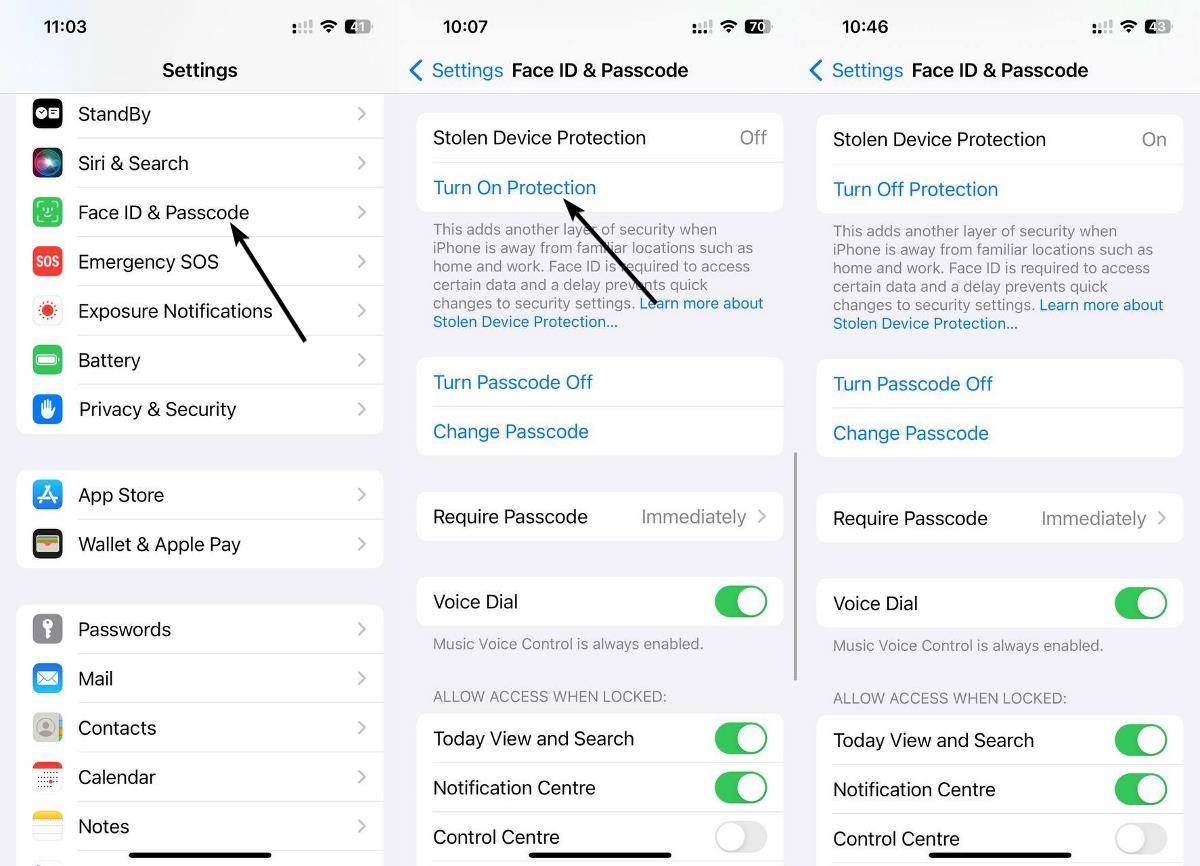
1. Go to Settings.
2. Tap on Face ID & Passcode.
3. You will need to enter your device's passcode.
4. Toggle the Stolen Device Protection.

What to do when you lose your iPhone
If your iPhone is lost, you should log on to Find My immediately and mark it as lost, you can do so from a web browser. This will disable most features in the phone. It will also allow you to track the device's location on a map, which you can provide to the Police, to help them recover your iPhone. Essentially, it uses nearby Apple devices to send a ping to Apple's servers, very similar to how AirTags work. Learn more about locating your device using Find My on Apple's website.
You can also use Lost Mode to display a message on the iPhone's screen, for example, to explain that it is your phone and that you lost it. You can also provide your phone number to help people contact you to return the device.
If you ever lose your phone and receive threatening messages from the thief who claims your data, photos and videos would be leaked on the internet, unless you remove the device from your account, don't fall for it. This is a common scam that uses scareware tactics to get you to remove the device from your Apple account, to unlock lost mode, so that the thief can sell it to someone else. Just ignore the messages.
Thank you for being a Ghacks reader. The post How to enable Stolen Device Protection on iPhone appeared first on gHacks Technology News.


0 Commentaires