Microsoft's Windows 11 operating system includes an option to assign graphics preferences to programs on the system. The default setting gives Windows 11 control over the performance, but administrators may change the default to enforce the performance level.
The main idea behind the graphics preference feature is to adjust the performance dynamically based on the power level. It is mostly useful on laptops and other mobile devices, but may also be used on other devices running Windows 11.
Users of Windows 11 may use the feature to assign a power configuration to a specific program, e.g. to make sure that the computer game's performance is set to high always, or to reduce the performance of other applications to save power.
Configuring the Graphics Preference for Programs on Windows 11
- Open the Settings application of the operating system, either with the shortcut Windows-I, or by selecting Start > Settings.
- Switch to System > Display.
- Select Graphics on the page that opens.
Windows 11 displays a list of installed apps on the page, and an option to find a specific desktop program or Microsoft Store application. The graphics preference setting for each is displayed in the listing.
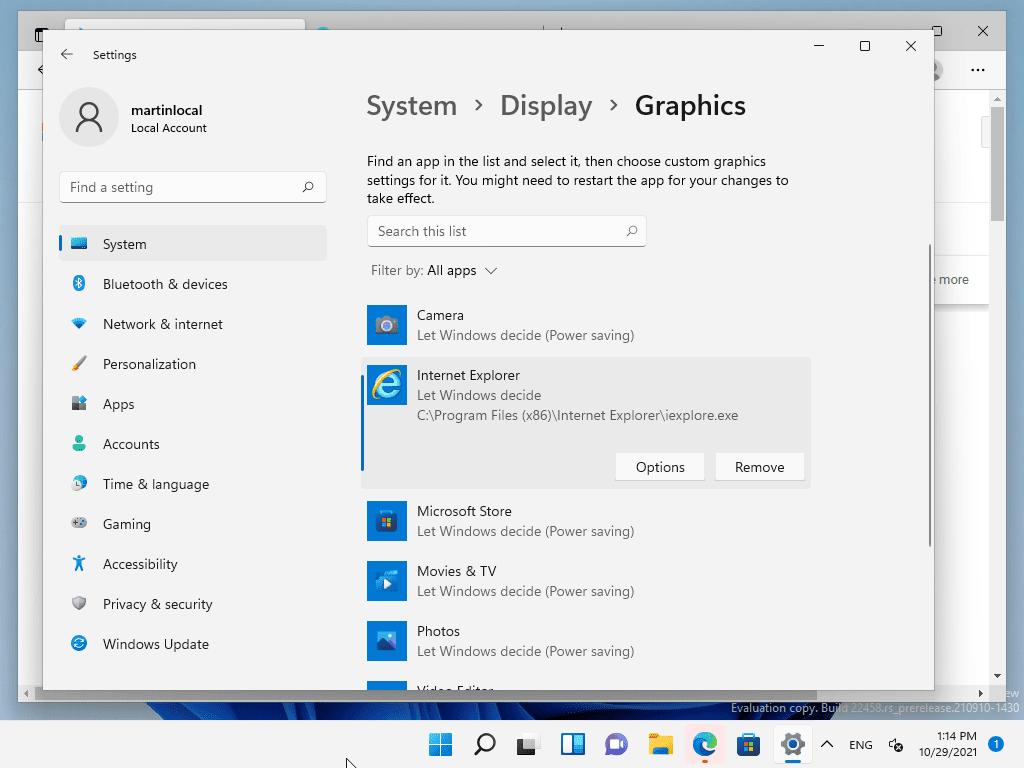
- If the program or app is listed already, activate it with a click and select the options button.
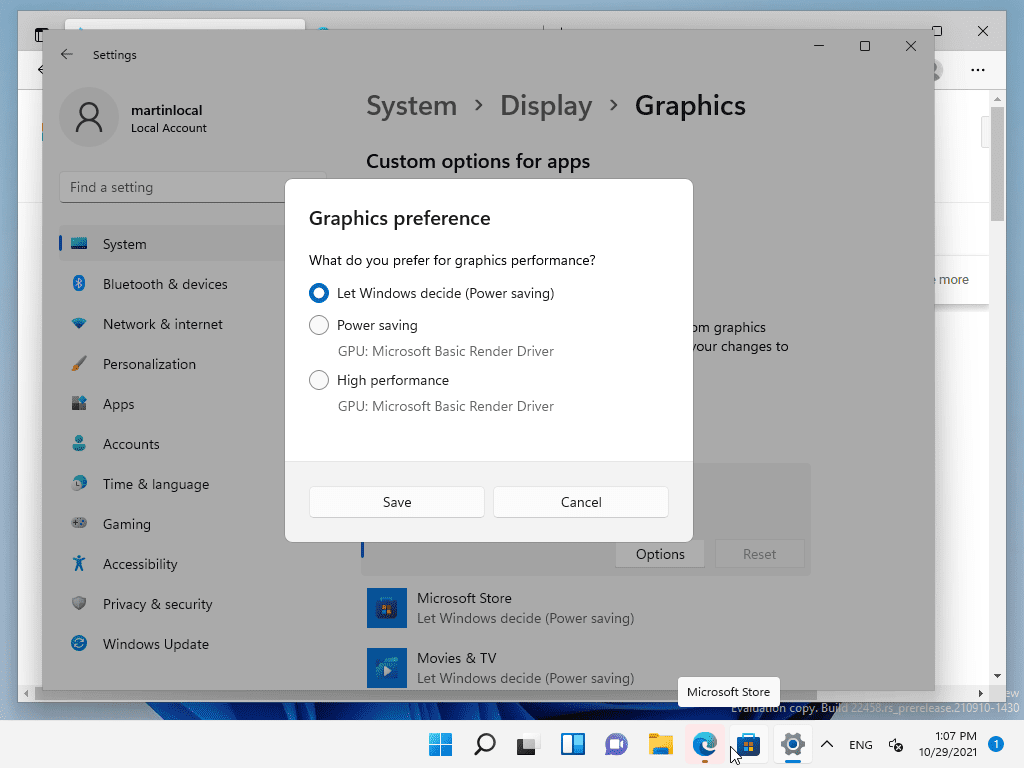
- The Graphics Preference window lists three options:
- Let Windows decide (Power saving).
- Power saving.
- High performance.
- Switch the setting to the desired level and select the save button to save it.
The graphics processing unit is listed for each performance level individually; this is useful on devices with onboard and dedicated graphics units, as you may use the preferences to switch between the graphics adapters. Some applications or programs may be limited in regards to the graphics adapter.
Note that you may need to restart the app or program if it is running already.
If the program or app is not listed, use the browse option on the page to add it manually to the page. The remaining steps are identical once a program or app has been added.
The apps that Windows 11 lists by default can't be removed, but they can be reset if a custom setting was assigned to them. The programs and apps that have been added manually can't be reset, only removed.
Closing Words
Graphics preferences for individual apps or programs may be useful in some situations, e.g. when you want heavy apps or games to always run in high performance mode, even if that impacts power consumption more. The other way around is possible as well, e.g. by making sure that an app or program is set to the power saving mode all the time to reduce its impact on the power consumption.
Windows 11 users should not expect wonders when they switch between the two modes, but it may be worth a short to optimize performance or power consumption for specific apps or programs.
Third-party programs likeEasy Power Plan Switcher, Laptop Power Plan Assistant, or PowerSchemeSwitcher may also be worth a shot.
Now You:
Thank you for being a Ghacks reader. The post How to assign graphics performance preferences to Windows 11 programs appeared first on gHacks Technology News.


0 Commentaires