It has been almost a week since Windows 11 has been released officially. The new operating system entirely focuses on design and thus has changed the interface of most of the Windows applications. Different utilities in the operating system have received a facelift and the process is not done yet as more is yet to come. In addition to that, certain features have been removed from the new operating system which can be really annoying to certain people. One of these features is the removal of the option that lets you adjust the size of the taskbar on your system. However, fortunately, there is a workaround for the problem that we are going to show you in this article.
As it turns out, one of the applications that has received a facelift so far is the Windows Settings app. If you have upgraded to Windows 11, you might have noticed that it isn’t just a facelift, but rather the layout of the application has been changed significantly. The options have been moved around a little and certain options have been removed completely. Like we have mentioned, one of these options is the ability to adjust your taskbar. On the previous version of Windows, users were able to adjust the size of their taskbar through the taskbar settings screen that was located in the Windows Settings app. There were three options available, large which was the default one, medium and then small icons.
Now that the option has been removed from Windows 11, and it hasn’t been added so far, the only real choice that you have is to use the workaround that has been known in the community for a while. As it turns out, to do this, you will be accessing the Windows Registry and creating a new key that will handle the size of your taskbar through the provided value. With that said, let us get started and show you how to do this.
Edit Windows Registry Manually
As it turns out, there are actually two options available to you that we are going to mention here that lets you change the size of the taskbar. First, you can choose to manually edit the Windows Registry using this method and create a new key that will change the size appropriately. In addition to that, if you want a more simpler solution, you can move down to the next method where you can use our one click registry files that will do the job for you automatically.
If you are an advanced user and wish to edit Windows Registry on your own, you are more than welcome to follow this method. Here, we will be accessing the Windows Explorer keys in the Windows Registry and creating a new TaskbarSi key there. The value of this key will decide the size of the taskbar, where 2, 1 and 0 refers to large, medium and small respectively. In addition to that, it is important to note that since this is more of a community workaround the problem, you might experience some issues where the alignment of the taskbar may get weird. This usually happens with the network icons and date and time information.
Having said that, the procedure is pretty straightforward and not complicated at all so if you follow our instructions correctly, you won’t be facing any issues. However, with that said, we would recommend creating a backup of your Windows Registry as it is a really powerful tool and any incorrect changes can result in your operating system not working at all. Therefore, to avoid such circumstances, go ahead and create a registry backup. With that said, follow the instructions down below to do this:
- First of all, go ahead and open up the Run dialog box by pressing Windows key + R on your keyboard.
- In the Run dialog box, type in regedit and hit the Enter key. On the follow up UAC dialog box, click the Yes button.
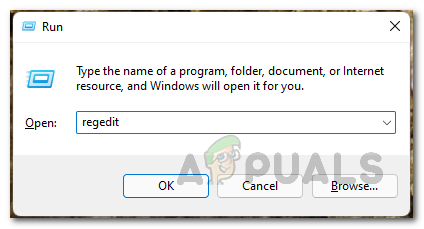
Opening up Windows Registry - This will open up the Windows Registry window.
- On the Windows Registry, navigate to the following path by copying the given path and pasting it in the address bar. You can also choose to manually make your way to the address but this is a simpler way to do it.
HKEY_CURRENT_USER\Software\Microsoft\Windows\CurrentVersion\Explorer\Advanced
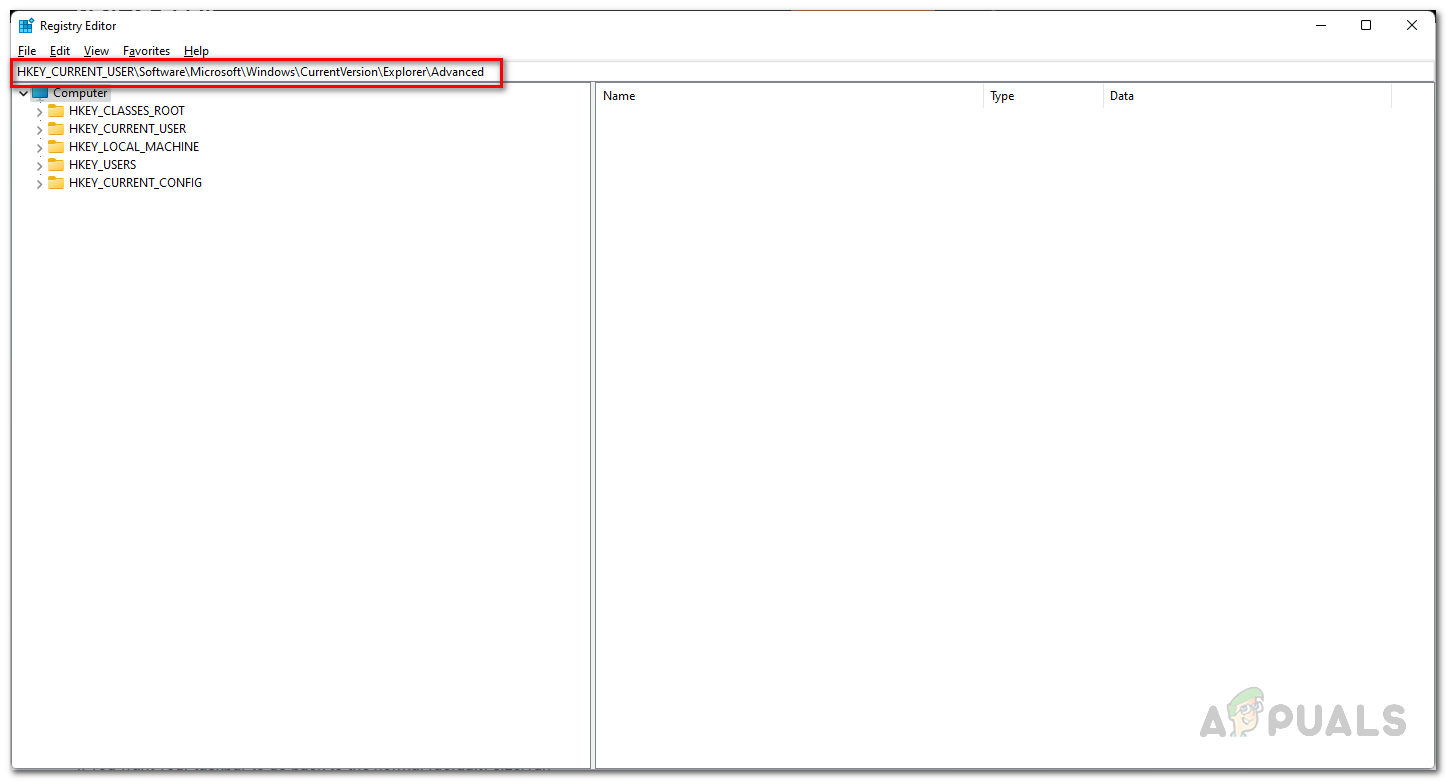
Pasting the Path in Windows Registry Address Bar - Once you are there, on the right-hand side, right click and choose the New > DWORD (32-bit) Value option.
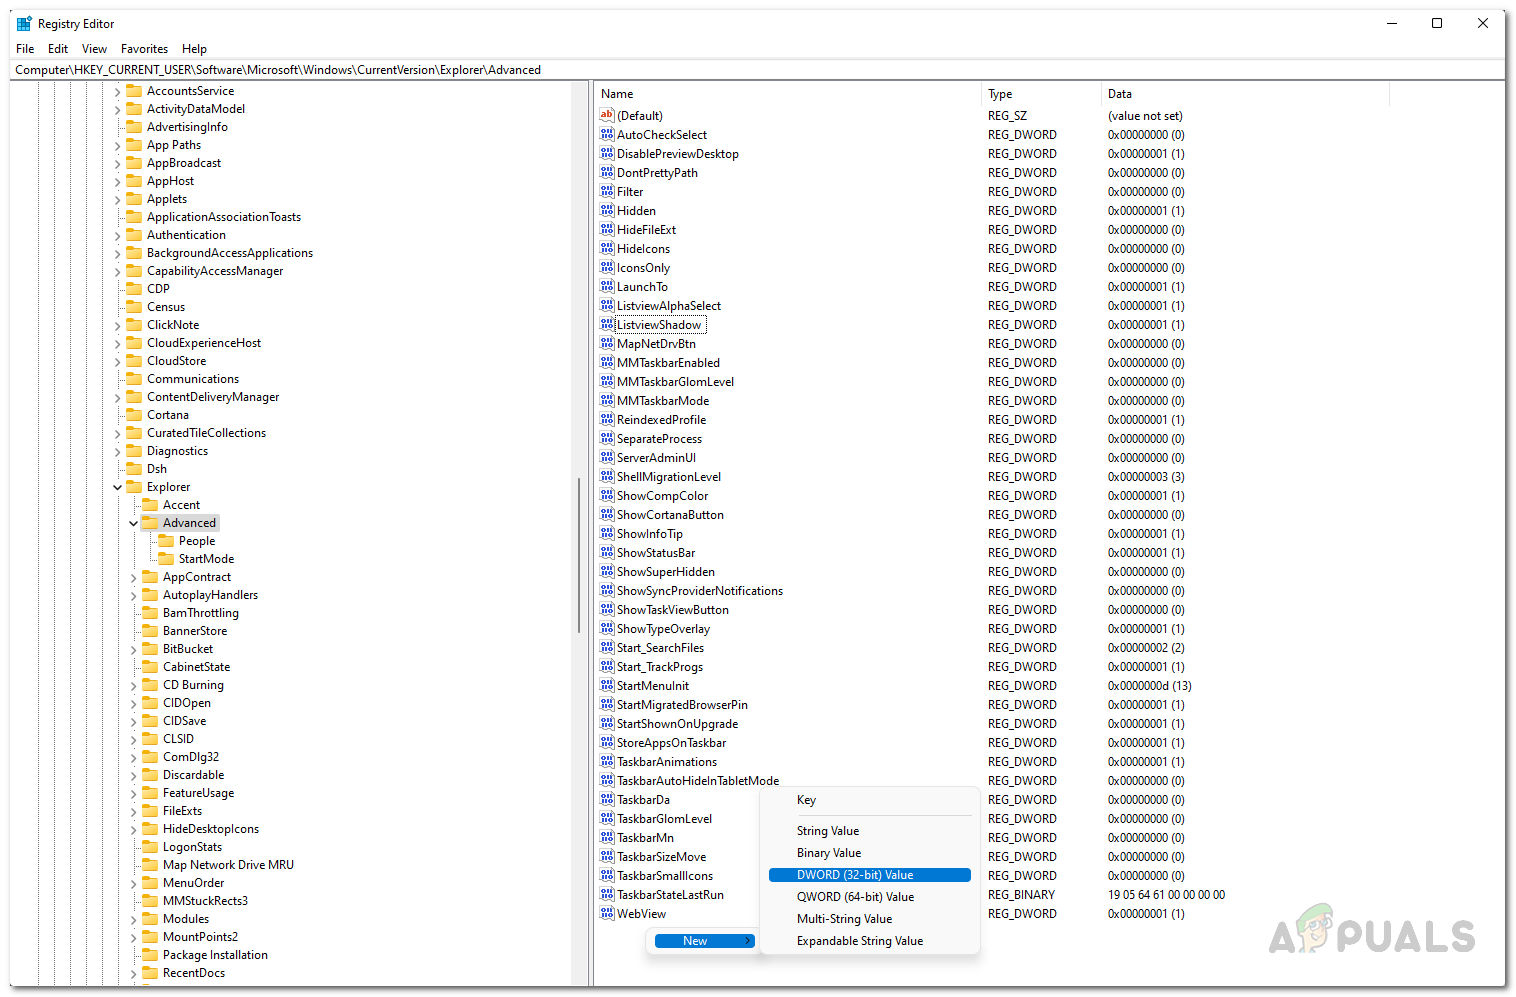
Creating a New Key - This will create a new key. Then, right-click on the newly created key and from the drop down menu that appears, choose Rename.
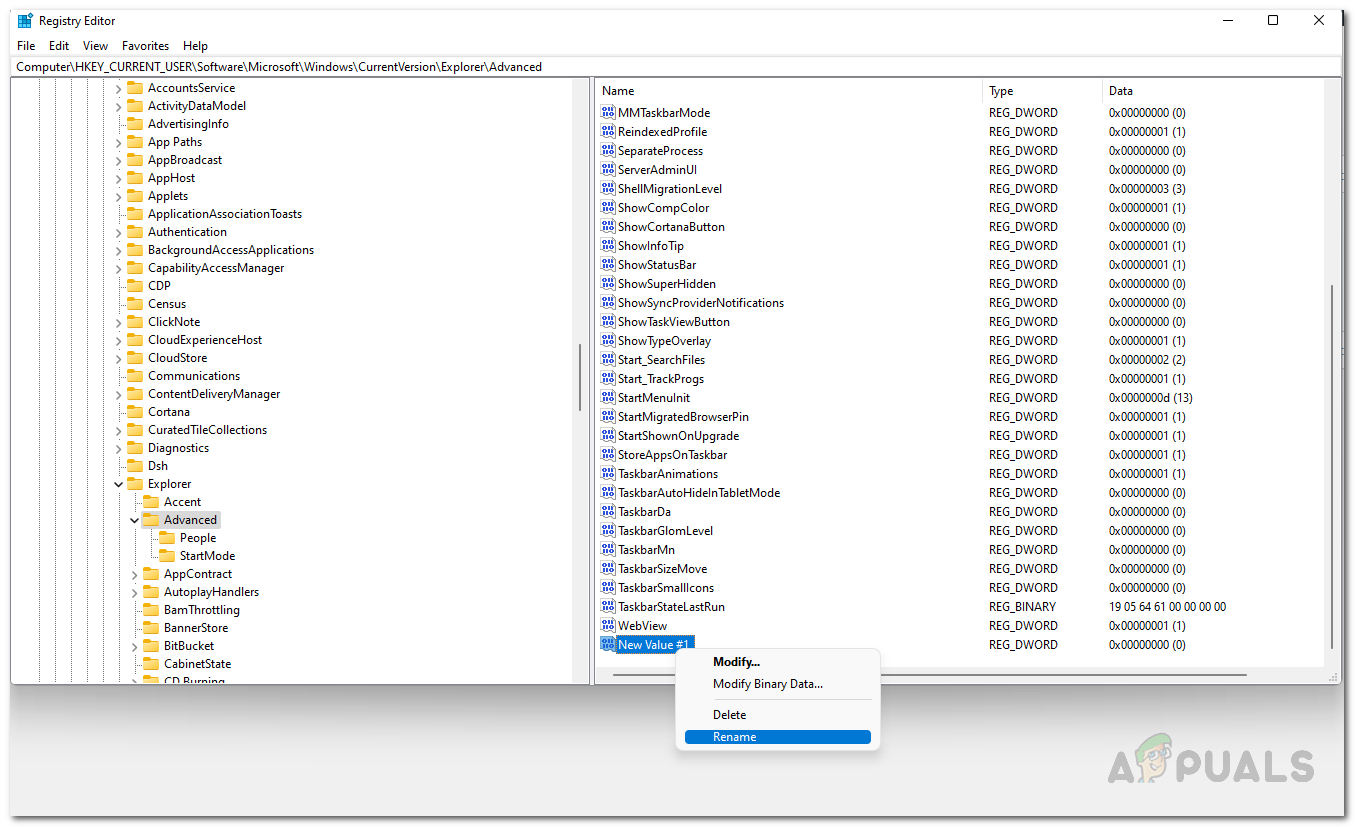
Renaming the Newly Created Key - Rename the key to TaskbarSi.
- Once you have done that, go ahead and double click the newly created key.
- Now, change the value per your choice. You can use three values i.e. 2, 1, 0 which means large, medium and small respectively. For example, if you want a smaller taskbar, you will have to enter 0. Then, click OK.
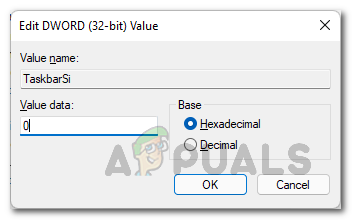
Editing the Value of TaskbarSi Key - After doing that, close the Windows Registry window and then go ahead restart your computer.
- Once your PC boots up, you will see the changes take effect and the size of the taskbar will be changed.
Use Registry Files
As we have mentioned above, if you do not want to go through the trouble of manually editing the registry, you can use the registry files that are provided down below to change the size of the taskbar on your computer. The file provided is a zip file that contains three registry files. To change the size of the taskbar, you will have to run one of the registry files that are named per the size of the taskbar. This means that if you wish to have a medium taskbar, you will have to run the medium.reg file. When you run the registry file, a warning dialog box will appear on your screen. Simply click the Yes button here. You can download the zip file by clicking here.
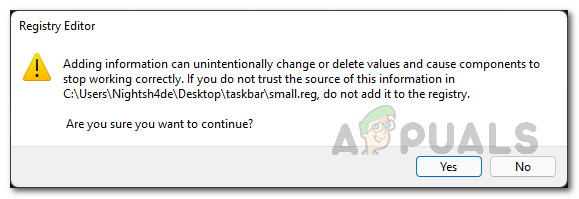
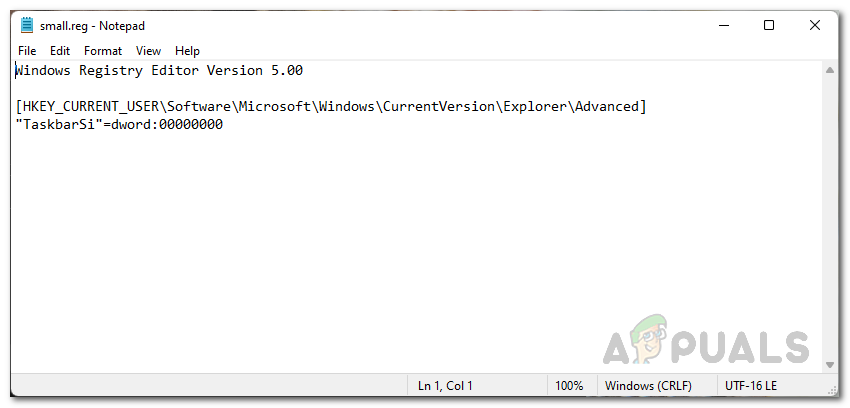
Normally, you should not be running random registry files that you find on the internet. However, the registry files that we have provided are safe and you can verify by viewing the content of the files provided. To do that, right click on any of the registry files and from the drop down menu, choose Show More Options. After that, click on the Edit option which will open up the registry file in a Notepad. There, you will be able to see what the registry file does.
The post How to Change the Size of Taskbar in Windows 11? appeared first on Appuals.com.


0 Commentaires