A full backup of your computer it's always a good idea to protect your installation and files, and in this guide, we'll show you how to do this on Windows 11.
On Windows 11, a full backup is among the best ways to protect your current setup and files against hardware failure, upgrade problems, malware attacks, file corruption, and more. In other words, if you don't have a proper backup, you are constantly at risk of losing your files, including pictures and documents, as well as custom configurations you may have spent many hours setting up.
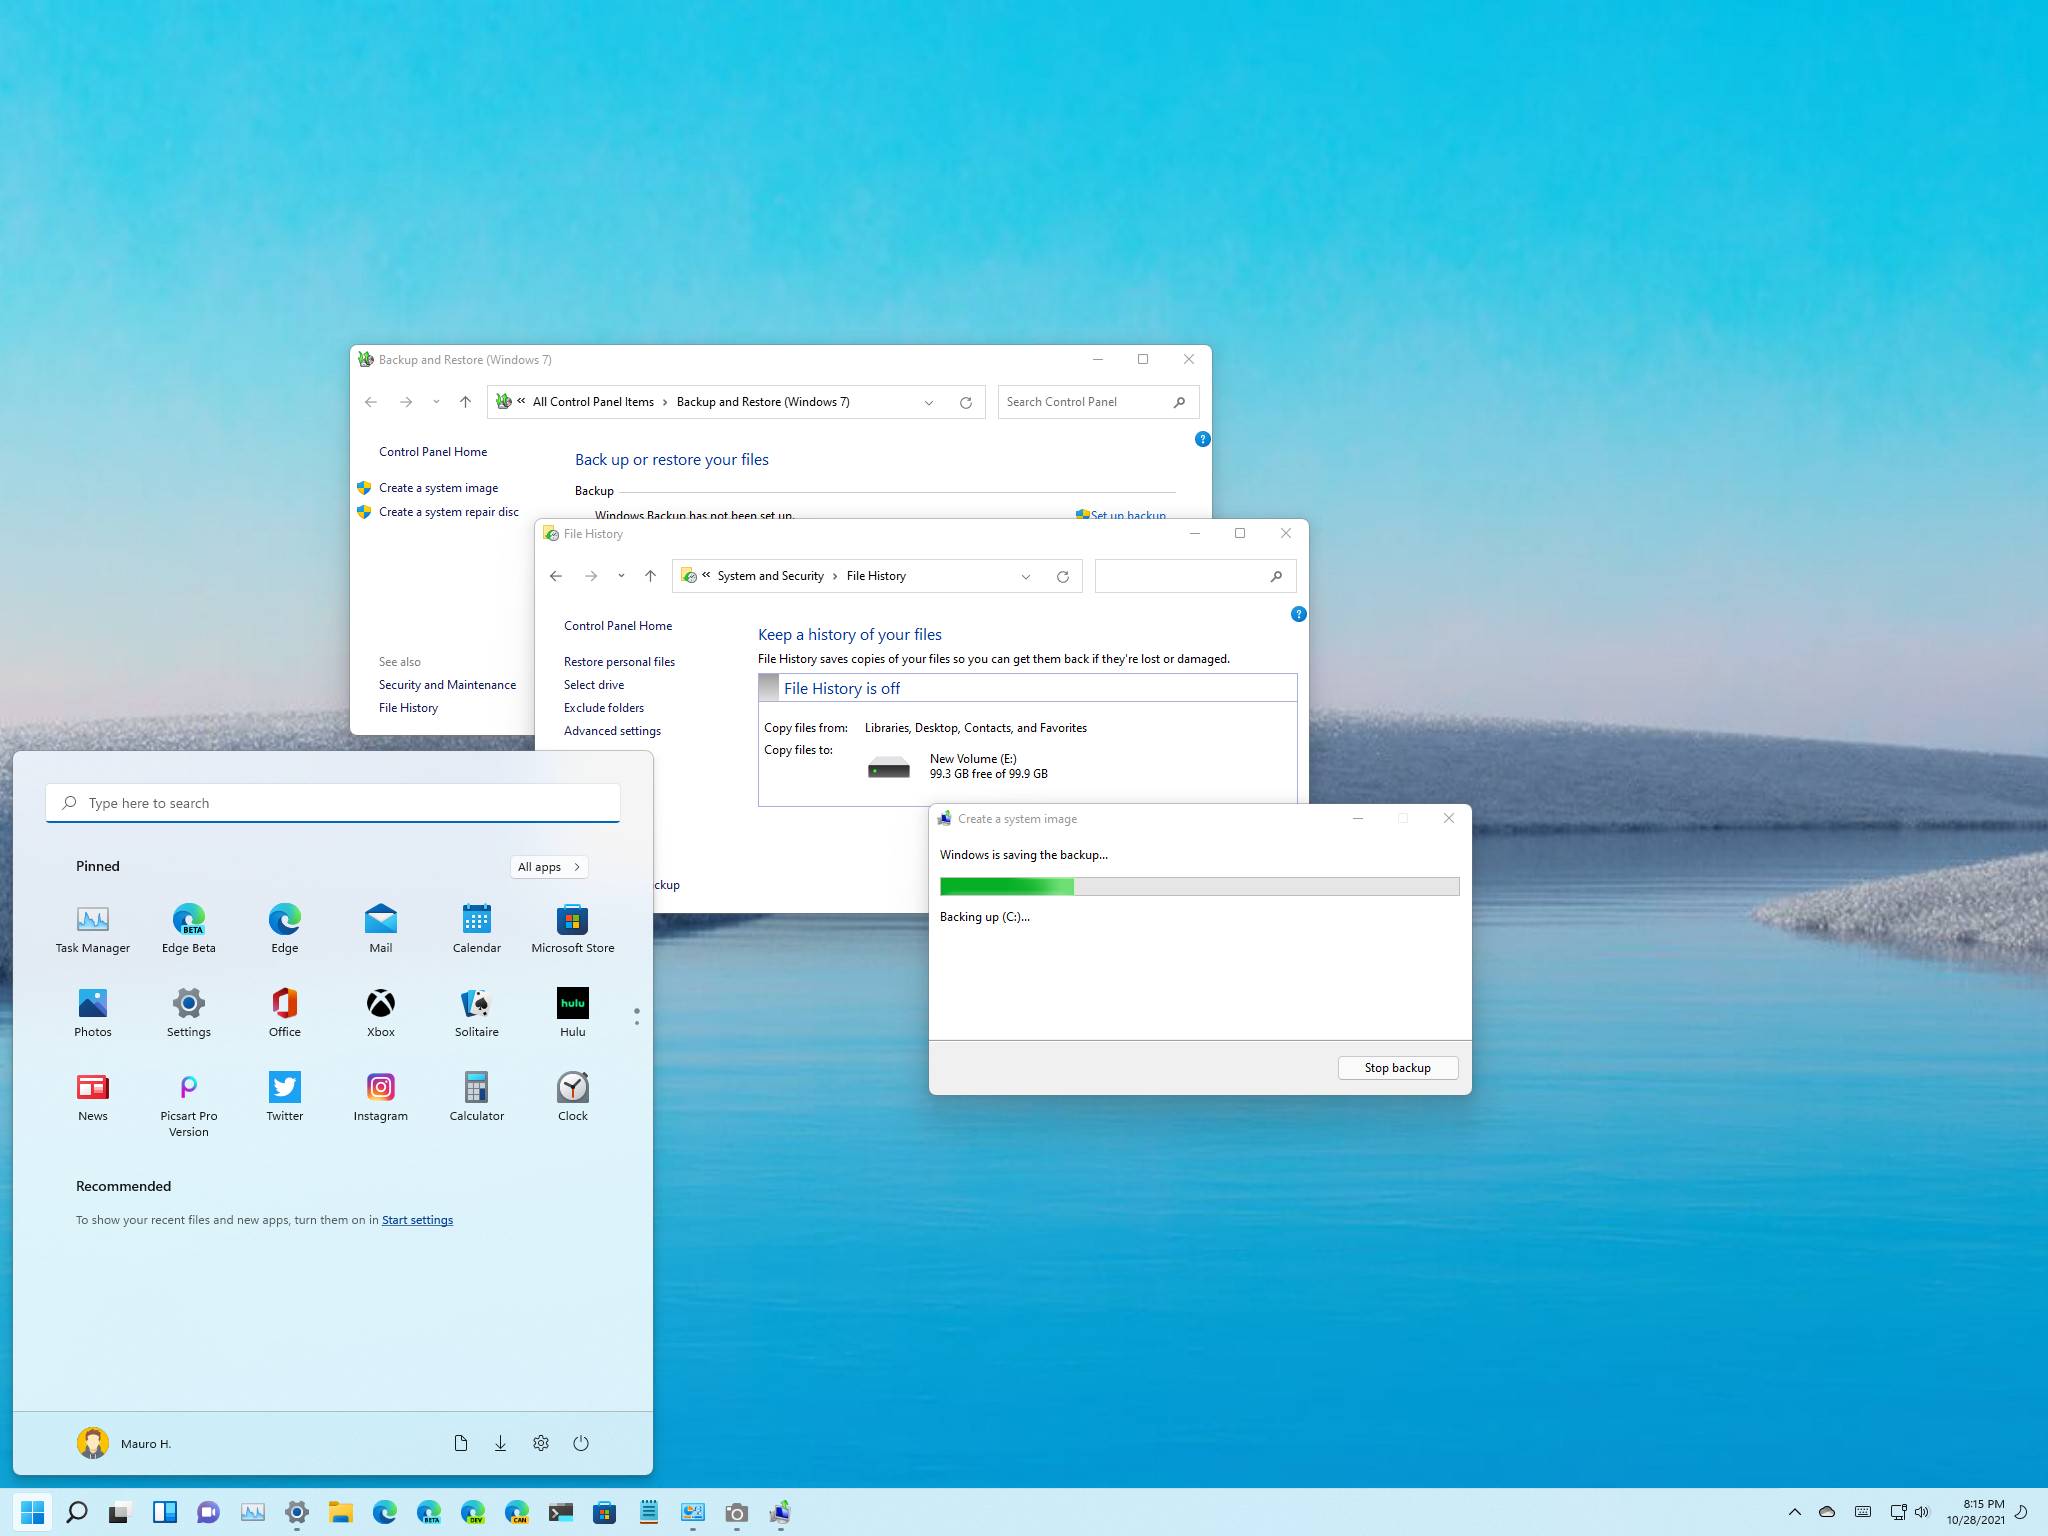
You can always use third-party local and cloud solutions, but Windows 11 still comes with the Backup and Restore feature that includes an option to create a system image of the entire system to an external storage.
A system image also describes a full backup since it includes an identical copy of the Windows installation, plus your settings, apps, and, more importantly, your files. Typically, you will find this backup approach more suitable to roll back to a previous version if you see problems after upgrading to a new version of Windows or restoring the system after replacing the hard drive or critical failure.
In this Windows 11 guide, we will walk you through the steps to create a full backup of all your custom settings, apps, files, and OS setup files using the Backup and Restore feature.
How to create backup on Windows 11
The Backup and Restore feature lets you create a system image of the entire system and files to an external hard drive or network folder location. However, this guide will look at the steps to create a backup to a USB storage (with enough space) since it's the most convenient process for most users.
Important: Microsoft no longer maintains the backup feature, but you can still use it to create a temporary full backup while it's still available.
To create a full backup on Windows 11, use these steps:
- Open Start.
- Search for Control Panel and click the top result to open the app.
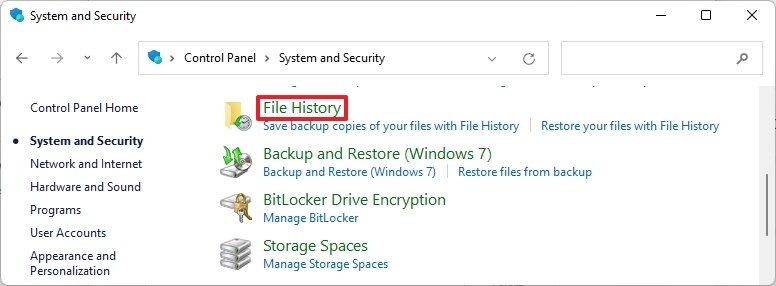
- Click on System and Security.
-
Click the File History setting.
-
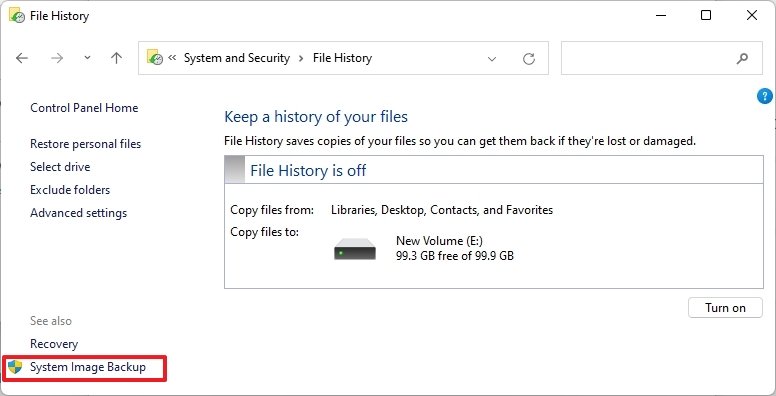
Click the System Image Backup option from the bottom-left corner.
-
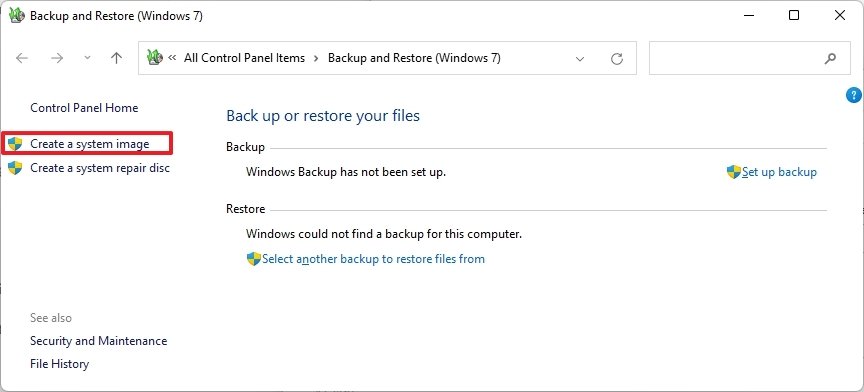
Click the Create a system image option from the left navigation pane.
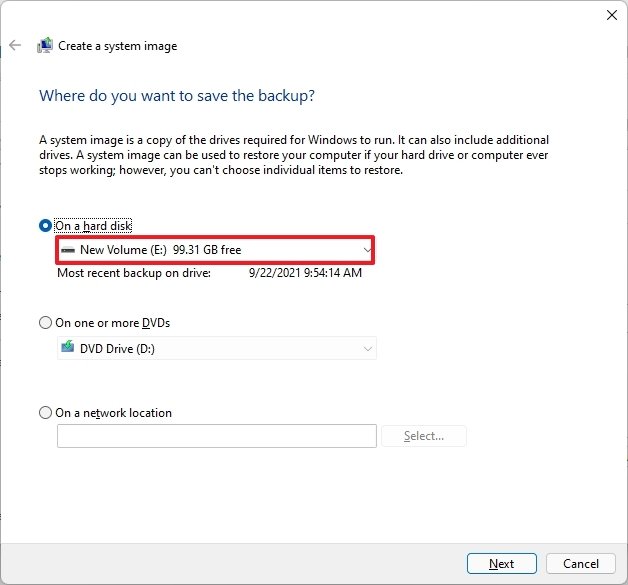
- Select the On a hard disk option.
-
Use the "On a hard disk" drop-down menu and select the Windows 11 full backup destination.
- Click the Next button.
- (Optional) Select any additional drive to include in the backup.
- Click the Next button.
-
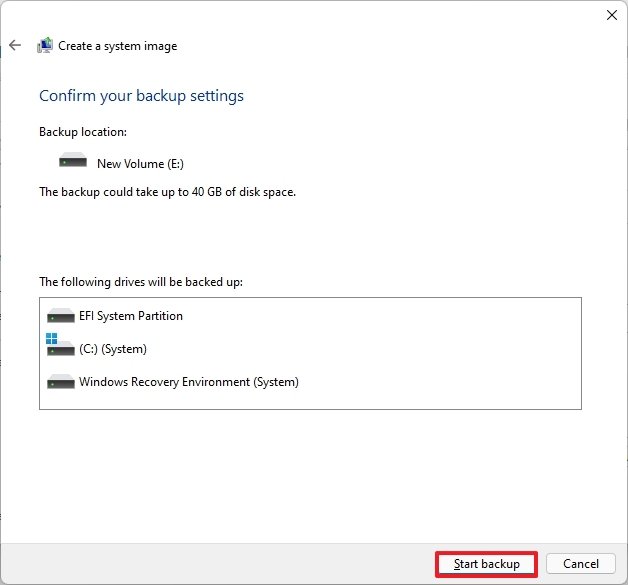
Click the Start backup button.
-
Click the No button.
Quick note: You'll also receive a prompt to create a system repair disc, but you can skip it. If you need to roll back to a previous installation, you can use a USB installation media to access the recovery settings.
- Click the Close button.
Once you complete the steps, a backup of the entire system will be created with everything on the primary hard drive and other drives you may have selected.
The tool uses the "Shadow Copy" feature backs up files even if they are open and apps are running, which means that you can continue to work during this process. After the backup is complete, disconnect and store the drive in a safe place.
If you don't have enough space to backup your computer, there are a number of great external hard drives, but we recommend the Western Digital My Book because of its reliability and affordability. Also, it is not as fast as an SSD, but you can get one of these drives with up to 14TB of storage to create many backups.
Best Bulk Storage for backups
Western Digital My Book
Bulk storage
The WD My Book might not be particularly fast or have the most compact design, but it does deliver massive and reliable storage for backups and other files at a great price.
How to restore backup on Windows 11
In the event of a hardware failure or if you're upgrading the system drive, you can use a previous backup to restore the device installation.
Whenever you restore a backup, avoid interrupting the process as it will cause the backup to fail, and the computer will no longer boot. If you want to avoid problems, it's recommended to maintain the laptop connected to a power source and a desktop connected to an uninterruptible power supply (UPS).
To restore a Windows 11 backup, connect the drive with the backup and a Windows 11 bootable USB flash drive, and use these steps:
- Start the computer.
-
On the USB bootable drive startup prompt, press any key to continue.
Quick tip: If the computer does not start in the Windows Setup wizard, you will need to access the Unified Extensible Firmware Interface (UEFI) to change the boot order settings. However, since these steps are different per manufacturer and device model, it is recommended to check your manufacturer support website for more specific details.
-
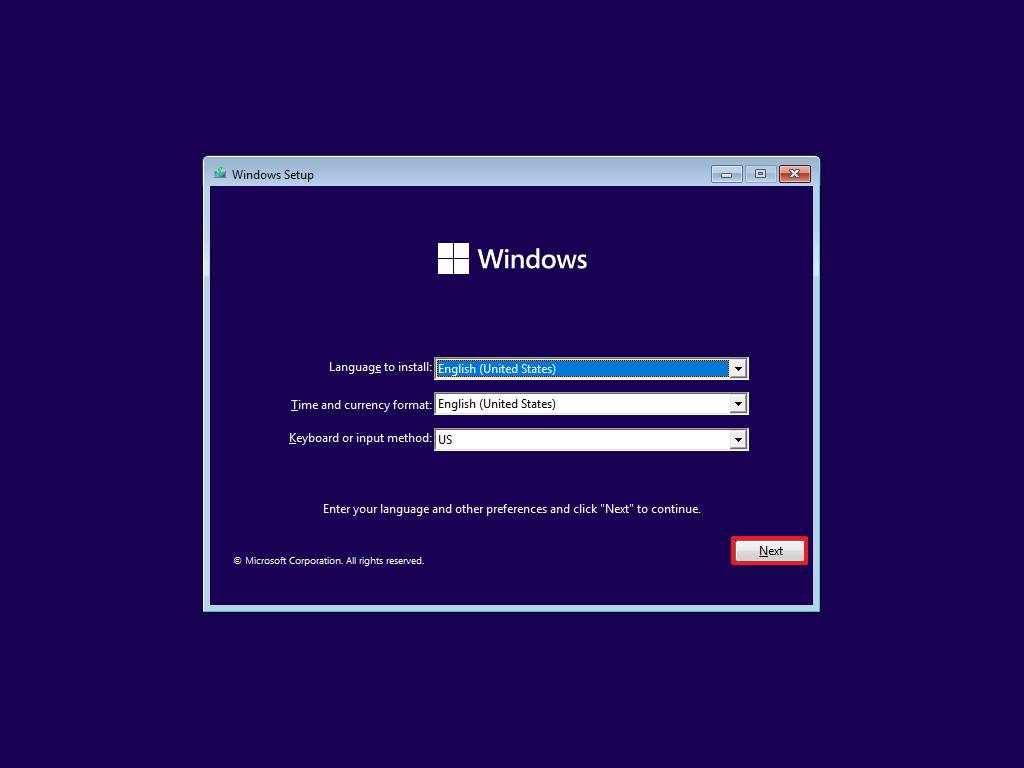
On the "Windows Setup" page, click the Next button.
-
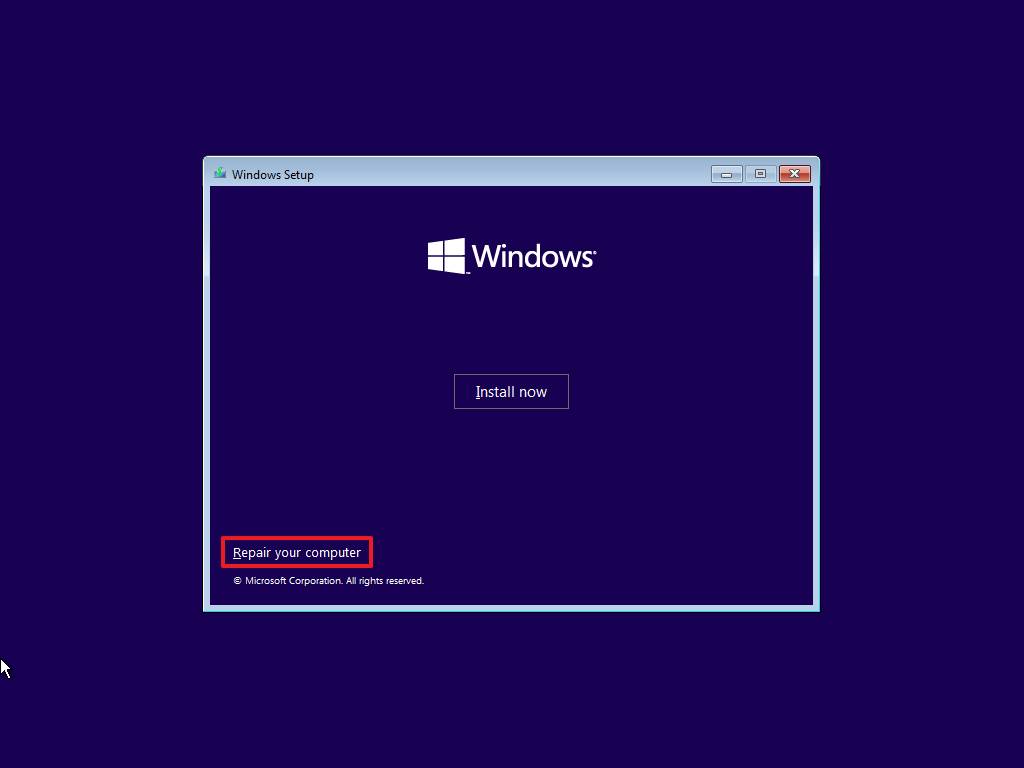
Click the Repair your computer option from the bottom-left corner of the screen.
- Click the Troubleshoot option.
-
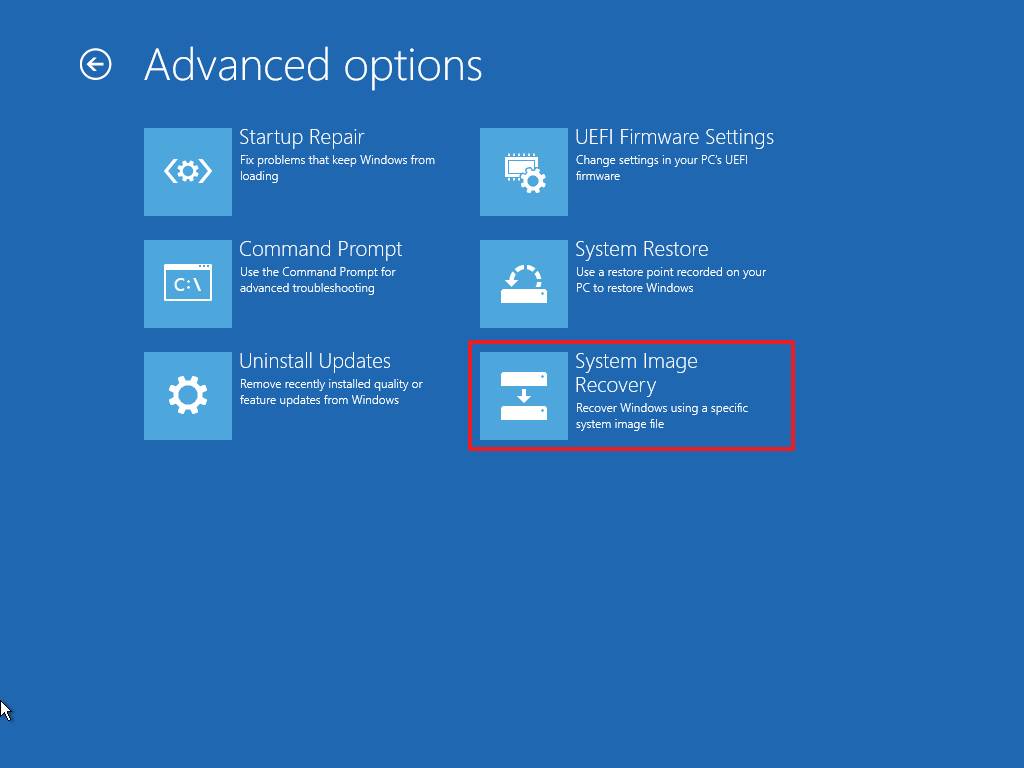
Click the System Image Recovery option.
- Select the Windows 11 option.
-
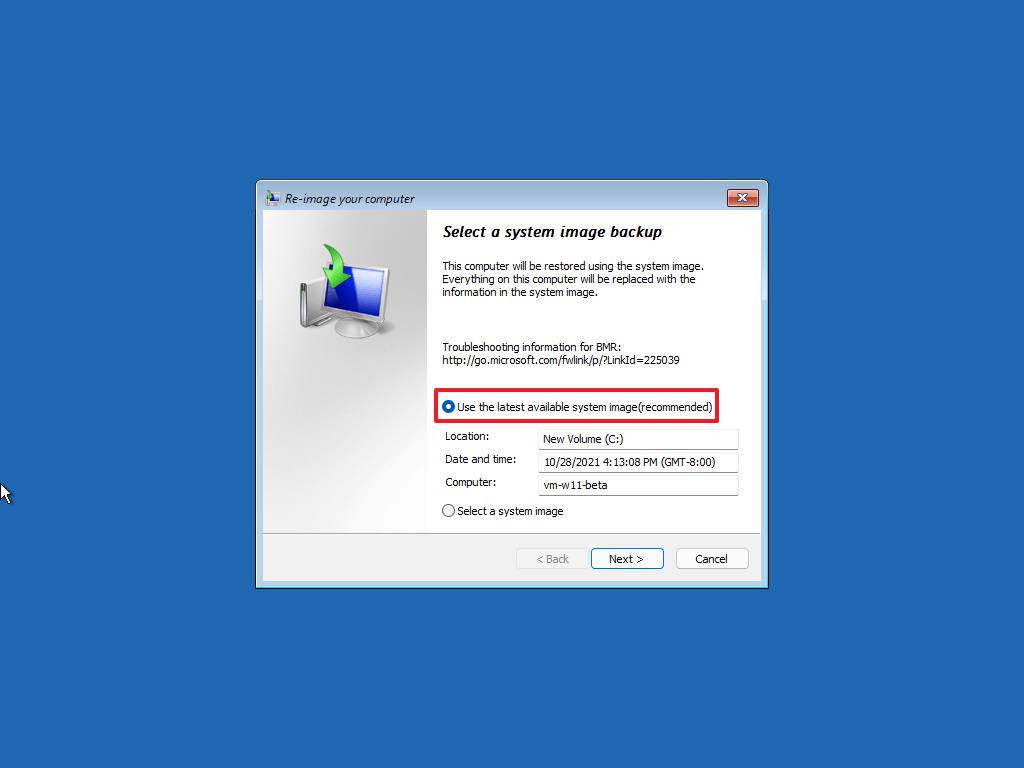
On the "Re-image your computer" page, select the Use the latest available system image option.
Quick tip: Use the "Select a system image" option to restore an older version of the setup (if applicable).
- Click the Next button.
-
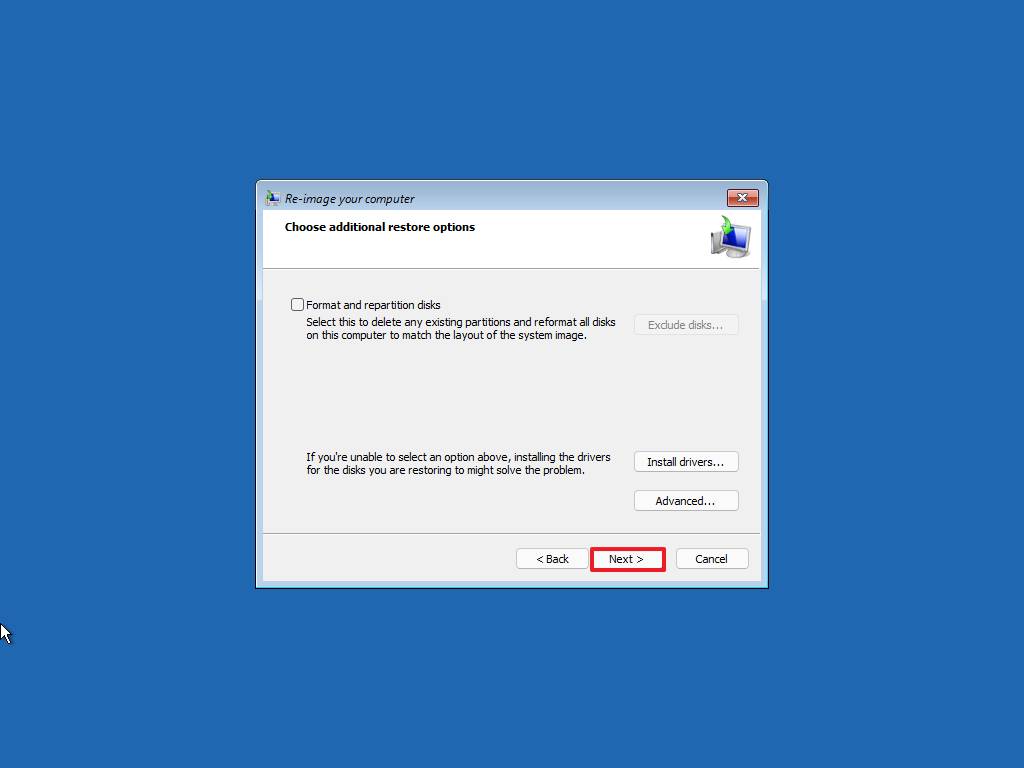
(Optional) Select the Format and repartition disks option before restoring the backup.
Quick tip: If you choose this option, use the Exclude disks option to prevent formatting the secondary drives that may contain data. Usually, you only want to use this option on new drives.
- (Optional) Check the Only restore system drivers option.
-
Click the Next button.
-
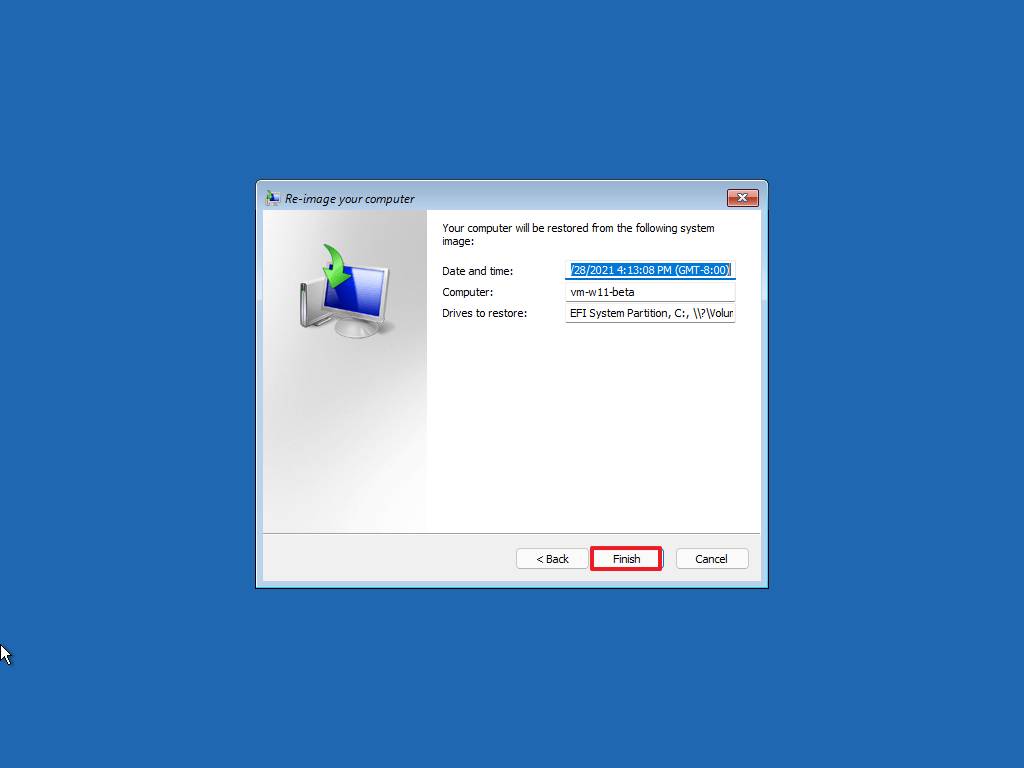
Click the Finish button.
- Click the Yes button.
After you complete the steps, the recovery process will start, and the restoration time will depend on the amount of data and hardware configuration of the device.
Once the backup has been applied, the device may likely be missing some updates, which means that it's a good idea to open Settings > Windows Update and click the Check for Updates button to update the system and drivers.
While you can find many other alternative solutions, the are still benefits to using the System Image Backup feature on Windows 11. For example, when you have to back up the system before an upgrade to a new version. You need to make system changes, and you want to make sure you have a quick way to roll back. Or when you have to replace the main hard drive or need a quick way to transfer the installation and files without reinstallation.
Also, it's always a good idea to periodically back up your computer to have a fresh copy to revert to if the unexpected happens, such as system or hardware failure, malware, ransomware, or hacker attacks.
Just remember that this feature has been designed to recover the whole system, not individual files. If you want to back up your files, you should be using something like OneDrive or File History. Also, you have to be proactive in creating backups because you can only recover until the last backup. Anything after the backup won't be recoverable.
More Windows resources
For more helpful articles, coverage, and answers to common questions about Windows 10 and Windows 11, visit the following resources:



0 Commentaires