Upon experiencing an inconsistent behavior with their Windows 11 installation, some users have discovered a repeating error inside Event Viewer – “Unable to start a DCOM Server.” In most documented cases, this particular issue seems to occur immediately after installing an update. New logs of this error are usually generated when the users try to access preinstalled apps like Mail, Store, Paint3D, etc.
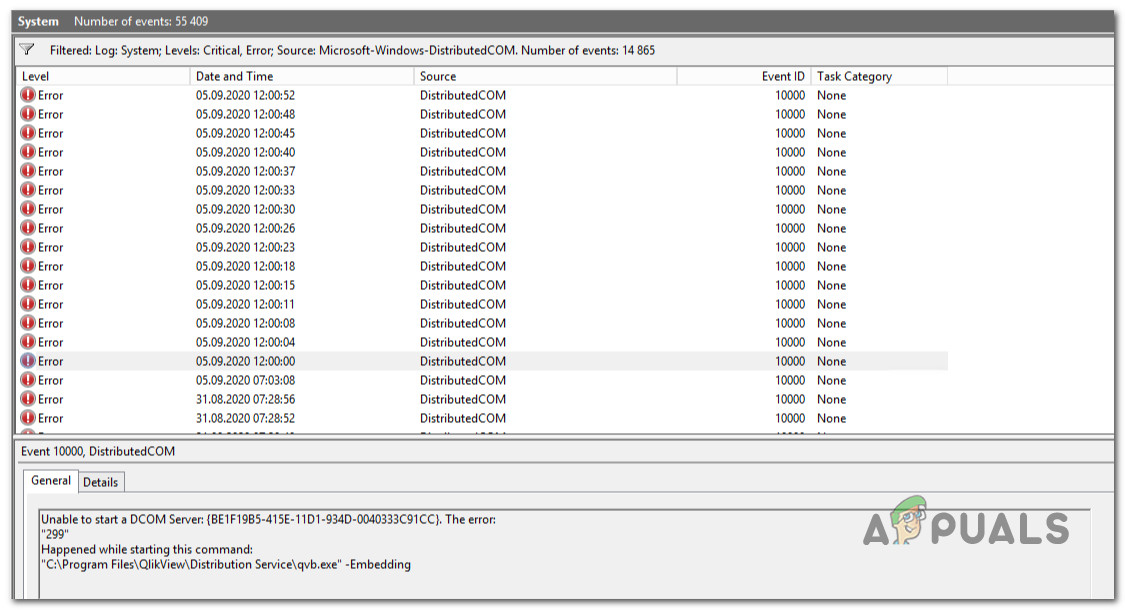
After investigating this issue thoroughly, we’ve discovered that several different underlying causes are responsible for this “Unable to Start a DCOM Server” Error. Here’s a list of potential culprits that you should look for:
- QlikView permission issue – If you’re using QlikView and experiencing this issue while trying to embed something, you’re most likely dealing with a resource issue rooted in a permission problem. Other affected users have used the Component Services utility to make sure the required permissions are correct to fix this issue.
- The Office suite causes DCOM Error – If the error message related to the error mentions the Microsoft Office Hub, the problem is most likely caused by a corrupted Office installation that generates corrupted entries. To fix the issue in this case, all you need to do is trigger a repair procedure via the Programs and Features menu.
- Active account doesn’t have full permissions over WscBrokerManager and WscDataProtection. Another viable reason why you can expect to see these recurring DCOM error logs inside Event Viewer is a situation where two Windows Security components (WscBrokerManager and WscDataProtection) don’t have the required permissions. In this case, you can rectify the issues by giving the correct permissions.
- Firewall interference – Another less common but real scenario is when the active firewall is causing these DCOM errors as your system cannot clear deprecated firewall rules. To fix this issue, you’ll need to run a series of commands that manually delete the unnecessary firewall keys.
- Overprotective AV suite – As it turns out, specific antivirus suites might be responsible for causing this issue indirectly after triggering a false positive. Several affected users that we’re dealing with the same kind of issue have managed to fix the problem permanently by reinstalling or permanently uninstalling the 3rd party AV suite.
- System file corruption – Under certain circumstances, you can also expect to deal with this issue whenever there’s an underlying corruption issue that forces your system to keep up with the creation of these DCOM events. To fix it, you can try doing DISM and SFC scans and work your way to a clean install or repair install procedure if the problem persists.
Now that you are familiar with every potential culprit responsible for this issue, let’s go over each possible scenario and deploy the appropriate fix according to the topic at hand.
Patching the permission issue (QlikView users Only)
If you’re experiencing this issue while attempting to use QlikView, the first thing you should do is troubleshoot against a potential permission issue caused by a resource inconsistency.
Note: If you’re not using QlikView, ignore this first method and move directly to the next one below.
Since the problem is closely correlated with a resource issue, you should first make sure the QVB is correctly registered.
Follow the instructions below to check if the QVB is correctly registered:
- Open up File Explorer and navigate to the default location of qvb.exe. You’ll find it in:
C:\Program Files\QlikView\Distribution Service\
Note: If you installed QlikView in a different place, navigate there instead.
- Once you arrive in the correct location and locate qvb.exe, double-click on it, this is required to create the necessary Windows registry keys and GUIDs.
- Reboot your machine to make sure the reg keys and GUIDs are created.
Once this first part is done, follow the following instructions below to make sure the QulikView permissions are correct:
- Press Windows key + R to open up a Run dialog box. Next, type ‘dcomcnfg.exe’ inside the text box and press Ctrl + Shift + Enter to open the Component Services tool.
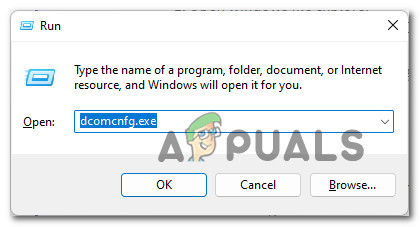
Opening the component store - Once the User Account Control prompts you, click Yes to grant admin access. Once you’re inside the Component Services window, use the left-hand pane to navigate to Component Services > Computers > My Computer > DCOM Config.
- Next, move over to the center pane, right-click on QlikViewBatch Application and choose Properties from the context menu.
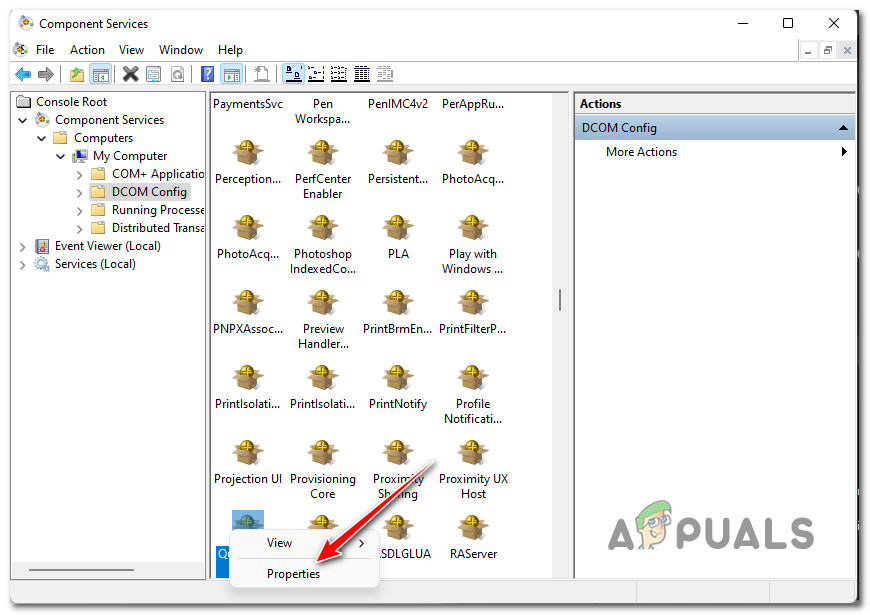
Accessing the properties screen of Qui - Next, go to the Security tab, click on Customize (under Launch and Activation Permissions), and click Edit.
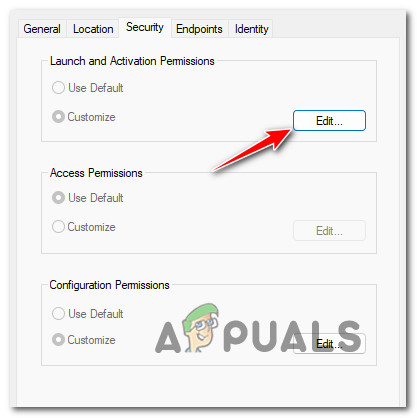
Editing the Launch permissions - Once you’re inside the specialized menu, go ahead and add the account that needs launch permissions (the service account running the QlikView Distribution Service)
- From the next menu, check the Allow box for the following options before saving (by clicking OK):
- Local Launch
- Remote Launch
- Local Activation
- Remote Activation
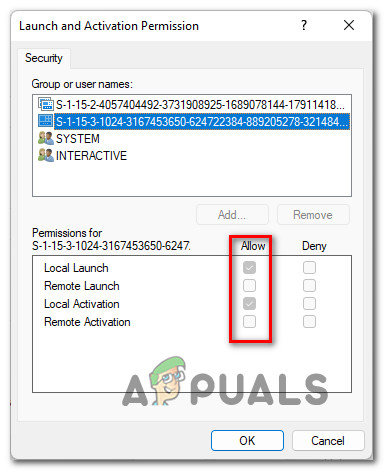
Allowing the Launch and Activation permissions
- Once these modifications have been operated, repeat steps 5 to 7 with Access Permissions and Configuration Permissions (under the Security tab).
- Finally, start the QlikView Distribution Service and see if you’re still getting new instances of the Unable to create a DCOM Server error.
If this method is not applicable, move down to the next potential fix below.
Repair the Office Suite installation
Suppose you’re noticing inside the Event Viewer that the problem is related to the Microsoft Office Hub. In that case, chances are you’re dealing with a corrupted Office installation – it’s much more common than you’d think.
Most likely, these constant “Unable to start a DCOM Server” error entries are generated in the background by a sub-component of the office suite.
After going through most of the documented cases, you might expect this issue to occur after the Antivirus suite ends up quarantining some files belonging to the Microsoft Office suite.
Here’s an example of an Event where Microsoft Office is to blame for the error:
Unable to start a DCOM Server: Microsoft.MicrosoftOfficeHub_18.2106.12410.0_x64__8wekyb3d8bbwe!Microsoft.MicrosoftOfficeHub.AppXt4mh7c9swwc5cmd5jgmtmwcfmvkddpn1.mca as Unavailable/Unavailable. The error:
"2147942405"
Happened while starting this command:
"C:\Windows\system32\backgroundTaskHost.exe" -ServerName:Microsoft.MicrosoftOfficeHub.AppX54h2e8jwdm50fj5ha8987vz1etpx7czd.mca
If the error you’re experiencing is similar, follow the instructions below to repair the Office suite effectively and hopefully fix the issue permanently:
- Press Windows key + R to open up a Run dialog box. Next, type ‘appwiz.cpl’ inside the text box that just appeared and press Enter to open up the Programs and Features menu.
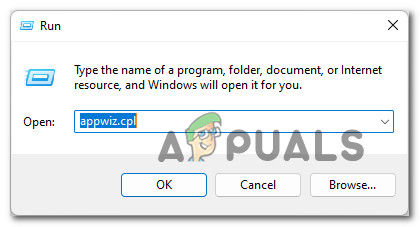
Open up the Programs and Features menu. Note: If the User Account Control prompts you, click Yes to grant admin access.
- Once you’re inside the Programs and Features menu, scroll down through the list of installed programs and locate the listing associated with the Microsoft Office suite.
- When you see the correct listing, right-click on it and choose Change from the context menu that just appeared.
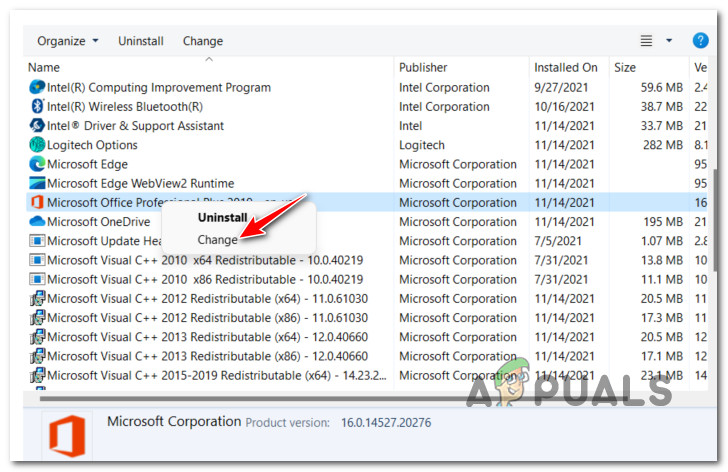
Changing the Office installation - When the User Account Control prompts you, click Yes to grant admin access.
- At the next window, choose the Online Repair toggle, then click on the Repair button.
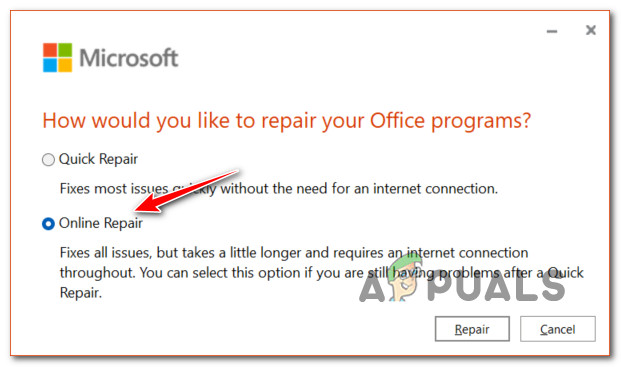
Perform an Online Repair on Microsoft Office - At the confirmation prompt, click on Repair once again, then wait until the operation is complete.
- Once this operation is complete, reboot your PC and see if the problem is fixed once the next startup is complete.
If this method did not apply to your scenario or you’re still noticing new “Unable to start a DCOM Server” Event Viewer errors, start following the following steps below.
Grant Full Control to WscBrokerManager and WscDataProtection (if applicable)
Suppose none of the methods below have proven to be applicable. The extended Event Viewer error message related to the “Unable to start a DCOM Server” mentions WscBrokerManager or WscDataProtection. In that case, the issue is most likely related to a permission issue caused by Windows Security Center.
Note: This is mainly reported for users using a 3rd party security suite and has just switched back to the default security suite (Windows Security).
If the scenario described above is applicable, you should be able to fix the issue by using the Registry Editor to obtain complete control for the current account over both WscBrokerManager and WscDataProtection.
Follow the instructions below to learn how to do so:
- Press Windows key + R to open up a Run dialog box. Next, type ‘regedit’ inside the text box and press Ctrl + Shift + Enter to open up a Registry Editor.
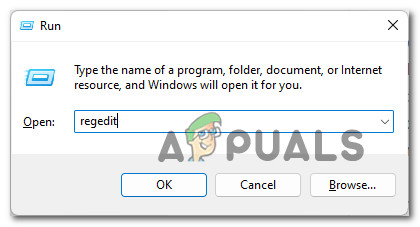
Open up the Registry Editor with admin access. Note: If you see the User Account Control prompt, click Yes to grant admin access.
- Once you’re inside the Registry Editor, press Ctrl + F to bring up the find function.
- Next, paste Windows.SecurityCenter.WscDataProtection’ inside the Find What box, then click on Find Next. This will transport you directly into the following location:
Computer\HKEY_LOCAL_MACHINE\SOFTWARE\Microsoft\WindowsRuntime\ActivatableClassId\Windows.SecurityCen ter.WscDataProtection
- Once you locate the WscDataProtection reg key, right-click on it and choose Permissions from the context menu.
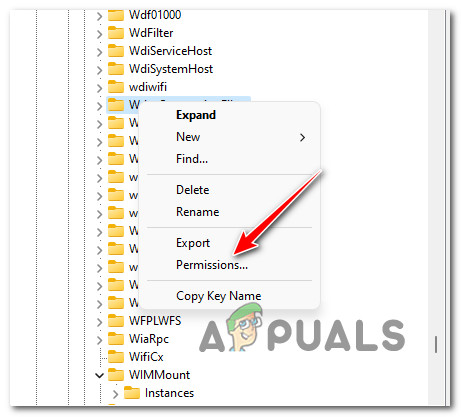
Accessing the Permissions page - Once you’re inside the Permissions for WscDataProtection window, go under Security and select the Users to account under Group or user names.
- Next, check the allow box associated with Full Control and click on Apply to make the Change permanent.
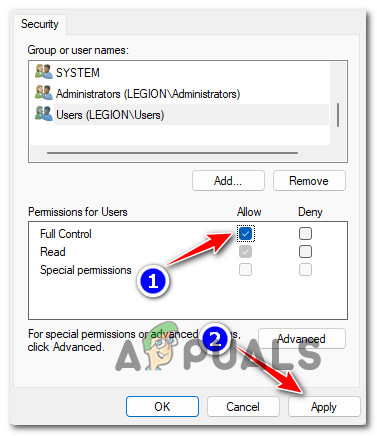
Allowing Full Control permissions - Next, repeat steps 2 to 6 with Windows.SecurityCenter.WscDataProtection.
- Once you grant full permissions for both WscBrokerManager and WscDataProtection, reboot your PC and see if the issue is now fixed.
If you’re still seeing new Events with the same DCOM error, move down to the following method below.
Remove the Firewall interference via Windows Terminal
This problem is also sometimes related to many firewall rules that get created by your active AV. Depending on your use case, you might find that these recurring DCOM errors might be generated when your system cannot clear deprecated firewall rules.
Fortunately, this is an issue that you can resolve quickly with a series of commands that will delete these problematic Reg keys and fix the Unable to start a DCOM Server issue entirely.
Here’s what you need to do:
- Press Windows key + R to open up a Run dialog box. Next, type ‘wt’ inside the text box and press Ctrl + Shift + Enter to open up an elevated CMD Windows Terminal window.
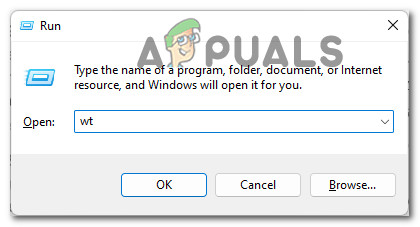
Opening a Windows Terminal app - When the User Account Control prompts you, click Yes to grant admin access.
- Once you’re inside the elevated Windows Terminal app, type the following commands in order and press Enter after each one to delete the unnecessary reg keys that are most likely causing the firewall issue:
reg delete HKEY_LOCAL_MACHINE\SYSTEM\CurrentControlSet\Services\SharedAccess\Parameters\FirewallPolicy\FirewallRules /va /f

reg delete HKEY_LOCAL_MACHINE\SYSTEM\CurrentControlSet\Services\SharedAccess\Parameters\FirewallPolicy\RestrictedServices\Configurable\System /va /f

reg delete HKEY_LOCAL_MACHINE\SYSTEM\CurrentControlSet\Services\SharedAccess\Parameters\FirewallPolicy\RestrictedServices\AppIso\FirewallRules /va /f
- Once all of the commands above have been processed successfully, restart your PC and see if the problem is fixed once e the next startup is complete.
If the same DCOM error is still filling up your Event Viewer, move down to the next potential fix below.
Uninstall 3rd party antivirus suite
As it turns out, there is a specific overprotective Antivirus suite (3rd party) that has the potential of causing this issue whenever there’s a false positive that unwarrantedly keeps some system components from communicating with external servers.
Unfortunately, if you’re suffering from this particular issue, there is no definitive fix, since thousands of potential scenarios might be responsible for this issue.
In this case, the best thing you could do is to temporarily uninstall the overprotective AV suite and see if new instances of the ‘Unable to start a DCOM Server’ error are no longer generated in Event Viewer.
Note: If you confirm that your 3rd party security suite was causing this issue, you can try reinstalling it or migrating to a more permissive option.
Follow the instructions below to uninstall the overprotective 3rd party antivirus suite:
- Press Windows key + R to open up a Run dialog box. Next, type ‘appwiz.cpl’ inside the text box and press Enter to open the Programs and Features menu.
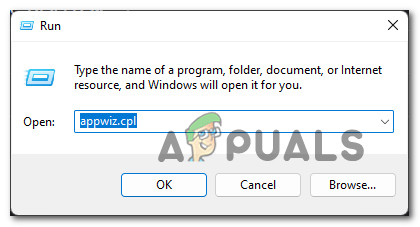
Open up the Programs and Features menu. - Depending on your User Account Control (UAC) settings, you might be prompted to give admin access. If this happens, click on Yes.
- After you manage to get inside the Programs and Features screen, scroll down through the list of installed applications and locate the AV suite that you’re planning to uninstall.
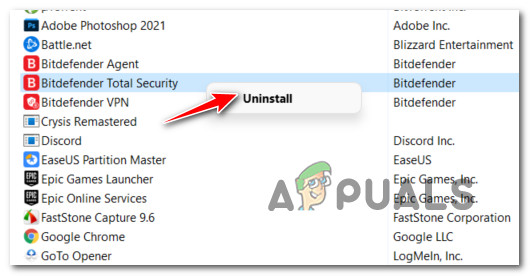
Uninstall 3rd party antivirus - Once you locate the antivirus, you wish to uninstall temporarily, right-click on it and choose Uninstall from the context menu.
- Follow the on-screen prompts inside the uninstallation screen to complete the uninstallation process, then reboot your PC.
- Once your PC boots back up, press Windows key + R to open up another Run prompt. Type’ eventvwr.msc’ inside the text box and press Enter to open up the Event Viewer utility.
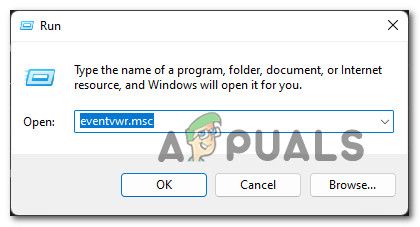
Opening up the Event Viewer - Inside Event Viewer, check the date of the lastly recorded DCOM error and see if it’s before you uninstalled the 3rd party AV. If no new errors have been reported after you’ve gotten rid of the AV suite, chances are you’ve resolved the conflict.Note: You can either install another 3rd party suite or don’t do anything and leave Windows Security up to take over your virus protection tasks.
If you were not using a 3rd party antivirus, or you already uninstalled your 3rd party suite, and you’re still dealing with the same kind of issue, move down to the next potential fix below.
Perform a clean boot procedure
As it turns out, an overprotective antivirus is not the only third-party component that might be responsible for this particular DCOM error. According to other affected users, an entire list of processes and startup services might be accountable for starting a DCOM Server error.
Since there is no definitive list of 3rd party services, processes, and startup items that might be causing this issue, the best option of figuring out if a 3rd party item is causing the problem is to boot your PC in a clean boot state.
If you manage to do this and ensure that there is no 3rd party item that is permitted to run, you’ll be able to tell if a conflicting app causes the problem or not.
Follow these instructions to boot your computer in a clean boot state and ensure that only native WIndows processes and startup items will run with the next startup.
Once you manage to boot in clean boot mode, access the Event Viewer (Windows key + R and type ‘eventvwr.msc) and see if there are any new instances of the DCOM error.

If you still see new instances of the same error, move down to the next potential fix below.
Perform SFC and DISM scans
If you’ve come this far without a result, there’s a big chance that you’re dealing with some system file corruption that ends up generating these DCOM errors.
In case you’re still constantly seeing new instances of the “Unable to start a DCOM Server” inside the Event Viewer, the next thing you should do is run a couple of built-in utilities capable of fixing the most common causes of system file corruption – SFC (System File Checker) and DISM (Deployment Image Servicing and Management).
While SFC and DISM share some similarities, my recommendation is to run both in quick succession to improve your chances of fixing the corruption issue.
Note: SFC retrieves healthy system files from a local folder while DISM uses Windows Update to download files that need to replace corrupted equivalents.
Start by deploying an SFC scan from an elevated CMD prompt and see if the utility finds & fixes any system file corruption.
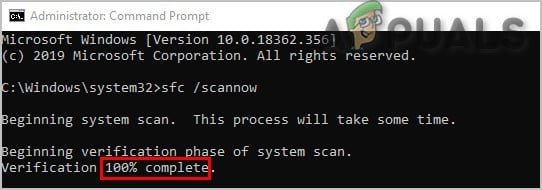
Note: After you start this operation, it’s recommended that you don’t interrupt it (or close the CMD window prematurely) even if the tool looks like it froze. Eventually, you’ll get the success message when the operation is complete.
After the DISM scan is complete, reboot your PC, then deploy a DISM scan after the next startup is complete.
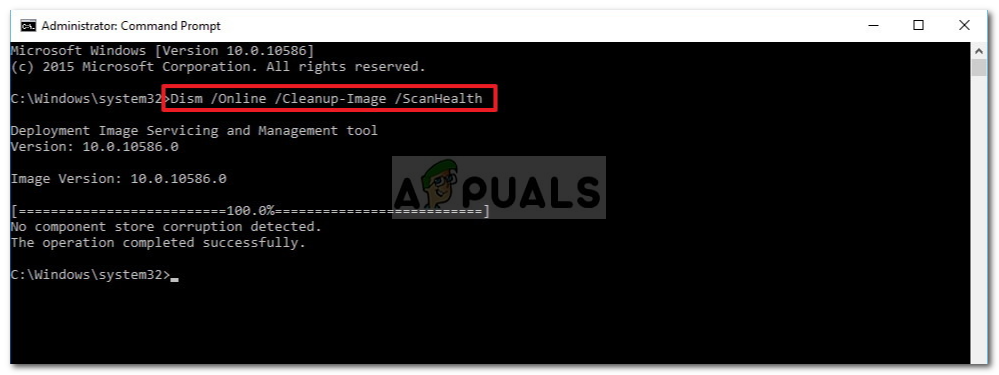
Note: Before you start this operation, make sure that you have a stable Internet connection.
After the DISM command is completed successfully, reboot your PC again and see if the problem is fixed at the next computer startup.
If the same ‘Unable to start a DCOM Server’ error is still occurring even after running both of these scans, move to the final potential fix below.
Repair install or clean install Windows 11
If running SFC and DISM scans didn’t help in your case, chances are you’re dealing with some system corruption that cannot be fixed conventionally.
At this point, the only viable option is to replace every Windows file with a healthy equivalent that is not affected by corruption – when it comes to doing this, the easiest way is to go for a clean install.
But before you go this route, keep in mind that you will lose any personal data currently stored on the OS drive.
A better option in this case (if you have the time) is to go for a repair install procedure instead. This operation will allow you to keep all your files, applications, games, and even some user settings – it will only touch OS files.
The post How to Fix “Unable to Start a DCOM Server” Error on Windows 11? appeared first on Appuals.com.


0 Commentaires