Error 0x800705aa is a code that shows up when an automatic Windows update or upgrade assistant failed to install an update in Windows 11 or 10. This update error code can occur on both build (feature) and cumulative (patch) Windows updates.
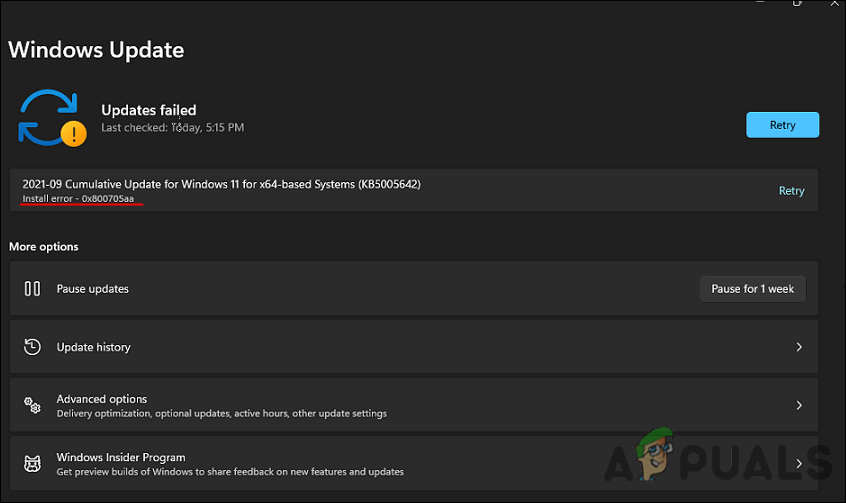
You might be encountering this issue due to several different factors, including the ones mentioned below:
- Windows Update glitch – There is a chance that the update you are trying to install is buggy or infected with a corruption error.
- WU file corruption – There is also the possibility that the issue is being caused by a file corruption that is blocking the WU component. Depending on whether this scenario applies to you, you may be able to fix the issue with the Windows Update troubleshooter or by resetting the WU components manually from an elevated command prompt.
- System file corruption – Occasionally, you may see this error code as a result of underlying system file corruption that cannot be repaired. In this case, repair install or clean install are your best options.
- Incorrect date and time – If the date and time of your operating system are incorrect, any updates will fail to install on your operating system. The solution is simple, as all that you need to do is adjust the date and time.
Now that we know what might be causing the 0x800705aa error code, let’s have a look at the troubleshooting methods to resolve the issue.
Adjust the Date and Time
Microsoft updates its Operating systems according to DST and TZ. If the date, time, and time zone of your computer are incorrect, you are likely to face issues while installing the recent updates.
Here is how you can adjust the date and time on your PC:
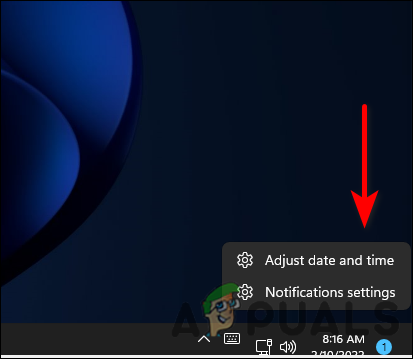
- Right-click the clock on the taskbar and choose Adjust date and time from the context menu.
Date and Time settings - Activate the Set time automatically option if it’s off.
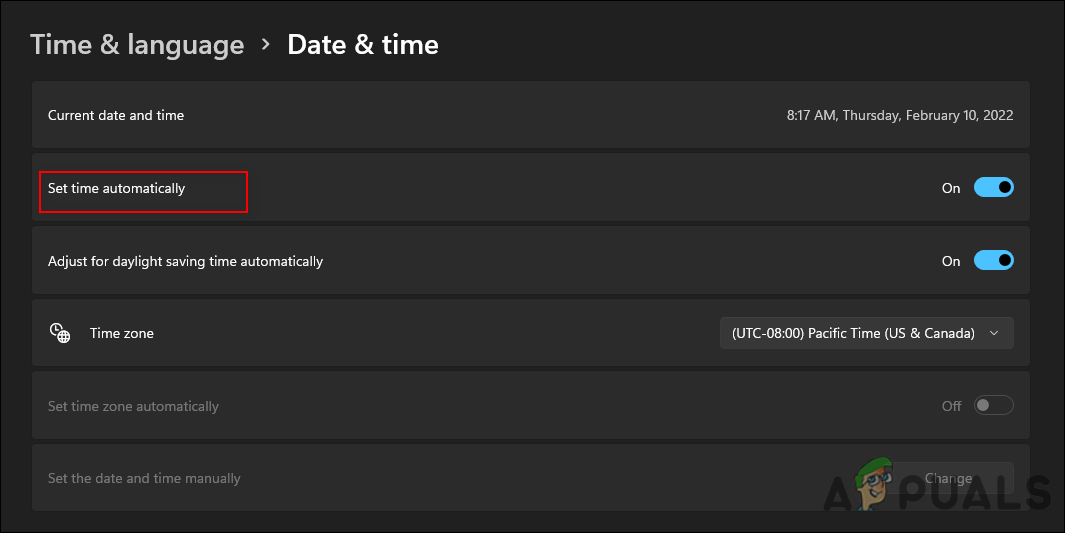
Let system adjust the time - Then, click Set the time zone automatically to enable that option.
- Once done, close the Settings window and check if the 0x800705aa issue is resolved.
Run Windows Update Troubleshooter
Additionally, you should run the Windows update troubleshooter if you encounter the 0x800705aa error code. Windows has a variety of tools that can be utilized for troubleshooting several problems that you may encounter. Among these tools is the Windows Update troubleshooter, which is designed specifically to solve problems with updates.
Hence, you can run the update troubleshooter and see if it can find and fix the problem. Follow the steps below to do so:
- Press Windows + I keys simultaneously on your keyboard to launch Windows Settings.
- In the System tab, scroll down and click on Troubleshoot.
- Next, in the Troubleshoot screen, click on the Other troubleshooters option.
- You should now see a list of various troubleshooters that you can use. Locate Windows Update troubleshooter and click on the Run button against it.
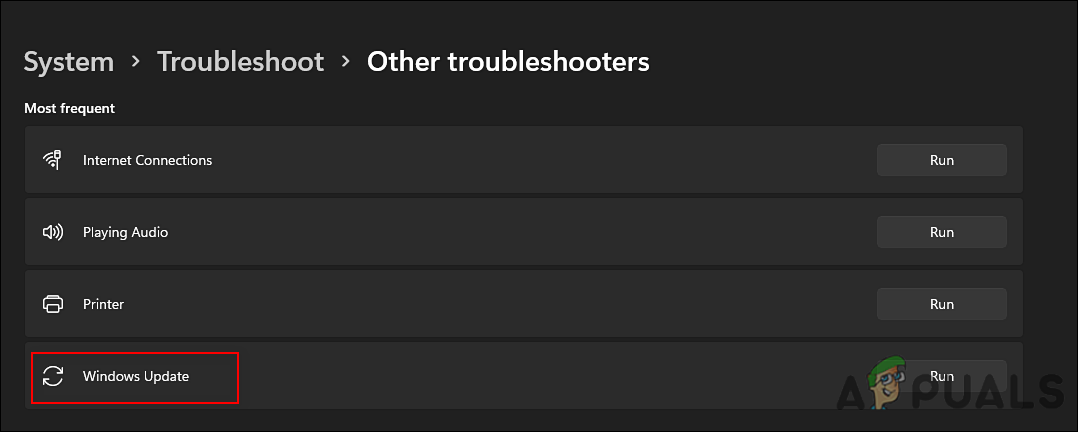
Run Windows Update troubleshooter - Once the troubleshooter has finished, check your computer to see if the problem has been resolved.
Reset Windows Update Components
When Windows is updating your computer, it uses multiple services for that purpose. In the event that any of these components responsible for updating your system fails to operate correctly, the updates will not be installed, leading to errors like the error code 0x800705aa.
To resolve the situation, you would need to reset your system update components. This will revert the update components to their original, error-free state, thus resolving the error in the process.
Here is what you need to do:
- Type cmd in the search bar and click on Run as administrator to launch Command Prompt with administrative rights.
- Now type the commands mentioned below and hit Enter after each to execute them.
net stop wuauserv

net stop cryptSvc

net stop bits

net stop msiserver
- Once done, execute the following commands one by one:
net start wuauserv

net start cryptSvc

net start bits

net start msiserver
- Finally, restart your PC and check if the issue is resolved.
Run SFC and DISM Scans
If the Windows Store troubleshooter failed to fix the issue, then you can also try running the SFC and DISM commands. Both are built-in utilities to resolve errors like the one at hand.
Most cases of file corruption can be resolved by running the SFC and DISM utilities, which is why we encourage you to give it a shot. Hopefully, it will resolve the issue in no time.
Free Up Drive Space
If you don’t have enough space on your computer’s hard drive, you won’t be able to install the latest updates. If this scenario is applicable, freeing up drive space can help you resolve the error code 0x800705aa in Windows 11.
Essentially, when you free up disk space, you get rid of unused files and fragments of data on your hard drive. This helps your computer run efficiently and allows you to install more programs and their updates without any issues.
Follow these steps to free up drive space on Windows 11:
- Type Disk Clean-up in the search area of your taskbar and click Open.
- Now select the files that you want to delete under the Files to delete option.
- Then hit OK and click the Delete Files button to confirm.
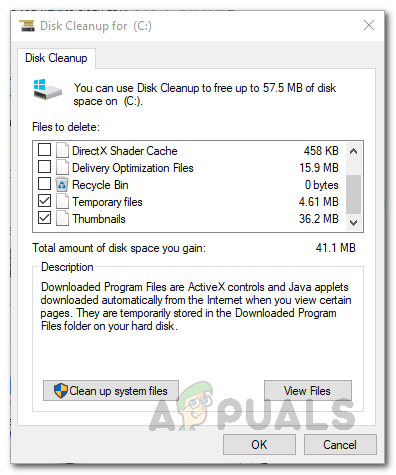
Disk Cleanup Scan Results - You can also select the Clean up system files button in the same window to clear more space.
Install the Updates Manually
Another way you can work around this issue is to manually install the update causing the problem. Any update that is causing you trouble can be downloaded from the update catalog, then installed manually.
Essentially, this is just a workaround to address the error code and not a troubleshooting method.
- Launch your browser and head over to the Microsoft Update Catalog.
- Type the required update name in the search bar on your screen and hit Enter.
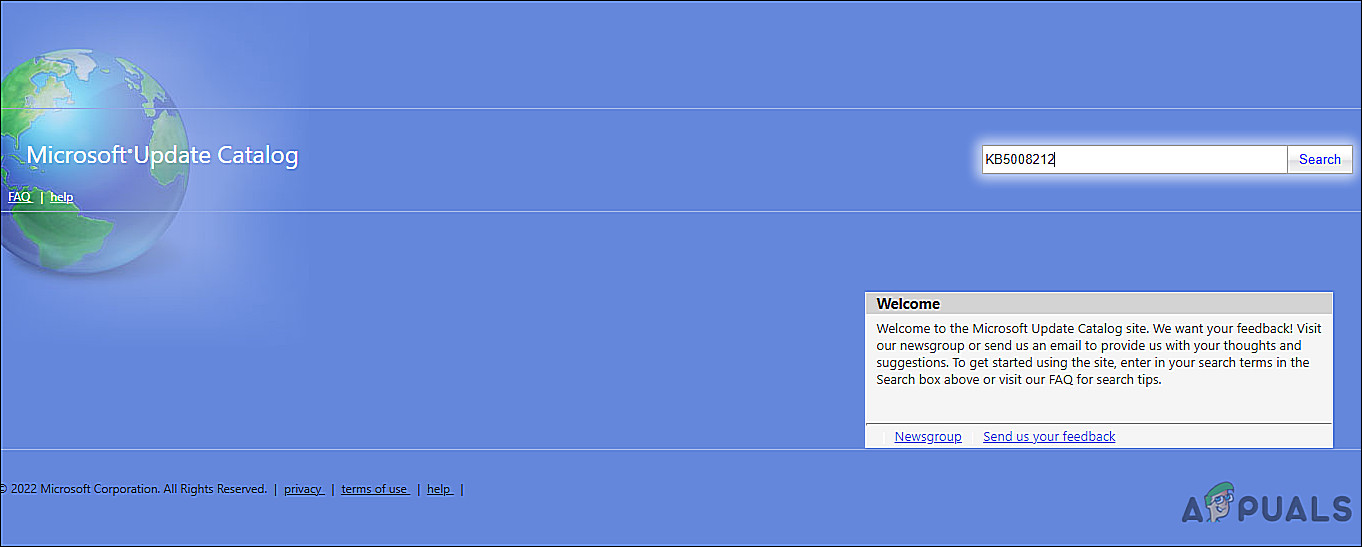
Enter KB5008212 in the Update Catalog - Now, depending upon your device type, install the update by clicking on the Download button.
- After you’ve downloaded the file, run it and follow the instructions to complete the installation. This will help you bypass the error 0x800705aa.
Clean Boot Windows
In some cases, a background application prevents you from performing your day-to-day operations on your system, which includes installing the latest updates. This might be true in your case too, which is why we suggest troubleshooting in a Clean Boot state.
A clean boot allows you to test whether a background program interferes with your game or program by starting Windows with just a few drivers and startup programs.
However, before you proceed with clean boot, try launching Windows in Safe Mode and repeat the action that caused the error. If the issue does not occur in Safe Mode, then perform a Clean Boot.
- Press Windows + R keys on your keyboard to open a Run dialogue box.
- In the text field of the dialogue box, type msconfig and hit Enter.
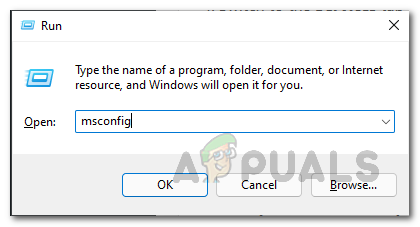
Opening up System Configuration - Head over to the General tab and select Selective startup.
- Now uncheck Load startup items option.
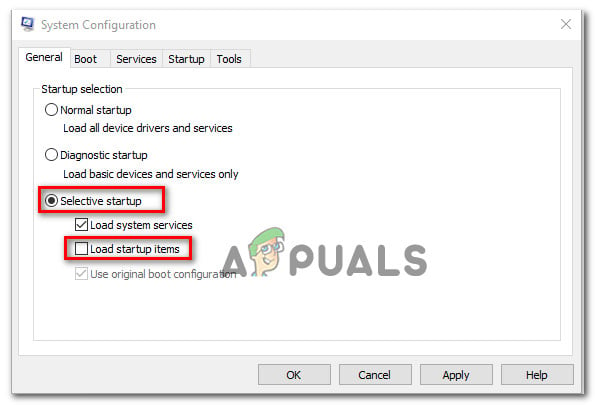
Preventing Startup Items from loading - Now go to the Services tab.
- Check the box against Hide all Microsoft services and then click on the Disable all button.
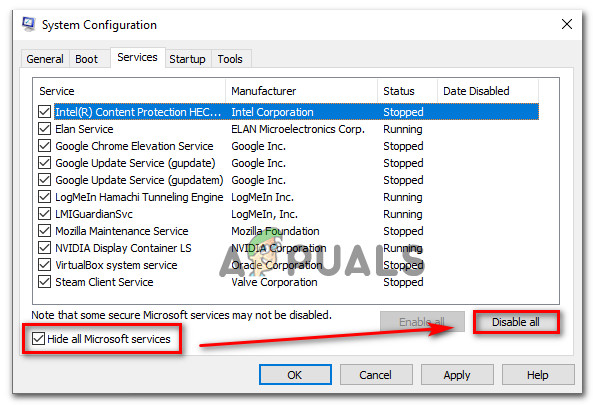
Hide all Microsoft services - Hit Apply and then OK.
- Finally, restart your PC and check if the 0x800705aa issue persists.
Repair Install or Clean Install
At this point, if none of the methods described in this article has worked for you and you are still unable to install the update, you have no choice but to reinstall the system files. You can do so via Repair install and Clean install.
Clean installing – You will reinstall Windows with this method. This is a good method if you want a fresh start. Nevertheless, you will lose any personal files you previously stored on the same partition as Windows.
Repair installing – You can replace every corrupted Windows file with an in-place repair procedure while maintaining your personal files (including applications and games). However, this process is a bit lengthy.
The post How to Fix “Error Code: 0x800705AA” in Windows 11? appeared first on Appuals.com.


0 Commentaires