If you are a multitasker, you most likely spend a lot of time switching between browsers, work applications, and other programs, which consumes time and brings in confusion. To tackle this issue and improve your productivity levels, Microsoft introduced the Split Screen feature, which is available on Windows 8 and above.
This feature allows you to split your window or screen horizontally or vertically in two, three, or four sections. You can view multiple sections of the same document or multiple programs at once!
In this guide, we will walk you through the methods of using the split-screen feature on Windows 10 and 11, so let’s jump right in!
Split Screen in Windows 10
To split screen on Windows 10, you need to enable the Snap windows feature via Windows Settings. Split-screen functionality is supported by most applications in Windows 10, including third-party programs, browsers, and File Manager.
Here is how you can enable the Snap windows feature:
- Press Windows + I keys simultaneously on your keyboard to open Windows Settings.
- In the Settings window, system System from the list of options on your screen.

Launch System settings - Now select Multitasking from the left pane and enable the toggle for Snap windows.
- Then, enable the snap features under Snap windows by check-marking the boxes against them.
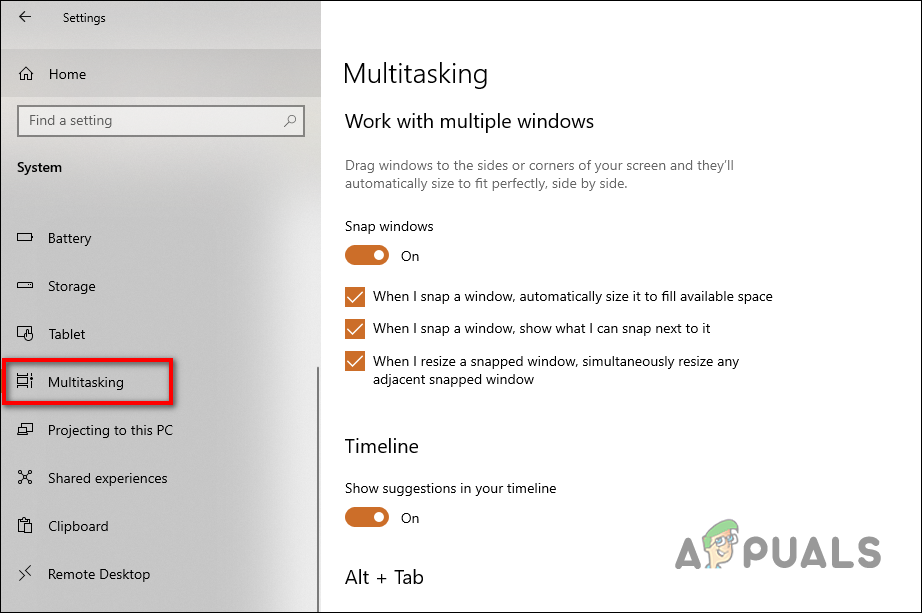
Enable Snap windows option - Once done, close the Settings window.
Using Snap Windows
Now that the feature is enabled on your Windows, you can begin using it. The most common way to use Windows 10 split-screen is to drag an open window to the left or right side of the screen.
Using this method, the window will automatically resize to take up exactly half the screen. When you have other windows open, they will appear on the other half of the screen as smaller thumbnails, from where you can click on the one you want. That window will take the other half of the screen.
You can also split screens using some keyboard shortcuts. We personally find this method the easiest, since it does not require you to hold the screen and drag it. Listed below are several keyboard shortcuts and their purposes:
- Snap window to left half or right half: Win + left/right keys.
Split screen into two - Snap window to corner/quarter of screen: First, press Win + left/right keys. Then, press up/down keys.

Snap windows to a corner - Make window fullscreen: Win + up keys until full-screen.
Make windows full screen - Expand ¼ window to ½ window: Win + up/down keys thrice.

¼ window to ½ window
Split Screen in Windows 11
With just a few differences, Windows 11’s snap windows feature is quite similar to that of Windows 10. Although this feature is enabled by default, it’s a good idea to make sure that it is working before we proceed.
Here is how you can do that:
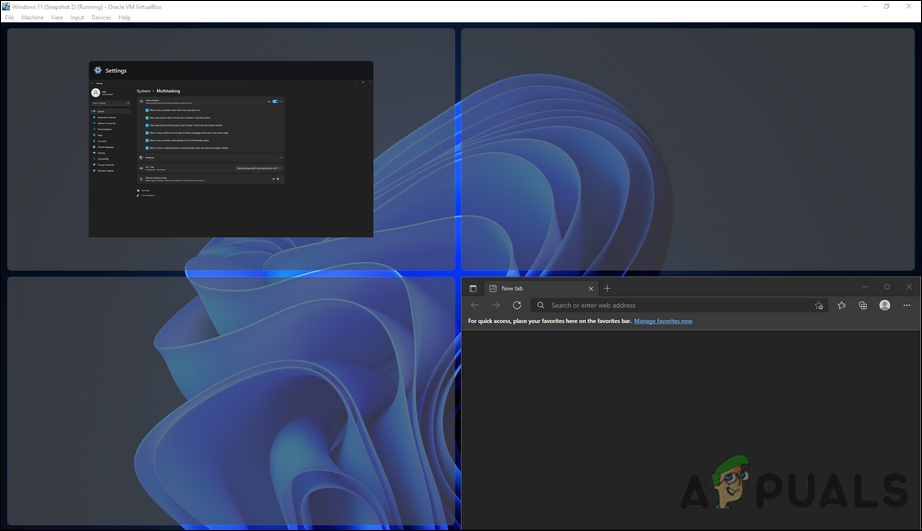
- Press Windows + I keys simultaneously to open Windows Settings.
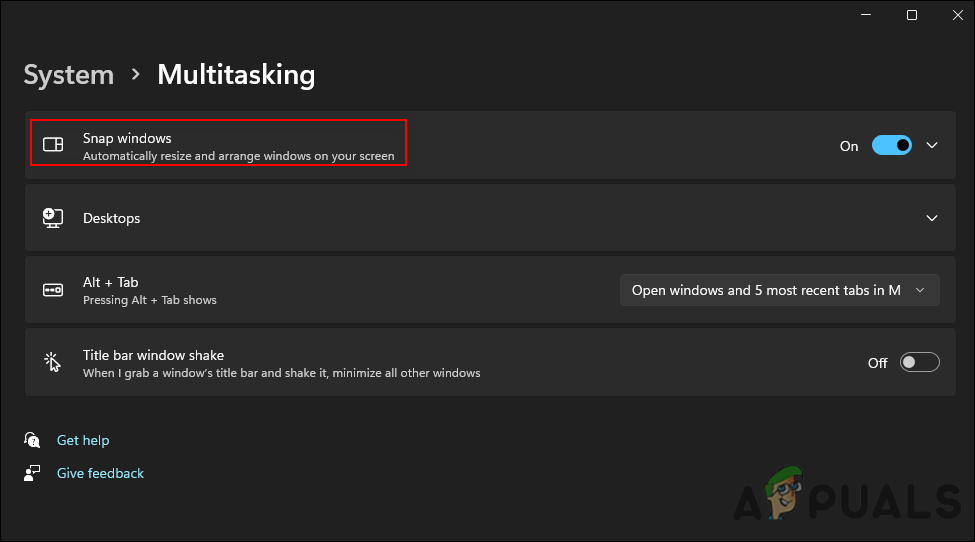
- In the Settings window, select System from the left pane and click on Multitasking on the right side of the window.
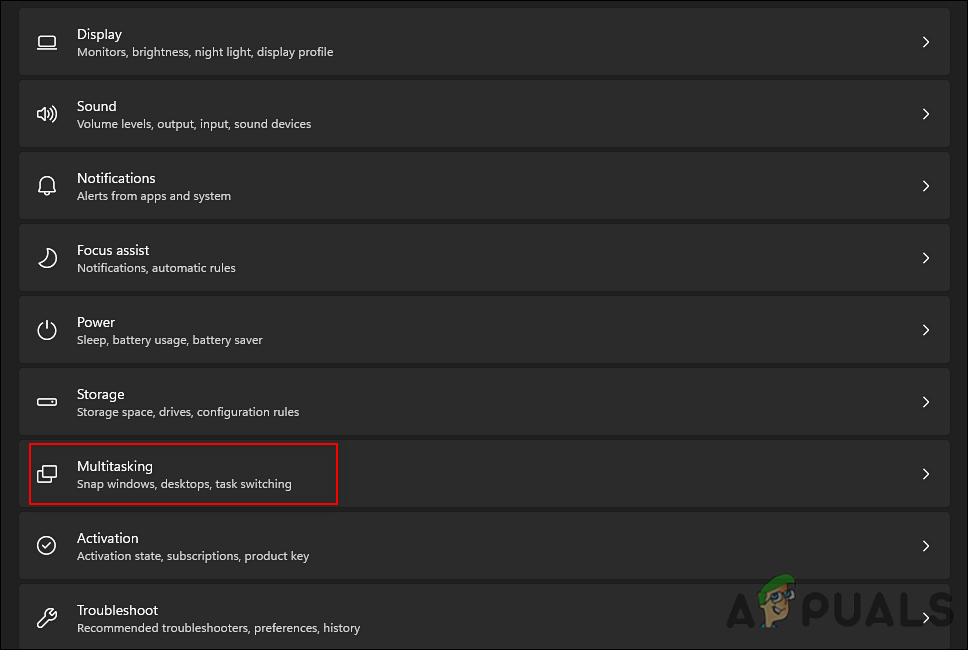
Launch Multitasking settings - Once you are inside the Multitasking window, check the toggle for Snap windows. If it is turned off, enable it.
Enable Snap windows option
Using Snap Windows
Using Snap layouts in Windows 11 is relatively easier since you no longer have to hold and drag windows or use the keyboard shortcuts. Snap layouts are integrated into the maximize button of each window in the new operating system version.
Once you have enabled the Snap windows option in Windows Settings by following the steps we have described above, here is how you can split your screen:
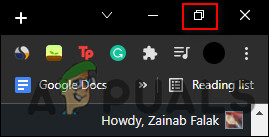
- Hover the cursor over the Restore down button located on the top-right corner of a window. By doing so, you will see a small box with four or six different options for splitting the screen.
- Select one according to your preferences:
- Using the first option, both windows would occupy equal screen space due to the split in the screen.
- As with the first, the second splits the screen in two, but the windows are not evenly distributed. Here, the left one occupies a larger area than the right one.
- In the third option, the screen is divided into three quarters. The left half is occupied by one window and the right half is further divided into two.
- In the fourth option, the screen is divided into four parts, with each window taking up a quarter of the screen.
Let’s have a brief look at each option:
Divide the Screen into Two Sections
- Hover the cursor over the Restore down button and choose the first option.
- The current window should now move to the selected half of the screen and in the other half, you should be able to view the other windows as thumbnails.
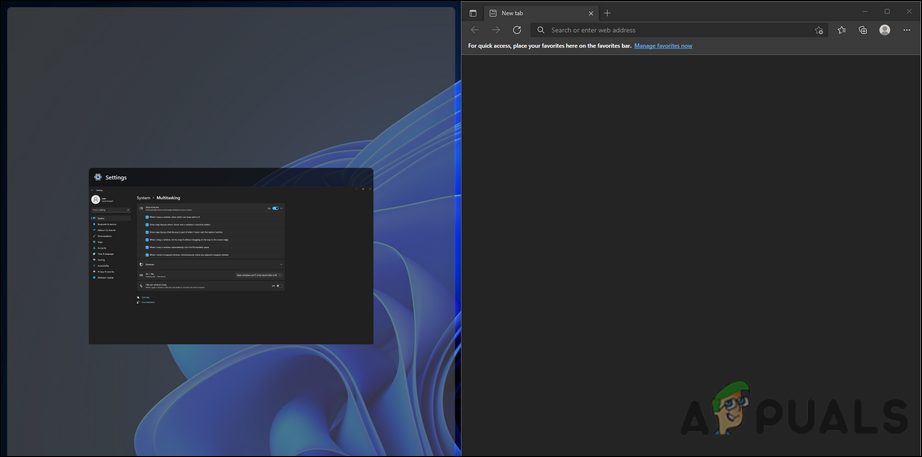
Splitting the screen in two - Select the window you want to add as your second screen by clicking on its thumbnail.
- If you wish to resize the windows, run the cursor over the dark thick line separating the two windows. You can now drag the line either left or right to resize the desired window.
Divide the Screen into Three Sections
- Hover the cursor over the Restore down button and select any one of the three parts of the third option.
- This window will fit in the portion of the screen that you just selected, and all the other windows will be displayed as thumbnails in the other half.
Split screen in three sections - Choose the second window.
- Now, the rest of the open windows will be displayed in the last empty section. Choose the one that you want to work on.
- You can resize these windows using the method we described above.
Divide the Screen into Four Sections
The method of splitting the screen into four sections is quite similar to the method we just discussed. All that you need to do is hover the cursor over the maximize button and choose the 4th option. You can then select the screens that you want to display, one by one, and even resize them if you wish.
In case you are comfortable doing it the Windows 10 way, then you can also split screens by holding and dragging them on the screen. You can also use the keyboard shortcuts as we described in the first method!
Use PowerToys FancyZones
Microsoft PowerToys is a set of freeware system utilities developed by Microsoft for the users to customize their operating systems. This program allows you to dig even deeper into snapping features on Windows 10, unlocking a variety of extra customization options aimed at power users.
Here is how you can use PowerToys to split your screens in different ways:
- Download Powertoys and run the downloaded file as an administrator.

Install the exe file - Once the installation process is completed, open the program.
- Click on FancyZones in the left pane and select Launch layout editor.
- You can now select how you want to split the screen according to your preferences.
- When dragging windows, hold down the Shift key to use your custom FancyZones.
The post How to Split Screen on Windows 10/11? appeared first on Appuals.com.


0 Commentaires