Several Valorant players report that they see the ‘Error Code Val 9’ every time they attempt to connect online. This problem doesn’t allow them to play online since the issue occurs every time the game tries to connect to the online servers.

After investigating this issue thoroughly, it turns out that several different scenarios might directly or indirectly cause this type of problem. Here’s a short list of culprits that might be causing this error code when the game tries to connect to the online servers:
- Underlying server issue – As it turns out, this problem can occur due to a server-side issue beyond your control. Before doing anything else, take some time to investigate if any underlying server issue is currently causing issues for players in your area.
- Corrupted game files – If you started to experience this problem immediately after a system interruption triggered a critical system crash, you might face this problem due to some file corruption affecting Valorant. To fix this issue, tricker an integrity check on Riot. If this doesn’t work, reinstall the game and see if the problem is fixed.
- Missing Windows feature update – If you haven’t updated your Windows build in a while, you might experience this problem due to a missing infrastructure Windows update. To fix this issue, access the Windows Update component and install every pending Windows update until you bring your system up to date.
- VGC service is disabled – As it turns out, you might experience this problem because a critical component that allows the game to connect online (the VGC service) is forcibly disabled by a system optimization suite. In this case, you can fix the issue by manually re-enabling the VGC service.
- VGC service is incorrectly configured – According to some affected users, you can expect to deal with this problem if the main VGC service is not correctly configured and programmed to remain disabled even when it’s called into action by the main game. In this case, you can fix this issue by reconfiguring the behavior of the VGC service.
- Corrupted cached data inside the Vanguard folder – As it turns out, this problem can also occur due to some corruption affecting the Vanguard cache folder. In this case, you can fix the issue by deleting the Vanguard cache folder forcing the game to re-create it from scratch.
- Conflicting game metadata – Valorant will accumulate data in a metadata folder over time. This data might inhibit the game’s ability to connect with the game server as the folder grows. Several users dealing with this problem have confirmed that they manage to fix the issue by deleting the components of the metadata folder.
- Missing Visual C++ dependencies – According to many affected users, you can expect to deal with the issue in a scenario where the game is missing an essential Visual C++ redist package that it needs to run the multiplayer component. You can fix this issue by installing every missing Visual C++ dependency from a one-click installer.
- Missing DirectX dependencies – As it turns out, you can expect to deal with this particular issue because of a missing legacy DirectX dependency that the game still uses. This dependency is present on Windows 10, but it’s entirely optional on Windows 11.
- Conflicting 3rd party service – Certain 3rd party services are known to cause this type of problem, mainly if they’re using the IPV6 protocol. To pinpoint the issue, achieve a clean boot state and see if the problem is now fixed.
Now that we went over every potential scenario that might be causing this problem, here’s a list of confirmed methods that other affected users have successfully used to fix this problem and play Valorant online:
1. Check the server status of Riot
As it turns out, this issue may arise due to a server-side fault totally out of your control. Take some time to consider whether there is a server issue at the root that is now affecting players in your area before taking any more action.
You should begin this troubleshooting approach by ensuring that Valoran’s servers are not currently down or undergoing maintenance because error code 9 is most suggestive of a widespread server issue.
Fortunately, Riot maintains a directory where you can check the status of each Valorant server to see if the error code 9 is now occurring across the board or is just affecting your computer.
Open your preferred browser and go to Riot Games’ status page if you think a server issue may be the root of your Valorant problem.
Choose your favorite language after entering, then click on Valorant from the list of Riot games.

Before selecting Continue, choose the location and language you’re connecting from while on Valorant’s status page.
Next, a list of all the issues the server is experiencing should appear. Check for any indication of a connectivity problem; if so, your only option is to switch the server from which you’re connecting.

The only workable solution is to wait for the developers to address the problem on their end if every server you try to connect to gets the same error code.
On the other hand, proceed to the next option below if the abovementioned examination did not uncover any underlying server issues.
2. Verifying the Valorant game files
This issue might be brought on by a file corruption affecting Valorant if you first saw it right after a system interruption that resulted in a critical system crash. Tricker an integrity check on Riot to resolve this problem.
To do this, launch the Riot client and click on your Profile icon in the top-right corner of the screen.
From the Settings menu, select Valorant from the menu on the left, then move over to the right-hand side menu and click on Repair.

Wait until the operation is complete, then restart your PC and launch the game once the next startup is done to see if the problem is now fixed.
3. Update Windows to the latest build
A missing infrastructure Windows update may cause this issue if you haven’t updated your Windows build in a while. Access the Windows Update component and install each pending Windows update until your system is up to date to resolve this problem.
Before attempting any of the other likely options below, install all pending updates first and see if the problem goes away on its own.
The procedures listed below should cure the problem if it results from a known defect because Microsoft has already released a hotfix for every version of Windows 11 (including the N version).
Follow these instructions to install each and every impending Windows update:
- Windows Update can be started by using the Run dialog box. Press Windows + R on your keyboard simultaneously to do this. Thus, the Run dialog box will show up.
- Next, enter the text “ms-settings:windowsupdate” in the box. The Windows Update area of the Settings app will then be displayed to you.

Access the Windows Update component Note: If you haven’t changed the UAC settings, you can receive a prompt asking for your permission to continue. Clicking Yes will indicate your agreement with this.
- Select Check for Updates from the option on the right after launching the Windows Update pane.

Checking for updates - Select Install Now to start a local installation after the update has finished downloading.
- Check to see if the problem has been fixed by restarting your computer.
If the problem is not fixed yet, move down to the following method below.
4. Force-start the VGC service
You might encounter this issue because a system optimization suite has forcibly deactivated the VGC service, a crucial component that enables the game to connect online. In this situation, manually re-enabling the VGC service will resolve the problem.
Several affected users have confirmed that the problem stopped occurring once they re-enabled the VGC service via the Services screen,
Follow the instructions below to re-enable the VGC service via the Service screen:
- To bring up the Run dialog box, press Windows key + R. Enter “services.msc” into the text field to launch the Services panel.

Access the Services screen - Click Yes to grant admin access when the UAC (User Account Control) prompts you.
- After entering the Services page, find the VGC service by scrolling down the list of currently running Services.
- Next, right-click on the VGC service and choose Enable from the context menu that just appeared.
- Once the VGC service has been enabled, reboot your PC and see if the problem is now fixed.
If you’re still experiencing the ‘Error Code Val 9‘ error, move down to the next method below.
5. Edit the VGC service
Some impacted users claim that if the primary VGC service is not properly configured and programmed to stay off even when the primary game activates, you can expect to deal with this issue. In this situation, changing the VGC service’s behavior will solve the problem.
This is a frequent occurrence if you also use third-party resource optimizers like SystemCare, Piriform, WinOptimizer, etc.
In most cases, the third-party utility changes the VGC service’s default behavior to conserve system resources. Although most programs don’t have this issue, Vanguard Riot works differently and has its main service set to Automatic.
If this situation seems to apply to you, take the steps below to visit the Services tab and change the VGS service’s default startup type in order to resolve the Valorant launch error:
- To bring up the Run dialog box, press Windows key + R. Enter “services.msc” into the text field to launch the Services panel.
Access the Services screen - Click Yes to grant admin access when the UAC (User Account Control) prompts you.
- After entering the Services page, find the VGC service by scrolling down the list of currently running Services.
- After successfully locating it, right-click on it and select Properties from the context menu that just appeared.

Access the VGS service - Select the General tab from the menu at the top of the Properties screen for the VGC service.
- After that, click Start to force the service to start if the Startup type is not already set to Automatic.

Changing the Status type of the service - After making sure the VGS service is running, launch Valorant once more using the standard procedure to determine if the issue has been resolved.
Continue to the method below in the event that the issue is still not resolved.
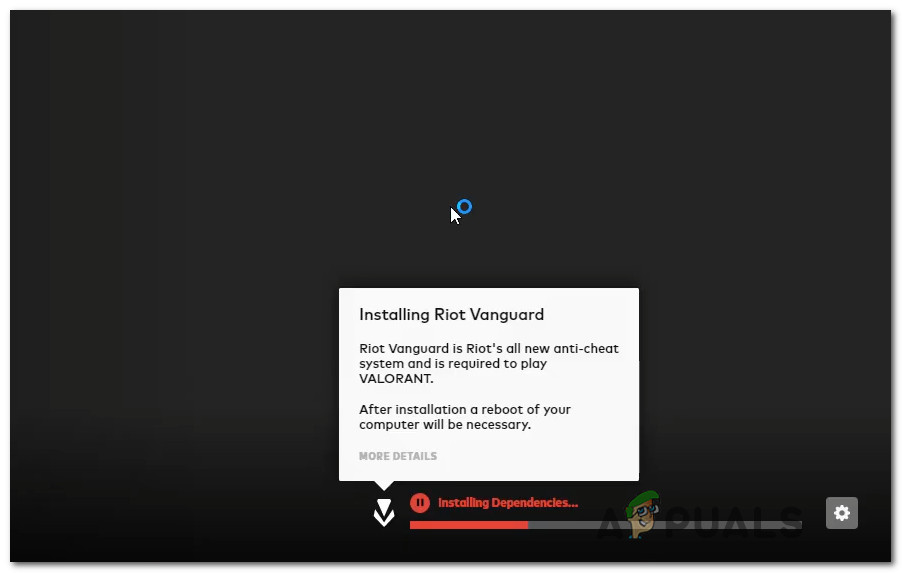
6. Delete the Riot Vanguard folder via CMD
The Vanguard Anti-Cheat engine’s inconsistency may also be connected to this problem. Reinstalling each Riot Vanguard dependent should be the next step if this situation applies to ensure that error number 9 is not the result of file corruption.
The anti-cheat engine can be uninstalled via the GUI option. However, we advise performing the task from an elevated Command Prompt to be sure you have the required permissions.
Before making Valorant reload the anti-cheat engine from scratch, use the steps listed below to temporarily deactivate it from an elevated Command Prompt:
- Make sure Valorant, its launcher, and any related background processes are shut off first.
- To launch the Run dialog box, press Windows key + R. Enter “cmd” into the text field, then press Ctrl + Shift + Enter to launch an elevated Command Prompt.

Open a CMD window - Click Yes to grant admin access when the UAC (User Account Control) window appears.
- To remove the Vanguard anti-cheat installation and its associated dependencies, enter the following commands into the elevated Command Prompt and press Enter after each one.
sc remove VGC
sc remove vgk
- Proceed to shut the elevated Command Prompts once both instructions have been successfully executed (and you have seen a success message for each Command).
- To find the Riot Vanguard folder, open File Explorer and select Program Files (on your OS system). You need to remove a few leftover files from this folder before reinstalling the anti-cheat engine.
- After you’ve found the suitable spot, use the context menu that is just displayed to select Delete when you right-click on the Riot Vanguard folder.

Deleting the Vanguard folder Note: If the system won’t let you delete the folder, it probably means that some anti-cheat engine programs are already running. To resolve this problem, launch Task Manager by pressing Ctrl + Shift + Esc, then go to the Processes tab, and turn off the Vanguard Tray notification service.
- Restart your computer after erasing the Vanguard folder, then launch Valorant once more following the conclusion of the subsequent startup.
Note: Open the launcher with administrative privileges by right-clicking on it and selecting “Run as Administrator” to make sure the installer has the required permissions. - If this occurs, Valorant will instantly recognize that the Vanguard Riot Anti-Cheat engine is missing and will download and reinstall the most recent version.
Installing Vanguard engine - After this procedure, restart your computer one last time to see if the issue is still present.
Continue to the next possible Repair below if the error still appears at Valorant’s initial starting screen.
7. Delete the metadata
The metadata folder in Valorant will fill up with information over time. As the folder expands, this information may make it more difficult for the game to connect to the game server. Several people who are experiencing this issue have reported that they were able to resolve it by deleting the metadata folder of Valiant.
This method will only be applicable if you are experiencing this issue because of corruption affecting the metadata folder of Valorant.
If you haven’t tried fixing the ‘Error Code Val 9’ error by clearing the metadata folder yet, follow the instructions below for specific instructions on how to do this:
- Press Windows key + E to open up File Explorer.
Note: This Command works on both Windows 10 and Windows 11. - Next, use the ribbon menu at the top to click on View and the Show drop-down menu, and ensure that Hidden Items are checked.

Access the Hidden items menu - Now that the hidden items are visible access the ProgramData menu and look for the Riot Games folder.
- Once you discover the Riot Games folder, right-click on it and choose Delete from the context menu that just appeared.
- After the folder has been deleted, reboot your PC and see if the ‘Error Code Val 9’ error is fixed once the next startup is complete.
8. Reinstall Valorant
If none of the methods above have proven successful in your case, you should troubleshoot against a potential corruption issue that affects the local installation.
Since there are a lot of moving parts that might ultimately cause this problem, our recommendation is to reinstall Valorant to get rid of any game corruption that might produce the issue.
Follow the steps below for specific instructions on how to do this:
- Press Windows key + R to open up a Run dialog box. Next, type ‘appwiz.cpl’ and press Ctrl + Shift + Enter to open up the Programs and Features menu with admin access.

Open up the Programs and Features menu. - At the User Account Control (UAC), click on Yes to grant admin access.
- Once inside, click Yes to grant admin access to the Programs and Features menu, select programs, and locate your Valorant installation.
- After you locate the Valorant installation, right-click on it and choose Uninstall from the context menu.
- Once the uninstallation is complete, reboot your PC and see if the ‘Error Code Val 9’ is now fixed.
9. Install the missing DirectX dependencies
As it turns out, this specific problem is caused by a missing legacy DirectX dependency that the game still depends on. Windows 10 has this reliance, but Windows 11 makes it completely optional.
Many people appear to be interested in this solution, especially those who have not yet upgraded to Windows 11. (which supports the latest DirectX version natively).
Note: The most recent version of this file is available on the Microsoft page.
However, before you install DirectX, it is advised that you delete the file D3DCompiler 43.dll from the system’s folder after making a backup copy of it. Inconsistencies in the file system caused by the DirectX dependencies will be resolved as a result.
If you don’t know how to install DirectX, you need follow these steps:
- Access the disk that Windows is installed on using File Explorer.
- Next, open the System32 folder in the Windows folder.

Accessing the System 32 folder - Next, look for the D3DCompiler43.dll file and copy and paste it somewhere else to make a backup of it.
- After doing so, select Delete from the context menu of the right-clicked file.

Delete the problematic D3D compiler - Next, open your usual browser and navigate to the Microsoft download page to access the file.
- To download the file, click the Download option while you are on the page.

Download the End User web installer - After downloading the file, double-click the program to start the installation process.

Agreeing with the EULA - Please restart your computer once the installation is finished, then check to see whether the issue still occurs when it boots up.
If you’re still dealing with the same ‘Error Code Val 9‘ when you launch Valorant, move down to the next method below.
10. Install the missing Visual C++ dependencies
Many customers who have encountered the problem claim that you should be prepared to cope with it if the game lacks a crucial Visual C++ redist package required for the multiplayer component to function. You can resolve this problem by adding all of the missing Visual C++ dependencies by using a one-click installer.
Many people claim that the faulty or missing Visual C++ Redist packages on your system may be the root of this error.
Installing all the missing Visual C++ Redist Packages is the first thing you may attempt. From the Microsoft website, you may download them.
The procedures you must take are listed below in case you are unsure of how to obtain and install the Visual C++ Redist packages:
- Launch whichever browser you choose, and go to the Microsoft download page to access the Visual C++ Redist Packages.
- Download both the x86 and x64 bit files after entering this page.

Download missing Visual Studio dependencies - Click on the downloaded files to launch the installer. If there is an Install option, select it and then follow the on-screen instructions. If not, choose Repair and let the installer swap out any unhealthy dependencies for any damaged Visual C++ versions.

Modifying the Visual++ package - After finishing, repeat the procedure for the other files.
- Open Valorant when your computer has restarted and check to see if the issue has been resolved.
If the issue persists after completing the steps above or you already have the necessary Visual C++ dependencies, consider the following possible solution below.
11. Disable unnecessary 3rd party services
Certain third-party services, especially those that employ the IPV6 protocol, are known to cause this issue. To identify the problem, do a clean boot state and check to see if the issue is resolved.
You can check if this theory is accurate by launching your machine in clean boot mode and observing whether the BSOD crash still occurs.
If not, you will need to carefully remove each component from third parties until you locate the problematic part.
If it doesn’t, you’ll have to cautiously take each component away from other people until you locate the problematic one.
If this holds true, you ought to be able to fix the issue by doing a clean boot to check for software conflicts and locate the troublesome service or process. The success of this measure was demonstrated by many of the impacted consumers. The effectiveness of this intervention was established for many of the affected Valorant players.
Note: Always remember that by achieving a clean boot state, your computer will start up without any third-party services, apps, or starting things that might be to blame for the formation of this issue.
To get this clean boot state, you must complete the following steps:
- Hold the Windows key + R key to launch the Run dialog box.
- The System Configuration window will open once you type “msconfig” into the text field and press Enter.

Accessing the Msconfig interface Note: Choose Yes when the User Account Control (UAC) asks you to provide admin access.
- Select the Services tab from the ribbon bar of the System Configuration menu. Then select Hide all Microsoft services from the list of options.

Access all the Microsoft service Note: Services This will prevent you from accidentally deactivating any Microsoft services that your operating system depends on.
- Select Open Task Manager from the drop-down menu on the Startup tab once you have taken care of all required services.
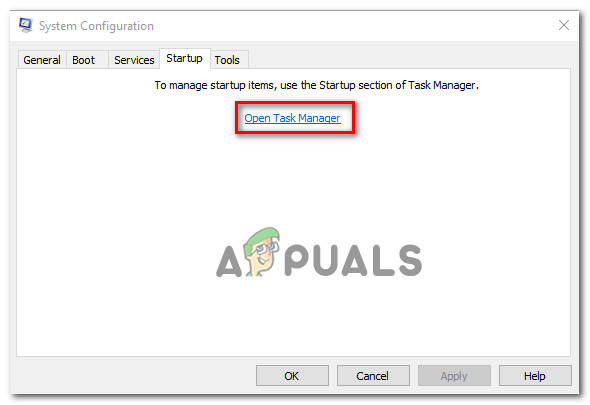
Opening Task Manager - You’ll be taken directly to Task Manager’s Startup tab after the previous action.
- Once you’ve logged in, select each external startup service separately and select the Disable option at the bottom of the page to prevent them from starting when the system restarts.

Disabling the startup programs Note: Keep doing this until there are no more startup services to start up with the system.
You are ready to polish the boot if you’ve made it this far in the article. To take advantage of this status, all you have to do now is restart your computer. - When you restart your computer, just the services that your operating system requires will run. Check to see if the issue with Valorant is still ongoing.
- Reverse engineer the preceding steps to ensure that your next computer starting is routine and that third-party services, processes, and startup items are allowed to execute, regardless of the result.
If the problem still persists after establishing a clean boot state, move on to the next solution.
The post How to Fix ‘Error Code: VAL 9’ in Valorant on PC? appeared first on Appuals.com.


0 Commentaires