The ‘ We found errors in your file history settings’ occurs when users try to reselect the locations they stored earlier. When users reselect the drive, the error message states, ‘This drive doesn’t have your most recent files’.
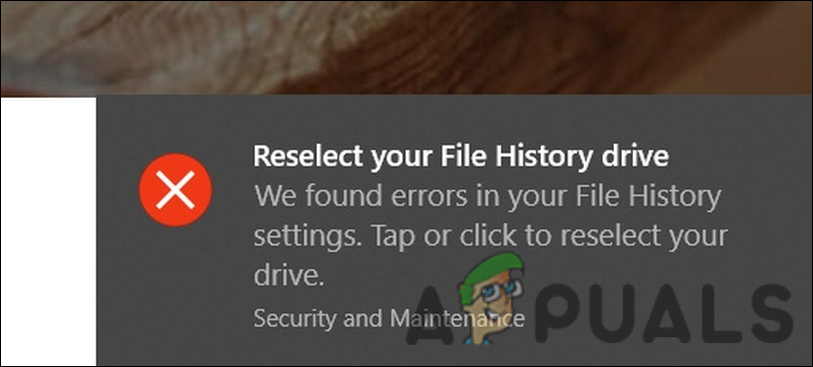
Let’s look at the troubleshooting methods that will hopefully resolve the file history issue for you.
1. Restart the File History Service
The relevant service that controls File History might not be working properly due to a temporary glitch or a corruption error. In this situation, you can simply restart the service to fix the problem.
Here is all that you need to do:
- Press Win + R to open Run.
- Type services.msc in the text field of Run and click Open.
- In the following window, locate the File History service and right-click on it.
- Choose Properties from the context menu.
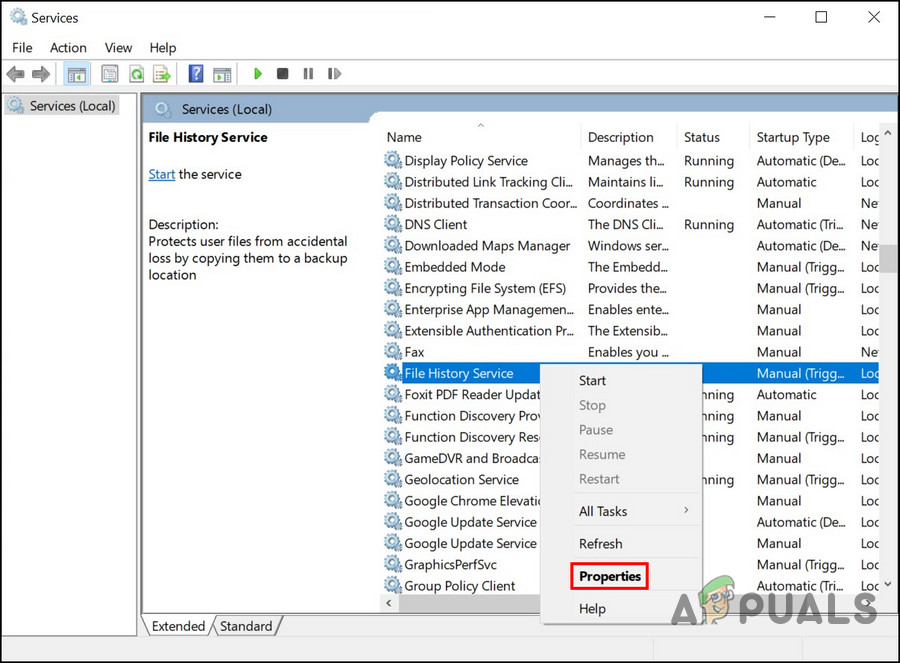
Access the File History service properties - In the Properties dialog, click on the Stop button.
- Wait for a few seconds, and then click on the Start button again.
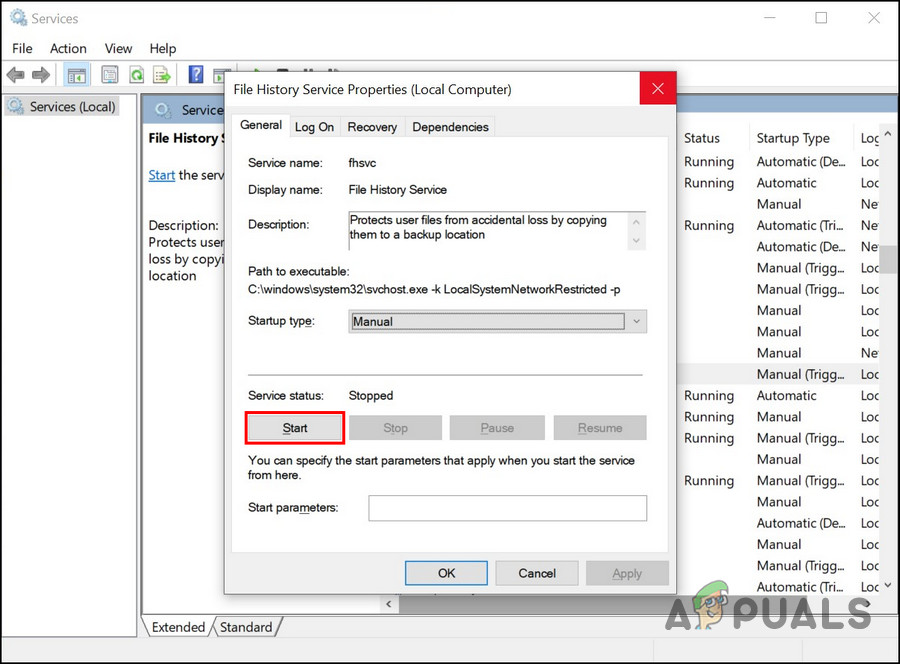
Start the File History service - Expand the dropdown for Startup type and choose Automatic.
- Click Apply > OK to save the changes.
Once the service is restarted, repeat the action that was previously causing the error and check if the file history issue appears again.
2. Repair or Reconnect the Drive
Another reason you might face the problem is that the targeted drive isn’t working properly. There can be a few reasons why this might be happening. For instance, the drive can be infected with a corruption error or might not be connected properly.
If this scenario is applicable, you can try repairing the faulty drive. If this does not work, you can try reconnecting it and then enabling the file history feature.
Here is how to proceed:
- Press Win + R to open Run.
- Type cmd in Run and click on Ctrl + Shift + Enter to launch Command Prompt with administrative privileges.
- Alternatively, you can type cmd in the search area of the taskbar and click on Run as administrator.
- Once you are in the Command Prompt window, type the command mentioned below and hit Enter to execute it. Replace drive_letter with the letter of the targeted drive.
chkdsk drive_letter: /f
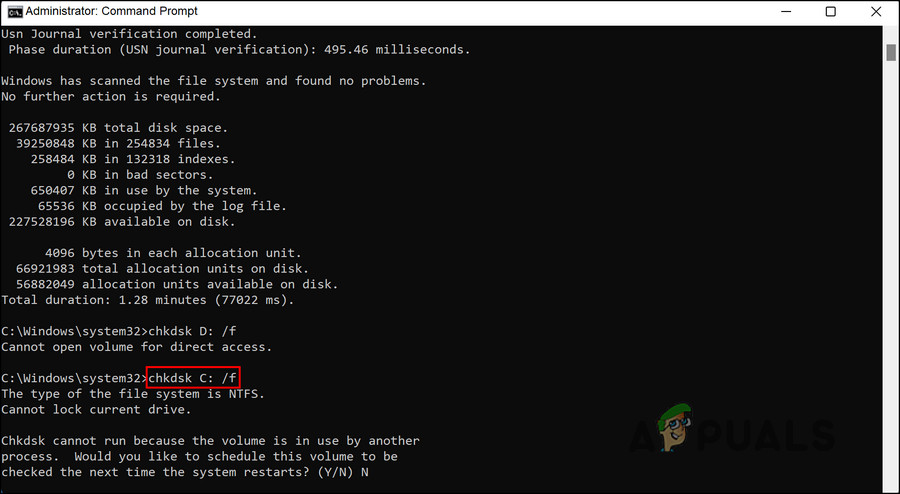
Execute the chkdsk command
Wait for the command to execute, and then restart your PC. Upon reboot, check if the problem is resolved.
If the error persists, you can try reconnecting the drive and see if that works. Follow the steps below for that:
- Launch File Explorer and click on the View option at the top.
- Navigate to Show and then checkmark the Hidden items option.
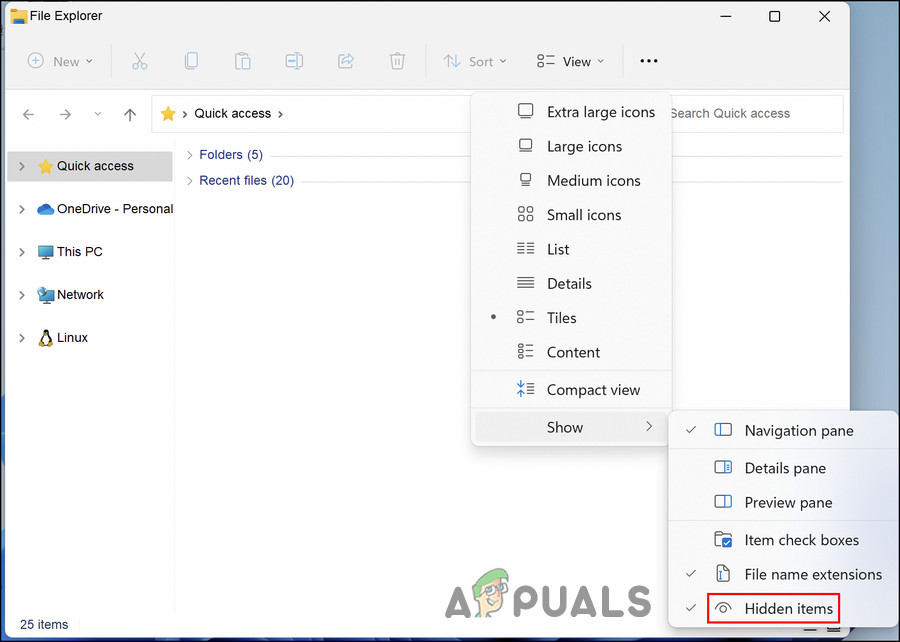
View the hidden items in the File Explorer - Now, head over to the following location in File Explorer. Delete the folder in this path.
C:\Users\[username]\AppData\Local\Microsoft\Windows\FileHistory\Configuration\Configuration
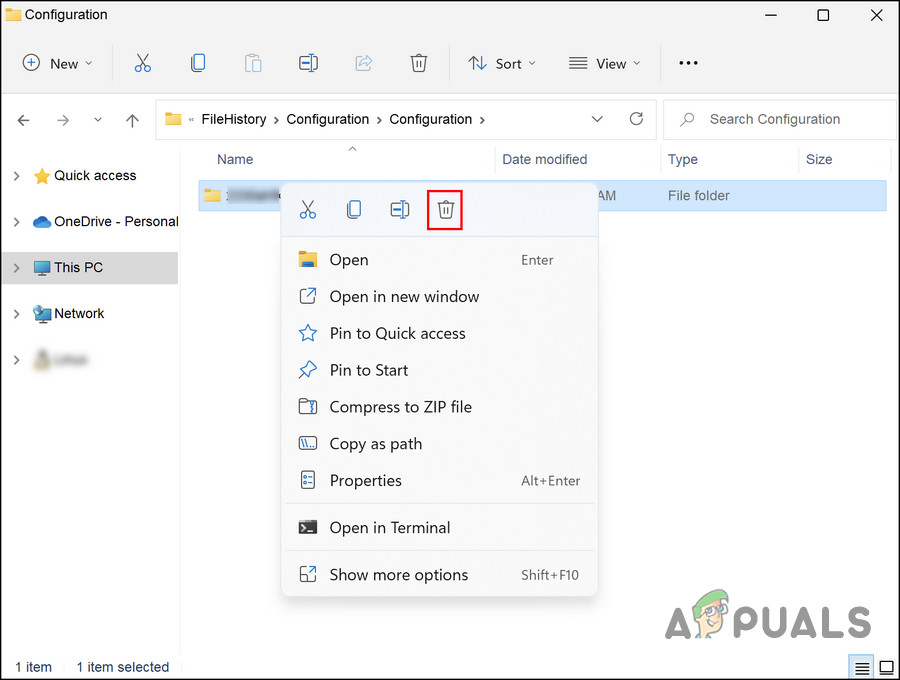
Delete the folder in File Explorer - Now, go back to File History and connect your drive again. Ensure that the File History feature is enabled.
Once done, check if you can now access the targeted location without the file history error.
3. Update Drivers
Your device drivers play an important role in allowing certain features and services to function properly. If your drive drivers are not up-to-date, you will likely experience this error..
In this case, all you need to do is update the relevant drivers. You can do this via the Device Manager.
To proceed, follow these steps:
- Type Device Manager in the search area of the taskbar and click Open.
- In the following window, look for the Disk drivers option and expand it.
- Right-click on the targeted drive’s driver and choose Update driver from the context menu.
- Next, click on Search automatically for updated drivers and wait for the system to complete its process.
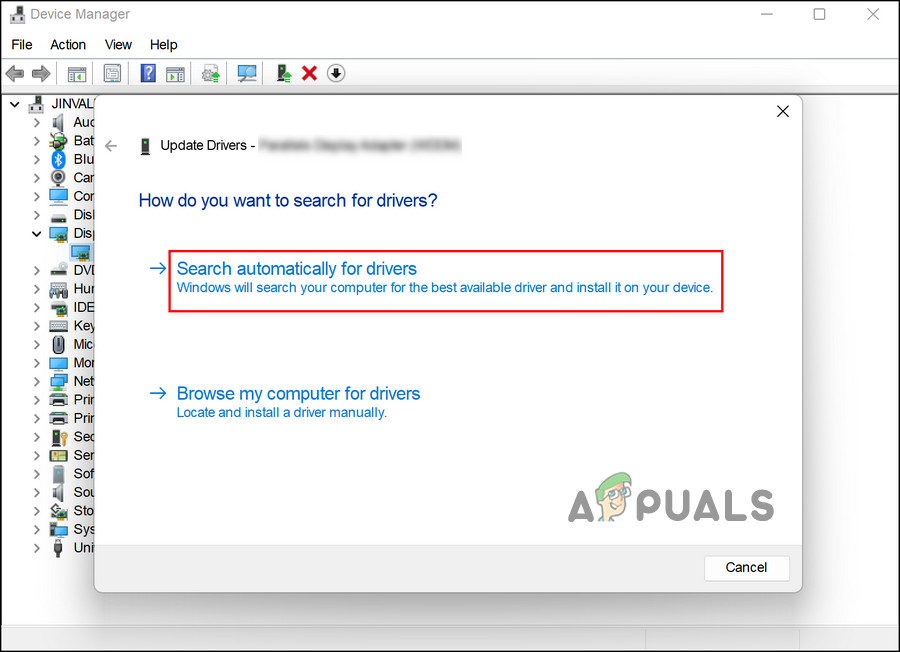
Scan the system for drivers automatically - Once done, close the Device Manager window and restart your computer.
Hopefully, you will no longer face the issue after a reboot.
4. Restart the Index Service
Another service that is connected to the File history service is the Index service. If this service is not working properly, the File history service will not be able to look for your previously stored locations, resulting in error codes like the one under consideration.
To fix this service, all you need to do is restart it. Here is how:
- Press Win + R to open Run.
- Type services.msc in the text field of Run and click Open.
- In the following window, locate the Windows Search service and double-click on it. This will launch the Properties dialog.
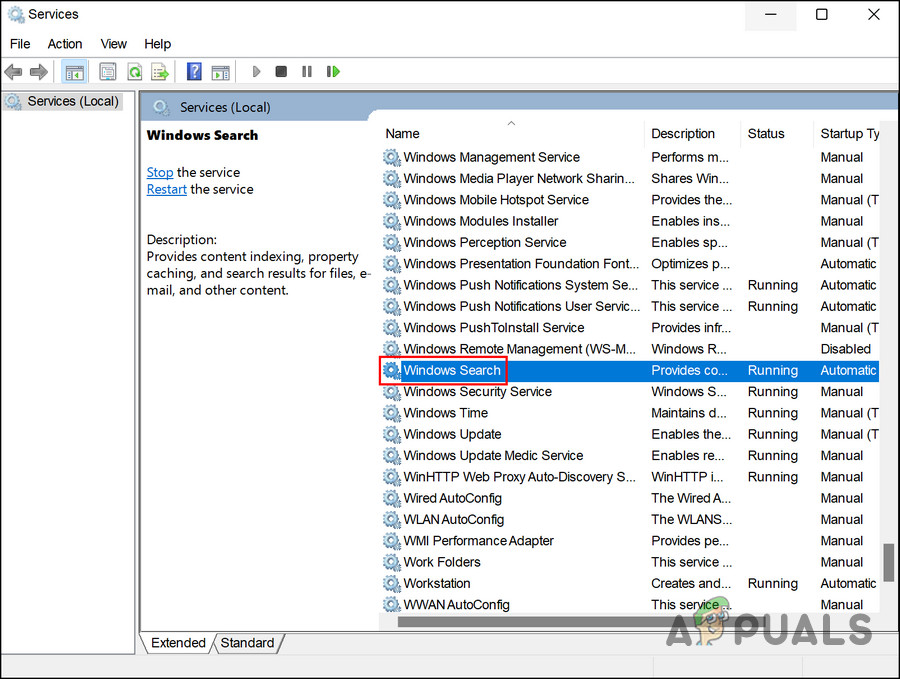
Access the Windows Search service - In the dialog, click on the Stop button, wait for a few minutes and then click Start.
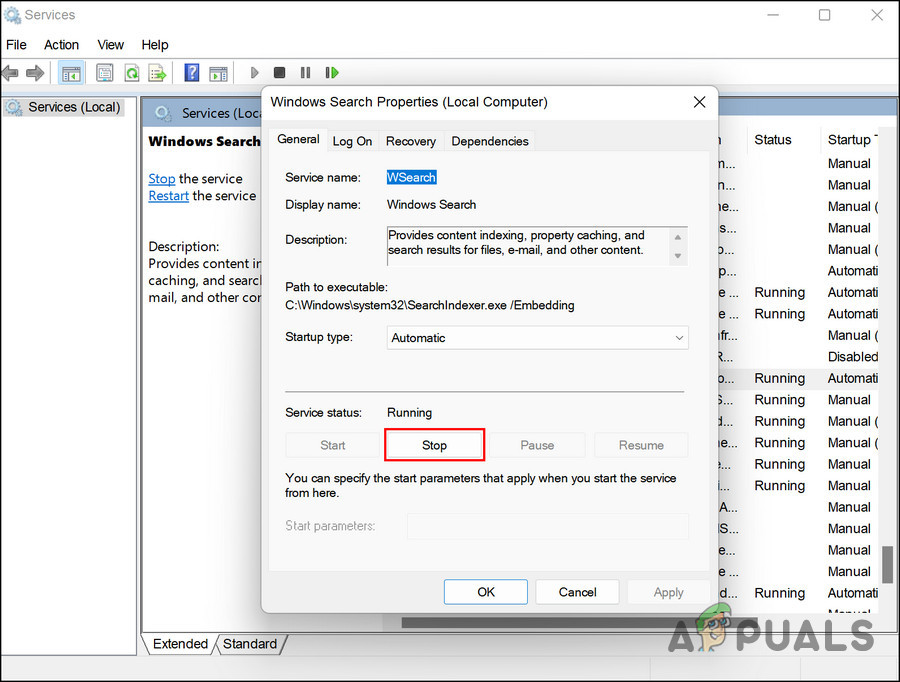
Restart the service - Now, expand the dropdown for Startup type and choose Automatic.
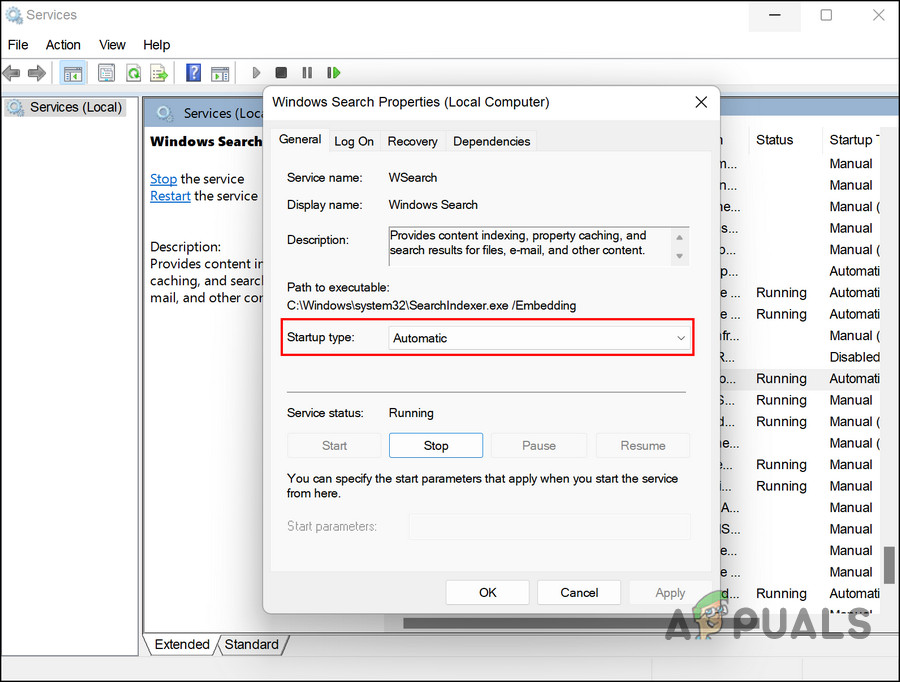
Change the startup type to Automatic - To save the changes, click on Apply and then hit OK.
In case the file history error persists even after following all the methods we have described above, we recommend that you reach out to the official Microsoft support team and report the issue to them. Hopefully, they will be able to come out with a more relevant fix after examining the exact cause of the problem in your case.
The post Fix: ‘We Founds Errors in Your File History Settings’ Error in Windows appeared first on Appuals.com.


0 Commentaires