Windows 11 has become even more efficient with its update schedule than previous iterations of the OS have been. However, the OS is still new, and all software is prone to the occasional bug or glitch. In the event that a recent Windows 11 update is causing issues with your PC, it’s always helpful to knoe exactly how to rid yourself of the little blighter. In that spirit, here’s how to uninstall an update on Windows 11.
Before we start
Before we get into the actual guide, it would be pertinent to mention that there are two different types of updates for Windows 11; builds and cumulative updates. Builds are the big boys; the major updates that furnish your PC with everything from appearance alterations to shiny new features. These are essentially new versions of the Windows 11 OS. Cumulative updates, on the other hand, are smaller updates delivered to patch any vulnerabilities and patches in the Windows 11 OS. Luckily, you can remove both of these types of updates from your system.
Related: How to downgrade your Windows 11 PC to Windows 10
How uninstall a Windows 11 update
Now that we’ve covered the basics, we can proceed with the guide. This is a really easy process and it’s quite quick to perform.
How to install a cumulative update on Windows 11

Step 1: Settings
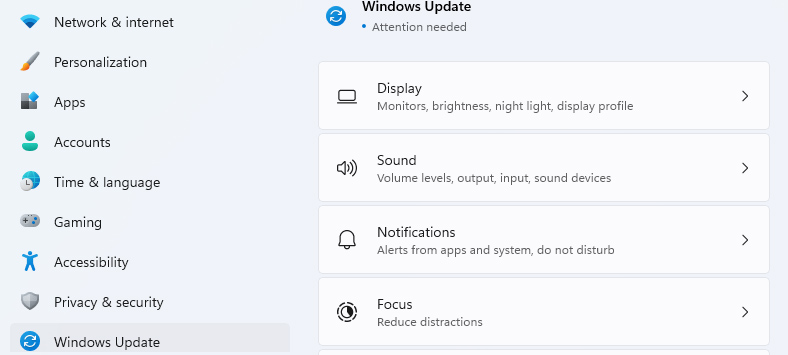
First, you’ll want to head into the Settings app on your PC. You can do this either by hitting the Windows button + i, or by heading into the Start Menu and hitting Settings.
Step 2: Windows update
Next, you’ll want to scroll down to the bottom of your Settings interface where you see Windows Update. Click on this option.
Step 3: Update history
Clicking on Windows Update will reveal additional options. The next one you want to click on is Update history. Scrolling to the bottom of the Update history panel will get you to the Uninstall updates button. Click it.
Step 4: Uninstall
Now, you’ll see a list of updates that you can uninstall. Simply select an update by clicking on it, and then hitting the Uninstall button at the top of the interface. Windows 11 will ask you to confirm your selection.
How to uninstall builds on Windows 11

Step 1: Settings
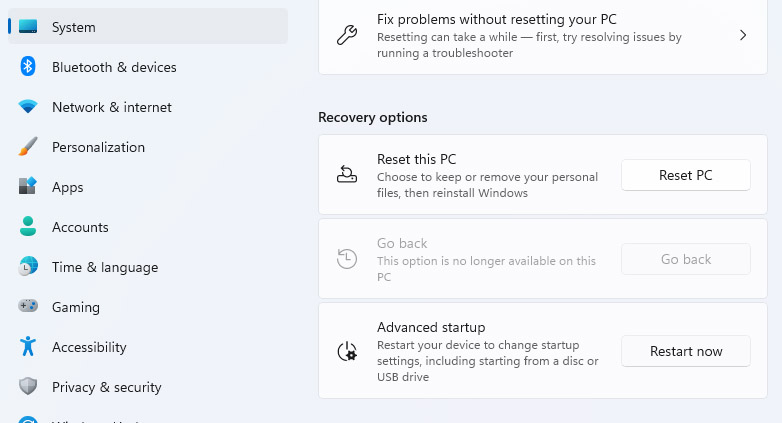
You’ll need to had back into Settings for this. Once there, click on System, and then head to Recovery.
Step 2: Recovery
In the Recovery panel, scroll down to Advanced startup and click Restart now. It’s always best to save any work you have in progress before you restart your PC.
Step 3: Restart
When your PC reboots, you’ll see Choose an Option on the screen. From here, you’ll want to head to Troubleshoot, and then Advanced options, and, lastly, Uninstall updates. Here, you’ll need to click on Uninstall latest feature update. Now, simply hit Uninstall feature update and the most recently installed Windows 11 build will be removed from your PC.
Before we go
Before we head into the next exciting article, there’s something you need to know about Windows 11 builds. You can only uninstall builds that have been installed in the last 10 days. If you wait longer than 10 days, you’ll need to reinstall a fresh copy of Windows 11; you won’t be able to roll back the build. You could also initiate a full system backup.
Thank you for being a Ghacks reader. The post How to uninstall a Windows 11 update appeared first on gHacks Technology News.


0 Commentaires