When you connect a drive to your Windows computer, you would normally expect it to appear in the File Explorer window where you can access the drive and store or retrieve your files. In some cases, however, upon trying to access the drive using the Windows Explorer window, users get the “A device which does not exist was specified” error message which prevents them from accessing the drive. Though the drive appears in the Windows Explorer window, there is no additional data shown under the drive which is something you would normally expect. That is, the size of the drive and the free space information is not given.

As it turns out, upon opening the Disk Management tool in Windows, in some cases, you might notice that the drive letter is not actually correct compared to what’s shown in the Windows Explorer window. If this scenario is applicable, you can work around the issue by changing the letters and then restarting your computer. However, that may not always be the case and in some cases, the issue can be related to the drive permissions in which case you will have to check them and make sure that you have full ownership over the drive. To understand the error message in question better, let us have a look at the possible causes of the issue before jumping into the different solutions that can help you resolve the issue.
- Insufficient Drive Permissions — As it turns out, in some cases, the issue may arise due to the drive permissions. This happens when your user account does not have full permissions over the drive and thus it is inaccessible which is reported in the error message as well. In such a case, you will simply have to give your account full ownership over the drive and everything should be fine.
- Incorrect Drive Letter — In some scenarios, the error message may be triggered due to the drive letter assigned to the drive by the operating system. This happens when the drive letter does not match that in the Disk Management utility and thus the error message is shown. In such a scenario, you will simply have to change the drive letter using the Disk Management utility and then restart your system.
- Faulty USB Port — More often than not, the problem in question can be due to the USB port that you have connected the drive into. If the port that you are using is faulty, the drive won’t be able to operate properly and hence, you are shown an error message. In such a case, you will have to change the ports and see if that helps.
- Outdated BIOS and Chipset Drivers — As it turns out, the error message may also be caused by outdated BIOS and chipset drivers of your motherboard. To resolve this, you will have to download the latest drivers available from your manufacturer and then install them.
- Motherboard Header — If you are using an internal hard drive, it is possible that the issue is due to a broken or faulty motherboard header. In such a case, you will have to use a different SATA header and see if that resolves the issue.
Now that we have gone through the possible causes of the error message in question, without further ado, let us get into the various solutions that you can implement to resolve the issue and access your drive.
Change USB Port
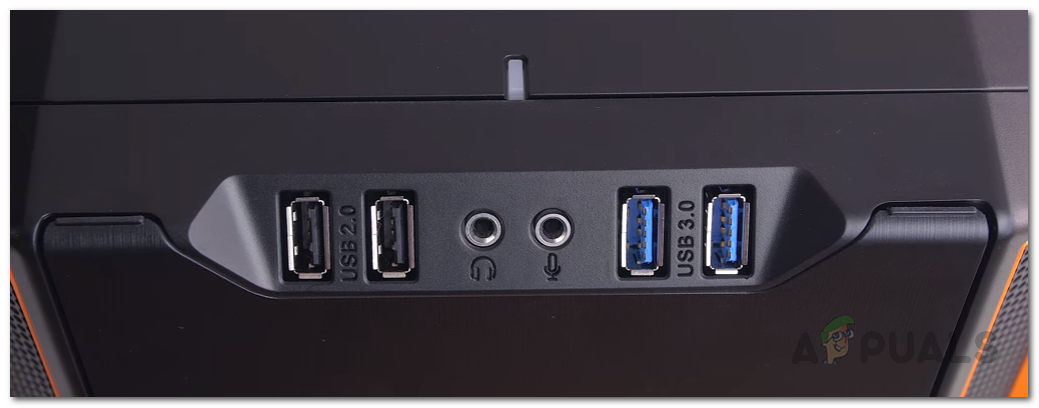
As it turns out, the first thing that you should do when you face the error message in question is to change the USB port that the drive is connected into. If you are using an internal drive, then this isn’t for you and you should move onto the next method down below. More often than not, a faulty USB port can cause the issue that you are facing and a simple switch of the USB port fixes the issue. If you have plugged the drive into a USB 2.0 port, try connecting it into a USB 3.0 port and vice versa to see if that resolves the issue.
Change Drive Permissions
As we have mentioned above, another cause of the problem could be the drive permissions. This happens when your user account does not have sufficient permissions to access the drive and as a result, you are shown the drive is inaccessible error message. In such a case, you will simply have to change the permissions of the drive via the Properties window and that should resolve the issue. To do this, follow the instructions given down below:
- First of all, open up the Windows Explorer window.
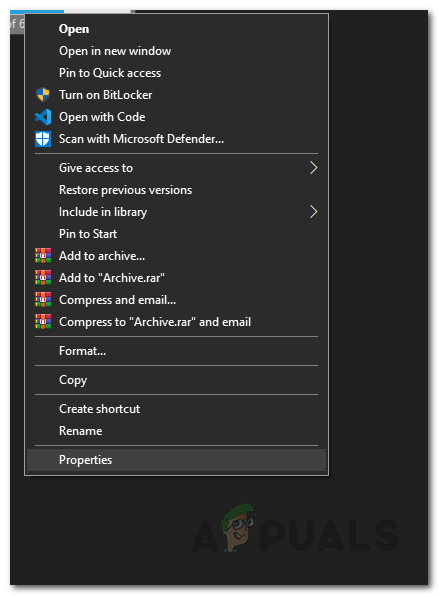
- Then, right-click on your drive and choose the Properties option from the drop-down menu.
Opening Drive Properties - On the Properties window, switch to the Security tab.

Editing Drive Permissions - There, click on the Edit button to change the permissions.
- Choose your user account and under Permissions, make sure the Full Control checkbox is ticked.
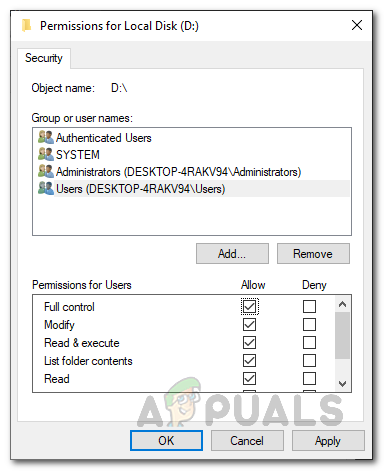
Changing Drive Permissions - Once you have done that, click on the Apply button and then hit OK.
- After doing that, open up the drive again to see if the issue persists.
Uninstall Device via Disk Management
As it turns out, in some cases, the issue can be resolved by a simple restart of the device. This can be done by first uninstalling the device via Disk Management. Once you do that, Windows will be forced to install the required drivers for the drive again when you plug it again. That has reportedly fixed the issue for some users and might do the same for you. To do this, follow the instructions given down below:
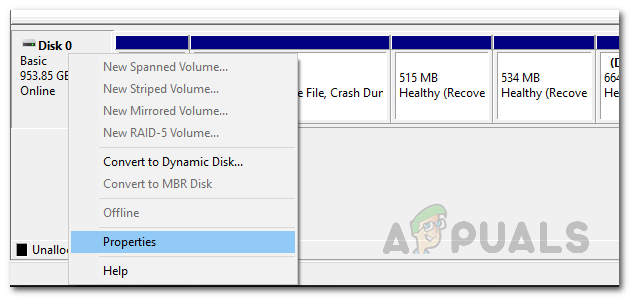
- First of all, open up the Start Menu, search for Disk Management and open it up.
- Then, on the bottom tab, locate your disk and right-click on it. From the drop-down menu, choose Properties.
Opening Drive Properties in Disk Management - On the Properties window, switch to the Drivers tab.
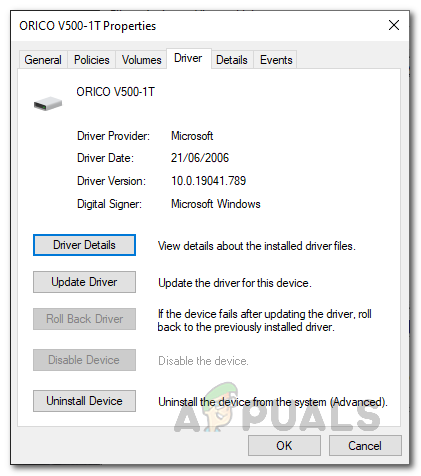
Drive Driver Details - There, click on the Uninstall device button and wait for it to finish.
- Once you have done that, go ahead and remove your drive from the computer.
- Then, connect it again and open up Windows Explorer.
- Try opening up the drive to see if the issue persists.
Change Drive Letter
The error message in question can be triggered by an incorrect drive letter in some cases. When you plug in a drive to your computer, the operating system assigns it a drive letter that is used to access the drive and the files inside it. If the drive letter is incorrect, you will be unable to access it which is why the error message is shown. This can be easily resolved by changing the drive letter via the Disk Management tool. To do this, follow the instructions given down below:
- First of all, open up the Start Menu and search for Disk Management. Open it up.
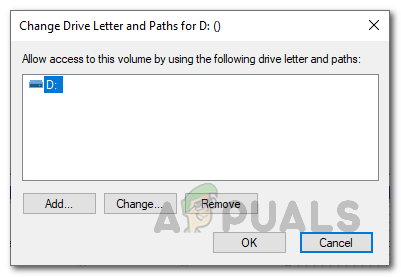
- Once the Disk Management window is open, right-click on your drive’s volume and choose the Change Drive Letter and Paths option.

Opening Change Drive Letter and Paths Window - On the window that appears, click the Change button.
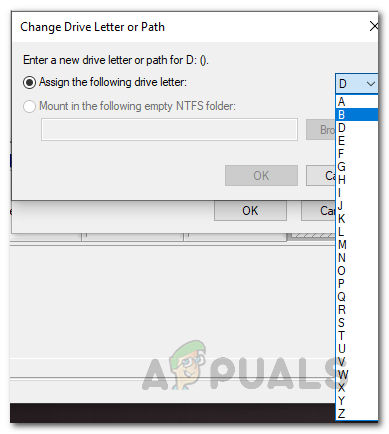
Changing Drive Letter - Choose an unused drive letter from the drop-down menu and then click OK.
Assigning a New Letter to the Drive - Once you have done that, right-click on the volume again and choose the Mark Partition as Active option.
- After doing that, go ahead and restart your computer.
- Once your PC boots up, go ahead and open up the drive via Windows Explorer to see if the error message is still there.
Update BIOS and Chipset Drivers
Chipset drivers are also known as motherboard drivers are really important. These drivers are responsible for the components that you plug into your motherboard so it is really important to make sure that they are up to date. In case you are outdated, you can potentially face issues such as this one. If this case is applicable, you will have to download the latest BIOS and chipset drivers available for your motherboard from your manufacturer and install them.
The process is not complicated and you will usually find a tutorial on your manufacturer’s website. There are also utilities available that automatically update the drivers on your motherboard so you can make use of them as well. Therefore, go ahead and search for your motherboard’s drivers by typing in the model that you are using. Follow the tutorial given on the website to install them and then see if the problem persists.
Check Motherboard Headers
Finally, if none of the above solutions worked out for you and you are using an internal hard disk that connects to your motherboard SATA headers, it is possible that one of the headers may be faulty which is why you are not able to access the drive. In such a case, you will have to open up your PC and then change the headers. It is recommended that you take it to a technician if you are not well versed with motherboards because it can get complex.
The post How to Fix “A device which does not exist was specified”? appeared first on Appuals.com.


0 Commentaires