A Text Box or Text Field is an object where users type text and add it to their document. It can be used for decorating text or drawing attention to specific text. The option cannot be found easily in Google Docs by any new user. That is because it is located under the drawing tool in Google Docs. In this article, you will learn about how to insert a text box and use the different options for it.

Inserting Text Box in Google Docs
You can insert the text box in Google Docs through the Drawing feature. The drawing option can be found under the Insert menu in the menu bar. There are also other shapes and options related to the text box. You can drag and move the text box anywhere in the document. The text box can also be filled with color and border size can be changed accordingly. Follow the below steps to use the text box in Google Docs:
- Open your browser and go to the Google Docs site. Login to your Google account if you are not already logged in yet.
- Click on a Black option or click on any of the existing documents where you want to add a text box.
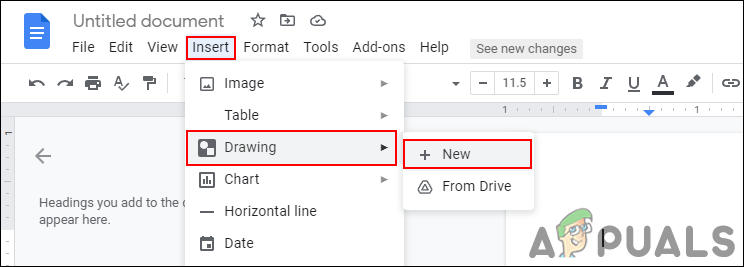
- Now click on the Insert menu in the menu bar and choose the Drawing > New option.

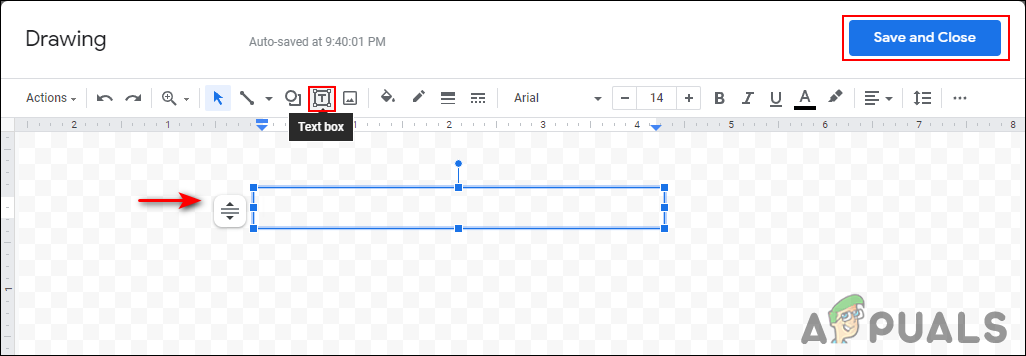
Inserting new drawing - Here you can click on the Text Box icon and start drawing a text box. Once you are done, click on the Save and Close button to add it to your document.

Adding Text box - You can drag and move it around the document and also double-click on it to open the settings again.
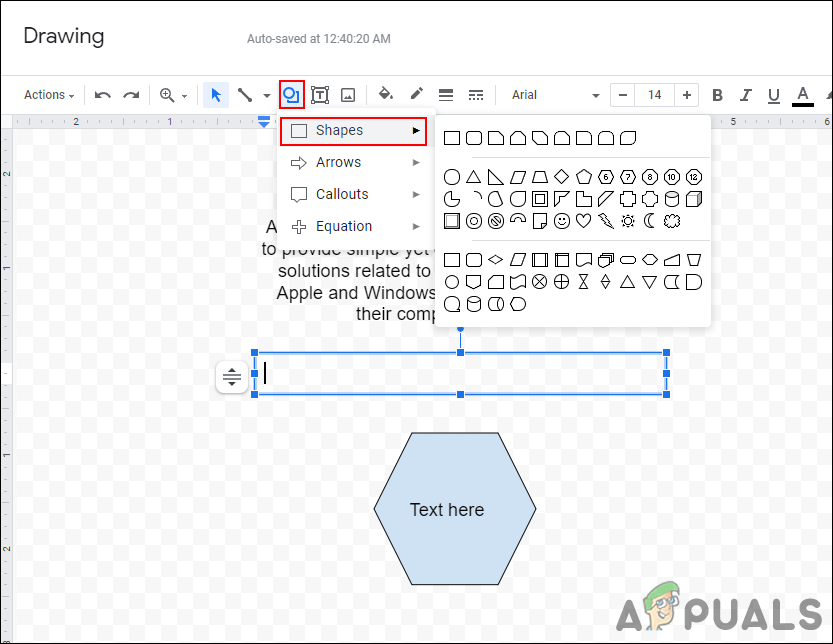
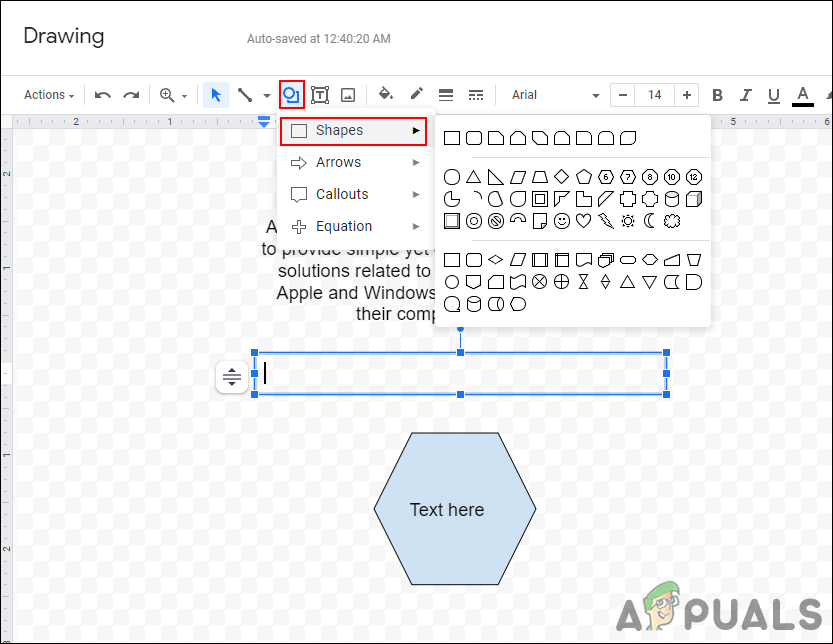
- In the settings, there are also other shapes available that you can use and add text to it.

Using shapes to insert text - You can also change the border size of the box. It also includes the option to format your text here and change the color of text, border, or the inside of the box.

Changing border size and other options
If you are looking for something pre-made other than shapes, then you can try using the Tables through the Insert menu in the menu bar. It contains all kinds of tables where you can insert text and add to your document.
The post How to Insert Text Box in Google Docs Easily? appeared first on Appuals.com.


0 Commentaires