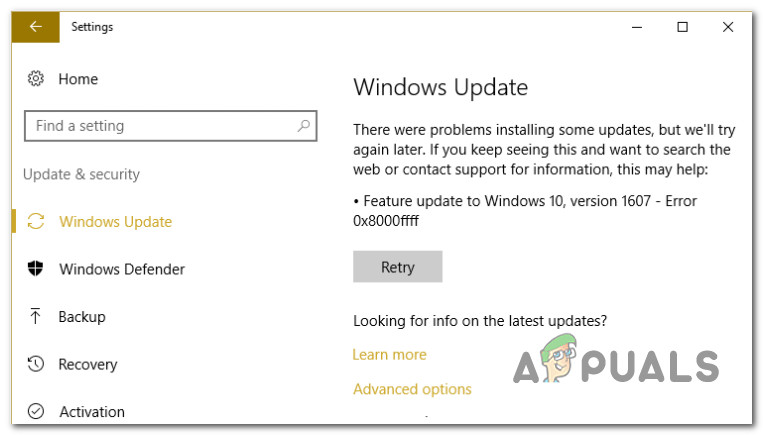
The 0x8000FFFF error is quite a popular error code nowadays on Windows systems. It typically occurs after a pending Windows update fails to install via Windows Update. This error is confirmed to occur on both Windows 10 and Windows 11.
After looking into this issue and analyzing various user reports, we realized there are actually multiple plausible scenarios that might ultimately cause this error code. Here’s a list of culprits that you should be aware of:
- Generic WU glitch – One of the first things that you should troubleshoot against is a potential glitch affecting the WU component. If you’re lucky enough, you might be able to fix the problem automatically by running the Windows Update troubleshooter and applying the recommended fix.
- Corrupted WU dependencies – As it turns out, you can expect to deal with this error code in situations where some dependencies used by Windows Update are affected by corruption. In this kind of scenario, deploying SFC and DISM scans in quick succession should take care of the issue in most cases.
- Bad update – If you only experience this issue with a certain update, you might consider the fact that it’s a bad one or it’s somehow conflicting with your fleet of hardware drivers. Until Microsoft resolves this problem, you can use an insider tool to hide the inconsistent update.
- Conflicting data inside the Hosts file – According to some affected users, another scenario that might ultimately produce this error is conflicting data held inside the Windows Hosts file. Other users dealing with the same problem have confirmed that the problem was fixed after they’ve successfully cleared the Windows Hosts file.
- The issue with the local WU component – In some scenarios, you might also expect to deal with the 0x8000FFFF error due to some kind of corruption affecting Windows Update files and dependencies. If you want to avoid troubleshooting the corruption issue, you should be able to update your OS build via the Media Creation tool.
- 3rd party interference – If you’re using a 3rd party Antivirus suite, you should also take the time to ensure that it’s not interfering with the installation of pending Windows Update. This is typically an issue with 3rd party AV suites running with outdated virus signatures. So to troubleshoot this issue, start by updating your AV virus signature to the latest version and proceed with disabling or uninstalling it completely if the first method fails.
- Corrupted SoftwareDistribution and Catroot2 folders – One of the lesser-known reasons why you should expect this issue to occur selectively is some kind of file corruption currently stored inside the SoftwareDistribution and Catroo2 folders. In this case, you can fix the issue by renaming these two folders in order to force your OS to create new equivalents.
- Broken WU interface – In certain scenarios, you might be able to get around this issue by forcing the WU agent to start updating your components via a Powershell command. This should be effective in situations where the GUI interface of Windows Update is unreliable.
- Certain WU dependencies are disabled – If you’re using a system resource optimizer program, it’s possible that it ended up modifying the behavior of certain WU dependencies in order to free up available resources. You can resolve this by reconfiguring the WU-related services & dependencies.
- Conflicting WU policy – As it turns out, there’s also a conflicting policy (enforced via the Local Group Policy Editor) named “Turn off auto-restart for updates during active hours” that might end up causing this error. To fix this problem, you’ll simply need to toggle this policy off.
- Underlying system file corruption – In more serious circumstances, the WU component will be broken without repair and none of the potential solutions mentioned above will work. In this case, the only solutions are to either bypass the local WU component entirely by using the Microsoft Update Catalog or by performing a repair install or clean install.
Now that we went over every potential cause of the 0x8000FFFF error, let’s go over all of the fixes that other affected users have successfully used to get to the bottom of the issue.
Run the Windows Update Troubleshooter
Before we move to more advanced repair strategies capable of resolving the 0x8000FFFF, you should start by verifying if your Windows installation is capable of resolving the issue automatically.
Both Windows 11 and Windows 10 include a lot of built-in repair strategies capable of resolving the majority of failures to install a pending Windows update.
Some users dealing with the same problem have managed to resolve the problem and install the pending update by running the Windows Update troubleshooter and applying the recommended fix.
Note: The Windows Update Troubleshooter contains hundreds of automated repair strategies that will be applied automatically if some type of inconsistency is found. The utility will automatically recommend a viable fix that you can apply with a simple click.
Follow the instructions below to deploy the Windows Update troubleshooter to resolve the 0x8000FFFF error code on Windows 11 and Windows 10:
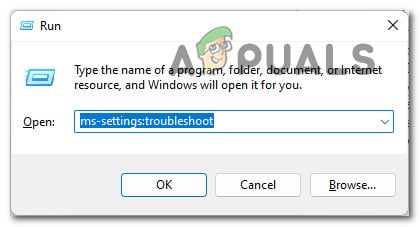
- Press Windows key + R to open up a Run dialog box. Next, inside the text box, type “ms-settings-troubleshoot” and press Enter to open up the Troubleshooting tab of the Settings app.
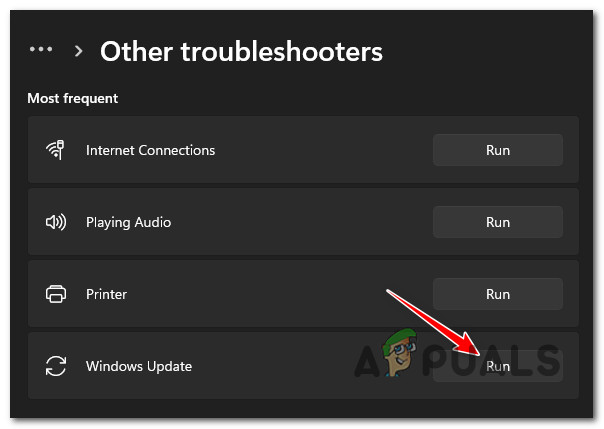
Access the Troubleshooting menu - Inside the Troubleshooting tab, go to the right section of the Settings screen then move down to the Get up and running section and click on Windows Update.
- Next, click on Run the troubleshooter from the newly appeared context menu.
Open up the Windows Update troubleshooter - At this point, the troubleshooter will get to work and automatically begin to scan your system of any inconsistencies. Wait until the initial scan is complete.
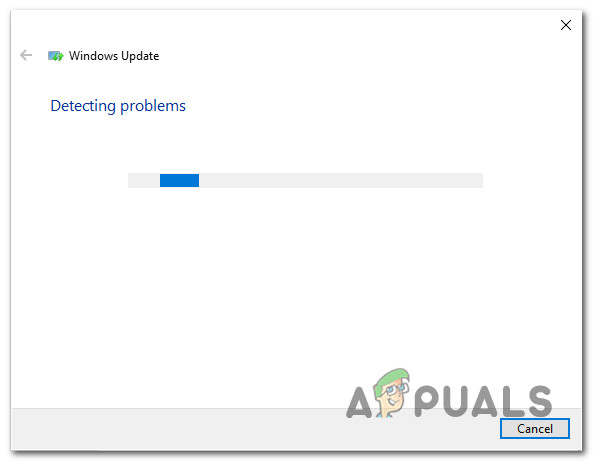
Detect problems with Windows Update Note: This function will determine whether any of the repair strategies included with it are a match for your particular Windows version.
- After some time, you will be presented with a new window in which you can click on Apply this fix to apply the recommended fix.
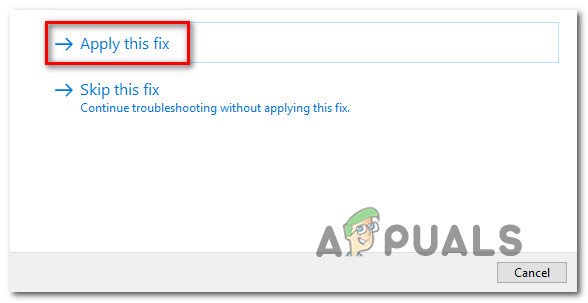
Applying the recommended fix Note: You might need to follow a series of additional instructions to enforce the recommended fix, depending on which one gets recommended.
Once you run this troubleshooter and apply the recommended fix, restart your computer and see if the error code is resolved.
In case you’re still dealing with the 0x8000ffff when attempting to install a pending update, move down to the next potential fix below.
Deploy SFC and DISM Scans
If refreshing running the Windows Update troubleshooter didn’t fix the problem in your case, you should also consider that some kind of system file corruption is causing the 0x8000ffff error.
To cover this potential scenario, start by running a couple of scans with two built-in utilities – System File Checker (SFC) and Deployment Image Servicing and Management(DISM).
These two tools share some similarities, but we recommend that you run both scans in quick succession in order to improve your chance of fixing the corrupted system files.
Start with a simple SFC scan since it’s easier to perform.
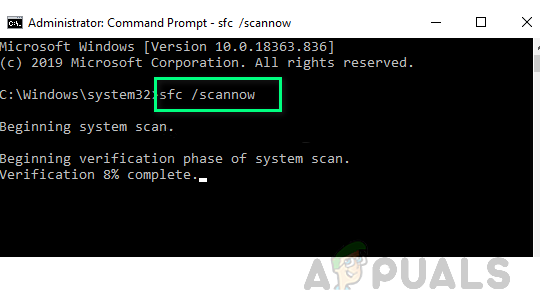
Note: This tool will not require you to be actively connected to the internet.
It’s very important to remember that once you initiate this procedure it’s not wise to close the CMD window even if the utility looks like it froze. Interrupting the operation might cause logical errors on your HDD/SSD.
After the SFC scan is finished, reboot your computer and see if the issue is now resolved by attempting to install the pending update once again.
If the problem is still ongoing, proceed by deploying a DISM scan and following the on-screen prompts to complete the operation.
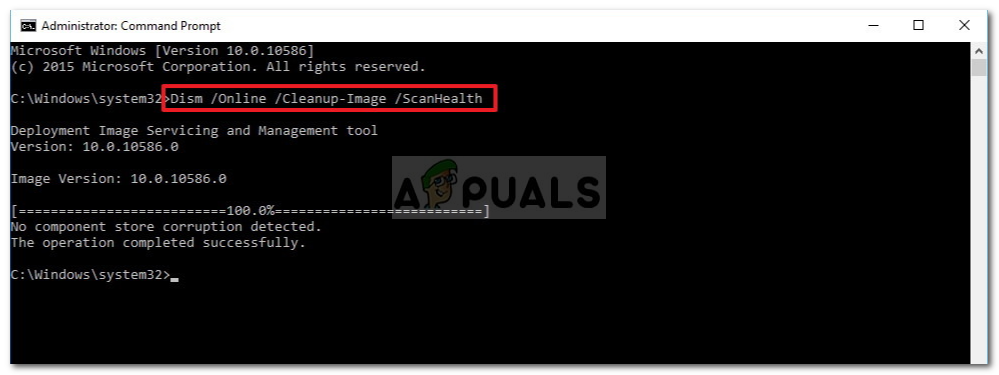
Note: DISM uses a sub-component of Windows Update to download healthy equivalents to replace corrupted system files. Make sure that you have reliable Internet before initiating this operation.
At the end of this procedure, restart your computer once again and see if the 0x8000ffff error is now fixed.
If the problem is still ongoing, move down to the final method of installing the feature update and avoiding the error.
Hide the inconsistent update
In some cases, the error code 0x8000ffff is indicative of a bad Windows update that is conflicting with some of your current drivers. Typically what you’d want to do in this case is to take a precautionary approach and hide the problematic update until Microsoft releases a hotfix.
Other users dealing with the same issue confirmed that they managed to fix this error code by hiding the update that was triggering the error code.
Note: This procedure is not permanent since you can always download the driver manually (from the manufacturer’s website) if you ever decide to give it another go. Or, you can simply revert the hiding using the Microsoft Show or Hide troubleshooter.
Here’s what you need to do to hide an inconsistent update:
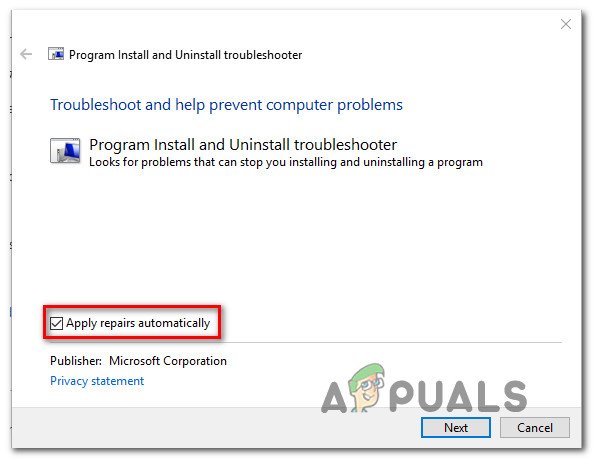
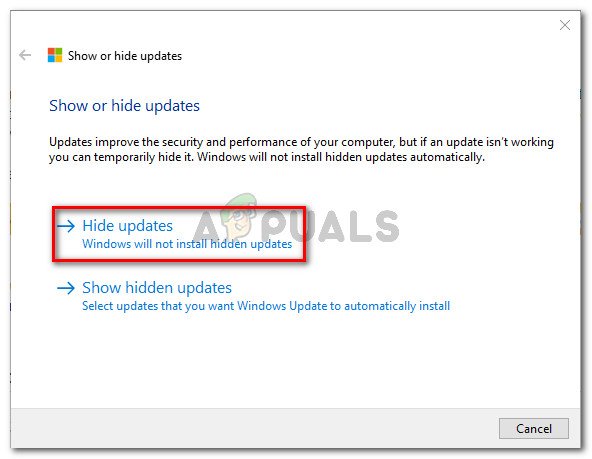
- Open your default browser and download & install the Microsoft Show or Hide troubleshooter package from the official download link.
- After the download is complete, double-click on it to open it and start by clicking on the Advanced button. Then, check the box associated with Apply Repairs Automatically.
Applying the repairs automatically - From the next screen, click on Next to advance to the next menu. Wait until the utility finishes to scan for updates, then click on Hide Updates.
Hiding the updates using the Show or Hide updates - Once you select the update you wish to hide, click on Next to advance to the following screen.
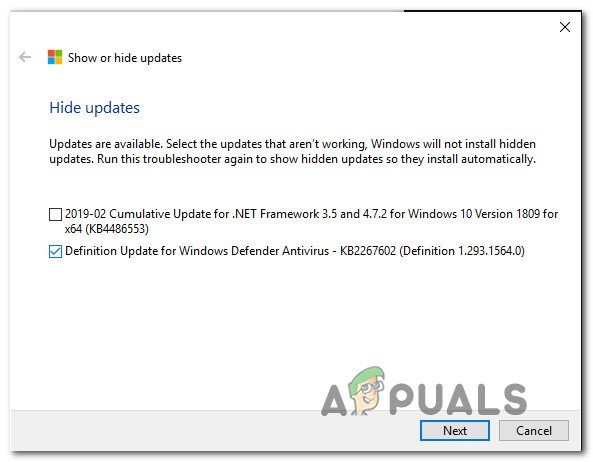
Hide the Updates - At this point, all you need to do is wait until the operation is complete, then reboot your PC and see if the problem is resolved.
In case you’re still dealing with the same 0x8000ffff error, move down to the next potential fix below.
Clear the Host file
As it turns out, you might also encounter the 0x8000ffff error due to some incorrect or conflicting entries inside the Windows Hosts file. This potential cause was confirmed by a lot of users dealing with this problem on Windows 11.
In most cases, you can fix this problem by navigating to the location where your Windows installation holds the RSI server entries and removing the potentially problematic entries.
Note: Additionally, you can also reset the host files to their default values.
Here’s what to do to clear the Windows Hosts file of potentially conflicting files:
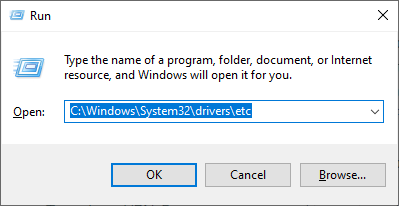
- Start by pressing Windows key + R to open up a Run dialog box.
- Once you’re inside the text box, type ‘C:\Windows\System32\drivers\etc‘ and press Enter to open up the default location of the hosts’ file.
Access the Host file location - Inside the ETC folder, start by going to the View tab at the top and ensure that the box associated with File Name Extensions is enabled.
- Right-click on the hosts file and click Rename from the newly appeared context menu.
- Inside the renaming context menu, add the ‘.old‘ extension at the end of the name of the file and press Enter to save the changes.
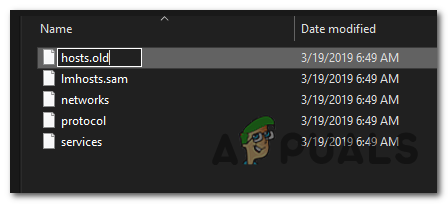
Renaming the hosts file Note: This modification will force your OS to disregard that file and create a new instance that is not hounded by the same broken entries.
- Reboot your PC before attempting to install the previously failing update once again.
In case you’re still dealing with the same 0x8000ffff error, move down to the next potential fix below.
Update via the Media Creation tool
If the local Windows Update component is broken and you don’t have the time to spend troubleshoot for the exact cause, one way to circumvent the 0x8000ffff error is to essentially use the updating functionality of the Media Creation tool to handle the pending updates.
This procedure might be a little tedious, but it will help you get the job done in case all the fixes above didn’t work.
Follow the instructions below for specific instructions of performing a system-wide update using the Media Creation Tool:
- Open up your web browser and visit one of the Media Creation tool download pages, depending on if you’re using Windows 10 or Windows 11:
Windows 10
Windows 11
- Next, from the dedicated page, click on the Download Now (under Create Windows 11 Installation Media) and wait until the executable is downloaded locally.
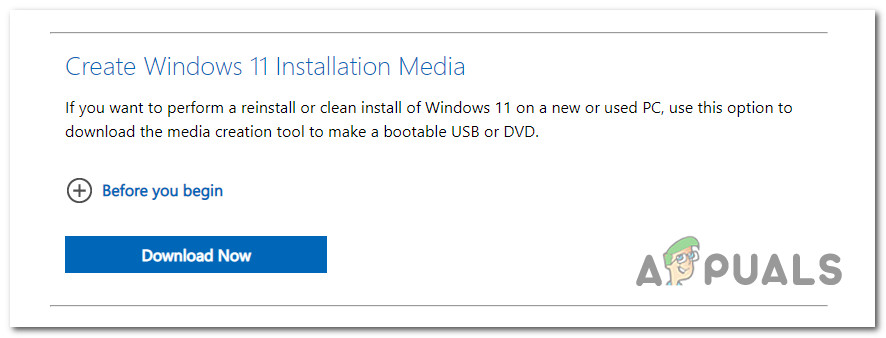
Downloading the compatible installation media - Once the executable is downloaded, open it with admin rights and follow the on-screen instructions to complete the updating procedure.
If you already went this route and the 0x8000ffff is still not fixed, move down to the next potential fix gelow.
Update 3rd party AV to the latest version (if applicable)
If you’re using a 3rd party antivirus, you should keep in mind that outdated virus signatures can actually inhibit the installation of pending Windows Updates.
This type of issue is typically reserved to free AV versions from Avira, Avast, and McAfee.
Before you dive into a more serious resolve, you should start by ensuring that your 3rd party antivirus version is up to date. To do this, access the main interface of your 3rd party suite and look for the option to check for updates.
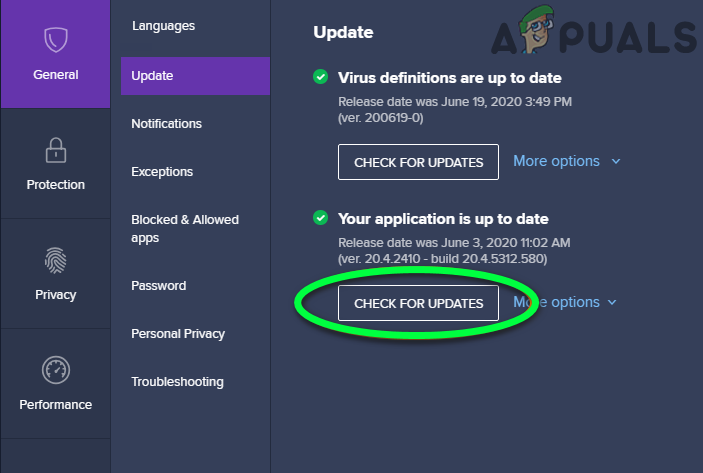
Note: Make sure that you update both the main AV application and the virus definitions.
After you update your 3rd party antivirus suite, reboot your PC and see if the 0x8000FFFF is fixed once the next startup is complete.
In case you’re still dealing with the same problem and you’re using a 3rd party AV, move down to the next potential fix below.
Disable or Uninstall 3rd party AV (if applicable)
If updating your AV suite’s application and virus signature didn’t fix the 0x8000FFFF error, there’s also the possibility that your AV is blocking some communications with the update server.
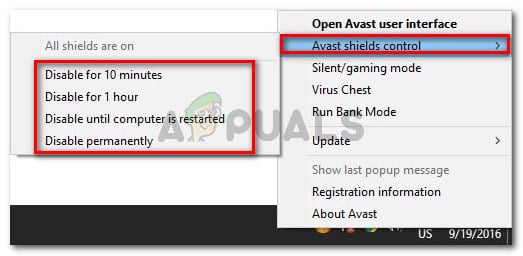
McAfee, AVAST, and Comodo are three 3rd party antivirus that is often blamed for this problem. Some users of these AV tools reported that they fixed the issue by disabling the real-time protection or by uninstalling the security suite altogether.
If you’re in the same boat, you should start by disabling the real-time protection and see if the issue is resolved automatically.
Note: Keep in mind that this operation will be different depending on the security suite that you’re using. However, in most cases, you will be able to do it directly from the tray-bar menu.
If you’re still encountering the 0x8000FFFF error even after you disable the real-time protection, you need to go the radical route (especially if you’re using a 3rd party firewall).
Certain security suites (particularly ones with a built-in firewall) are programmed to maintain the security rules even when the real-time protection is disabled.
To fix this, you’ll need to uninstall the program completely and ensure that you’re not leaving behind any leftover files.
For more information on doing this, check out this article on completely uninstalling your 3rd party AV suite and removing any leftover files.
If this method was not applicable to you or it didn’t help your cause, move down to the next method below.
Reset the SoftwareDistribution and Catroot2 folders
Another potential cause that will cause the 0x8000ffff error is a scenario in which there’s actually a WU inconsistency that is effectively stopping your machine’s ability to update. Another clue that supports this root cause is if more than one update is failing with the same 0x8000ffff error code.
If this method fits your scenario, you should be able to resolve the issue by resetting all Windows components and dependencies involved in this process. Some users dealing with the same problem confirmed this method as being successful in resolving the 0x8000ffff error
Here’s a quick guide on addressing the issue by resetting the SoftwareDistribution and Catroot2 folders from an elevated Command Prompt:
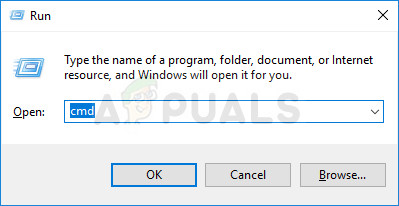
- Start by pressing Windows key + R to open up a Run dialog box. Next, type “cmd” inside the text box and press Ctrl + Shift + Enter to open up an elevated Command Prompt.
- At the UAC (User Account Control), click Yes to grant admin access.
Open up a Command Prompt window - Inside the elevated Command prompt, type the following commands and press Enter:
net stop wuauserv
net stop cryptSvc
net stop bits
net stop msiserver
Note: By running these commands you will effectively stop the Windows Update service, MSI Installer, Cryptographic service, and BITS services.
- Next, run the following commands in the same CMD window and press Enter after each command to rename the SoftwareDistribution and Catroot2 folders:
ren C:\Windows\SoftwareDistribution SoftwareDistribution.old
ren C:\Windows\System32\catroot2 Catroot2.old
Note: By renaming these two folders, you will force your OS to create new folders that are not being affected by corruption.
- Finally, type the final commands below and press Enter after each one to restart the services that you previously disabled:
net start wuauserv
net start cryptSvc
net start bits
net start msiserver
- Repeat the action that was previously triggering the 0x8000ffff error and see if the issue is now resolved.
In case the same problem is still ongoing, try the next potential fix below.
Force the Update installation via Powershell
If none of the presented fixes above have helped you to fix the problem in your case, you might be able to bypass the 0x8000ffff error entirely by forcing the update via Powershell.
We managed to get confirmation that this method is really effective by looking into user reports confirming that they’ve managed to handle a failing pending update after going this route.
Here’s how to force-install the currently pending Windows Updates via Powershell:
- Start by pressing Windows key + R to open up a Run dialog box.
- Next, type ‘powershell’ and press Ctrl + Shift + Enter to open up an elevated Powershell window with admin access.

Opening a Powershell command - At the UAC (User Account Control), click Yes to grant admin access.
- Once you’re finally inside the elevated Powershell window, type the following command and press Enter to force the pending Windows updates to install:
wuauclt.exe /UPDATENOW - Once the operation is complete, restart your computer and check the WU screen to see if there are any pending updates still.
If you’re still dealing with the same 0x8000ffff error, move down to the next potential fix below.
Reconfigure the behavior of WU-related services
Another reason why you can expect to deal with this issue is a scenario where some Windows Update-related services and dependencies are not configured properly.
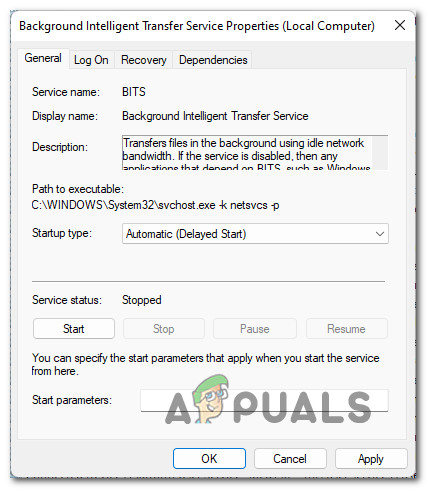
Ensure that the 0x8000ffff error code is not occurring because some WU dependencies are disabled. You can do this by accessing the services screen and ensuring that the following services are all enabled:
- Background Intelligent Transfer Service
- COM+ Event System
- DCOM Server Process Launcher
- Windows Update
- Remote Procedure Call (RPC)
Here’s how to ensure that the above services are all enabled:
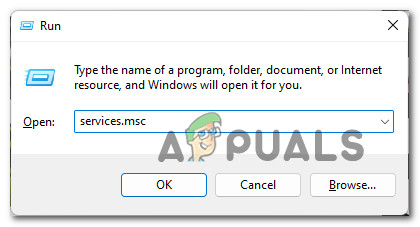
- Start by pressing Windows key + R to open up a Run dialog box.
- Next, type ‘services.msc’ inside the text box and press Enter to open up the Services screen.
Accessing the services screen - Inside the Services screen, scroll down through the list of services and make sure that every service below is enabled:
Background Intelligent Transfer Service
COM+ Event System
DCOM Server Process Launcher
Remote Procedure Call (RPC)
Note: Check each service to see if they’re disabled by right-clicking. If you have the option to click on Start, it means the service is disabled – in this case you need to enable it by clicking on Start.
Note 2: As a bonus step, double-click on every service mentioned above and change the Startup type of each to Automatic from the General tab. - Finally, attempt to install the previously failing Windows Update and see if the 0x8000ffff is now fixed.
Starting the service In case the problem is still not resolved, move down to the next potential fix below.
Manually install the failing update/s
If you want to avoid using the local component of Windows Update, you can bypass it entirely by downloading the update manually from the Microsoft Update Catalog.
Important: Going this route will NOT fix the root issue that’s causing this weird behavior on Windows 11. You’ll still need to troubleshoot your WU component further if you don’t want this issue to repeat with other updates.
By using the Microsoft Update Catalog, you will be able to install the update directly (without involving the local WU component). This means that in case some corrupted dependencies are causing this behavior, this method will allow you to bypass them entirely.
Here’s what you need to do:
- Before you do anything else, you need to know your operating system architecture (32-bit or 64-bit). If you don’t know it, open File Explorer, right-click on This PC, and choose Properties from the newly appeared context menu.
Accessing the Properties screen - From the About system tab, scroll down under Device specifications and check the System type to find out your OS architecture.
Checking the System architecture
Note: If the System type says 64-bit, you will need to download the 64-bit update and if it says, 32-bit, you will need the 32-bit Windows Update equivalent.
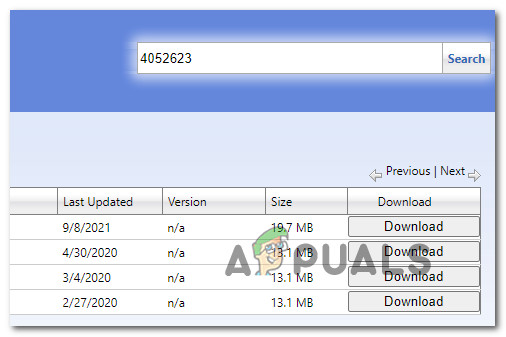
- Start by visiting the home page of Microsoft Update Catalog and use the search function (top-right corner) to search for the failing update.

Finding the Update Note: You can find out the name of the failing update by analyzing the error code you get inside Windows Update.
- Next, look for the correct WU listing you need to download by looking at the architecture. Once you find the correct one, click on Download to download the update locally.
Finding the Correct update - Next, navigate to the location where the update was downloaded (most likely in the Downloads folder), then open the .msu (or .ini) installation package and follow the on-screen prompts to install the update locally.
- Finally, reboot your computer and see if the issue is fixed once your PC boots back up.
If you’re still dealing with the same 0x8000ffff error code, move down to the underlying method below.
Disable “Turn off auto-restart for updates during active hours”
If you’re using a Windows version that includes access to the Local Group Policy Editor (Pro and Enterprise versions of Windows 10 and Windows 11), there’s also a possibility that the 0x8000ffff error is caused by a policy called Turn off auto-restart for updates during active hours.
To investigate if this policy is active and causing the error for you, you’ll need to open the Local Group Policy Editor utility and see if this scenario is applicable.
Here’s what you need to do:
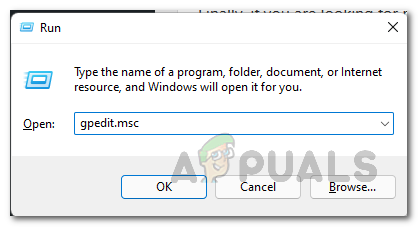
- Press Windows key + R to open up a Run dialog box.
- Next, type gpedit.msc inside the text box and press Enter to open up the Local Group Policy Editor.
\Open up the Gpedit utility - Use the menu on the left to navigate to the following location:
Computer Configuration > Policies > Administrative Templates > Windows Components > Windows Update
- Move over to the right section and double click on Turn off auto-restart for updates during active hours.
- Finally, set this policy to disabled and reboot your PC to enforce the changes.
In case this method is not applicable or it didn’t allow you to fix the 0x8000ffff error, move down to the next method below.
Perform a repair install / clean install
If none of the procedures showcased in this article so far have made a difference for you, it’s very likely that you’re encountering the due to a Windows system file inconsistency. The only viable fix at this point is to reset every Windows component in order to ensure that any type of corruption is removed.
If you face this scenario and the 0x8000ffff error is still not resolved, you have a couple of ways forward:
- Clean install – Pick this method if you don’t have any important data on your operating system drive. It’s super easy to perform, but the major disadvantage is that unless you back up your data in advance, you will lose any personal files including applications, games, and personal media. The good news is, this procedure does not require compatible Windows installation media.
- Repair install (in-place upgrade) – You’ll need access to compatible installation media to go for this procedure. The major advantage is that the operation will only touch the Windows files – all your personal files & settings (including videos, photos, music folder, apps, games, and even some user preferences) will remain untouched.
The post How to Fix Windows Update Error 0x8000FFFF? appeared first on Appuals.com.


0 Commentaires