We’ve been seeing more and more reports of Windows 11 issues complaining that their overall PC audio volume is unusually low. This problem occurs for both system sounds and sound in native and third-party applications.

After investigating this issue, it turns out that this audio issue can actually be rooted in multiple potential causes. Here’s a list of scenarios that might cause the unusually low volume output on Windows 11 (21h2 and newer):
- Common inconsistency – As it turns out, a lot of the problems that could be responsible for the low audio issue you’re experiencing on Windows 11 are already covered by the automated fixes available via the Windows Audio troubleshooter. Because of this, the ideal way to start troubleshooting this problem is by running the Audio troubleshooter and applying the recommended fix.
- Outdated audio driver – If you haven’t updated your audio driver in a while and Windows Update is not allowed to update it, chances are you are experiencing this problem due to using an older audio driver version. In this case, you can force the driver version to update via Device Manager.
- The generic driver is partially incompatible – If you’re using a generic update (migrated after the upgrade to Windows 11), it’s very likely that the low-volume behavior will be rectified if you actually take the time to install the dedicated sound card driver applicable to the motherboard that you’re using.
- The dedicated audio driver is not updated for Windows 11 – The opposite scenario of the potential caused detailed above is a scenario in which you’re using a dedicated driver for which the manufacturer has not yet made it fully compatible with Windows 11. In this case, the ideal way to fix it is to uninstall the current dedicated driver and use a generic driver equivalent instead.
- Interfering audio enhancements – As it turns out, software simulated audio enhancements can also cause low volume outputs on Windows 11, especially when using speakers instead of headphones. To fix this particular scenario, you’ll need to disable every software simulated enhancement via Sound Properties.
- Incompatible BiRate sound format – If you have previously established a Studio quality format as the default BitRate for your default audio device, you will experience lower volume when playing sounds of inferior quality. To avoid this problem, you will need to change the default BitRate sound format from your Sound settings.
- Recent driver or app conflict – As with every operating system, there are a lot of moving parts that could actually interfere with the sound output on your Windows 11 installation. Both drivers and 3rd party processes can ultimately be responsible for this weird behavior. If this problem only started to occur recently, try tapping into the latest System Restore snapshot to revert your PC to a state in which the problem did not occur.
- System file corruption – According to some affected users, this issue can also be rooted in some kind of system file corruption. Other users dealing with the same sound issues have confirmed that they’ve completely managed to fix the problem by deploying SFC and DISM scans in quick succession.
- No compatible audio driver for Windows 11 – If everything else fails to work, there’s always the option of reverting to Windows 10. In this case, chances are you’re using a legacy sound card that is not yet made compatible with Windows 11. In this case, the only option unfortunately is to move away from Windows 11.
Now that we went over every potential cause of this issue, let’s get to the fixing part. Below you’ll find a list of methods that have proven to be applicable for other users that have been dealing with low volume issues on Windows 11.
Run the Audio troubleshooter
When you’re troubleshooting this particular issue, the first thing you should test is whether your Windows 11 installation is actually able to fix this problem automatically.
As it turns out, Microsoft is already aware of this problem and the software engineers have already pushed a couple of automated fixes aimed at resolving the low volume problem on Windows 11.
To take advantage of these automated fixes, you’ll need to run the Audio troubleshooter and apply the recommended fix.
This fix has been confirmed by a lot of affected users – particularly those that upgraded to Windows 11 from Windows 10 instead of clean installing the latest operating system.
Follow the instructions below to run the Audio Troubleshooter and apply the recommended fix on Windows 11:
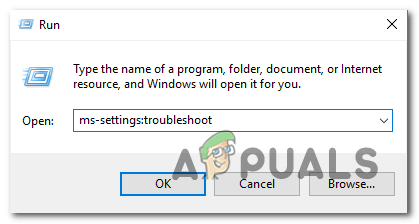
- Start by pressing Windows key + R to open up a Run dialog box.
- Next, type “ms-settings:troubleshoot” and press Enter to open the Troubleshooting tab of the Settings app.
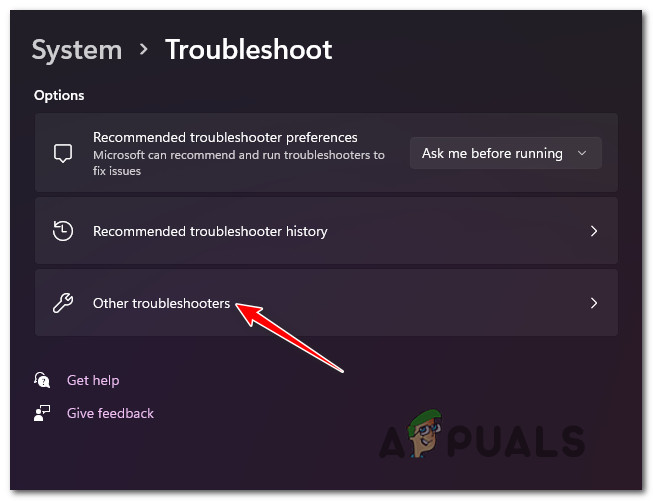
Accessing the Troubleshooting tab - In the Troubleshoot tab, move over to the right-hand section of the screen and click on Other Troubleshooters (under Options).
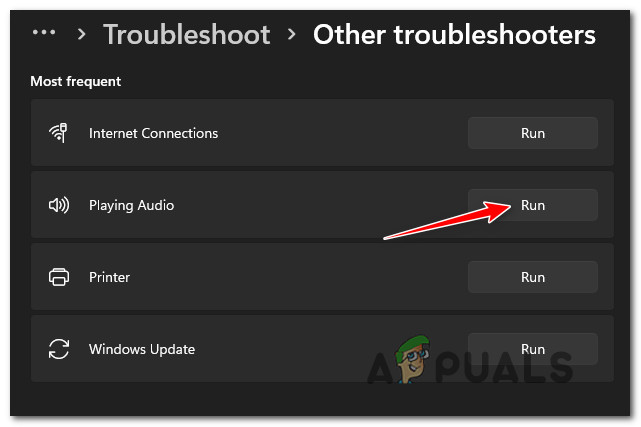
Accessing the Other Troubleshooting tab - From the next menu, go under Most frequent and click on the Run button associated with Playing Audio.
Running the Audio Troubleshooter - Once you run this troubleshooter, wait patiently until the initial investigation phase is complete.
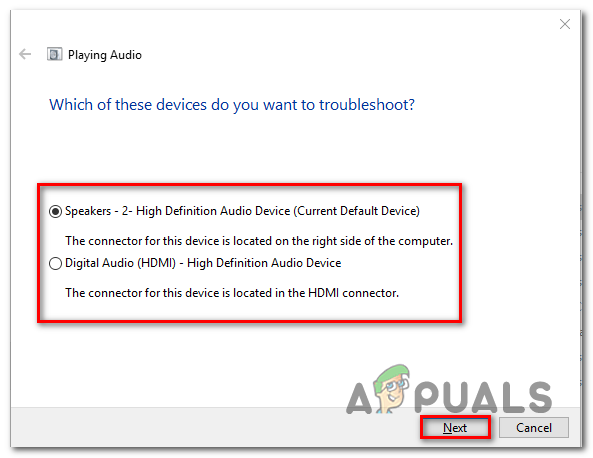
- Next, select the device that you’re currently using as the default audio device.
Selecting the default audio device - After you deployed this scan, wait until the utility analyses your Audio device for problems.
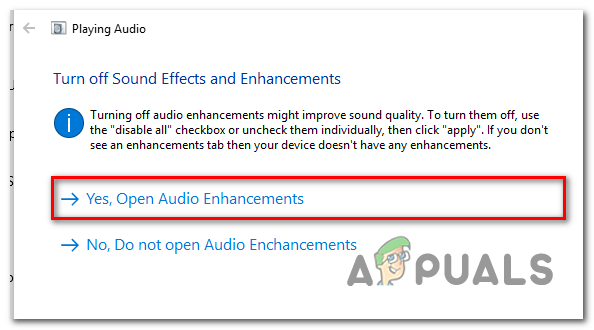
- In case a problem is identified, you will be recommended a repair strategy. Follow the on-screen prompts (click ‘Yes, Apply fix‘ or ‘Yes, Open *menu‘) and follow through with the recommendations.
Applying the recommended fix - Restart your computer and see if the error is no longer occurring once the next startup is complete.
If you’re still experiencing low-volume audio on your Windows 11 computer, move down to the next potential fix below.
Update the Audio driver
If the troubleshooter didn’t make a difference in your case, the next thing that you should do is ensure that the audio driver that you’re currently using is updated to the latest available version.
Normally, Windows Update should automatically update and maintain this driver without any further action on your side. But in certain situations, you become stuck with an outdated audio driver that is not compatible with your current OS version.
Several users that we’re dealing with this problem have reported that the problem was finally fixed after they used Device Manager to force the updating of the driver from the Properties screen of the High Definition Audio Device.
Here’s what you need to do:
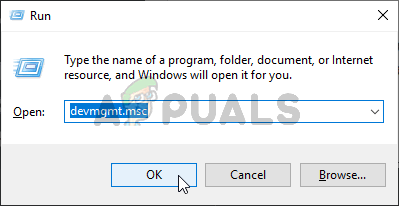
- Start by pressing Windows key + R to open up a Run dialog box. Next, type ‘devmgmt.msc’ and press Enter to open Device Manager.
Accessing the Device Manager tab - If you’re prompted by the User Account Control window, click Yes to grant admin access.
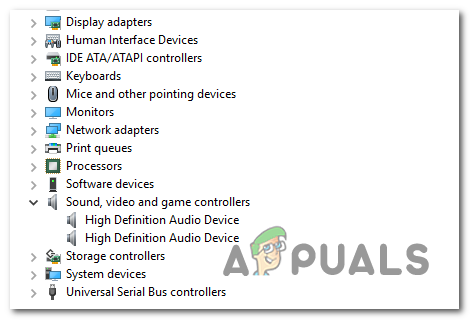
- Once you’re inside Device Manager, scroll down through the list of installed programs and expand the Sound, video, and game controllers drop-down menu.
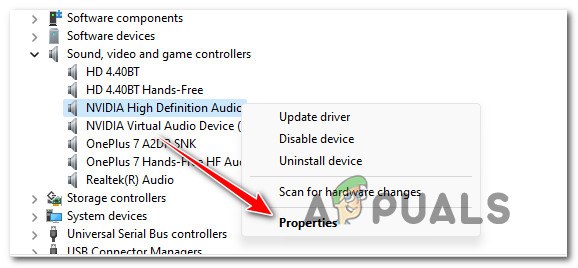
- Inside the Sound, video, and game controllers menu, right-click on your high-definition audio driver.
- From the context menu that just appeared, click on Properties.
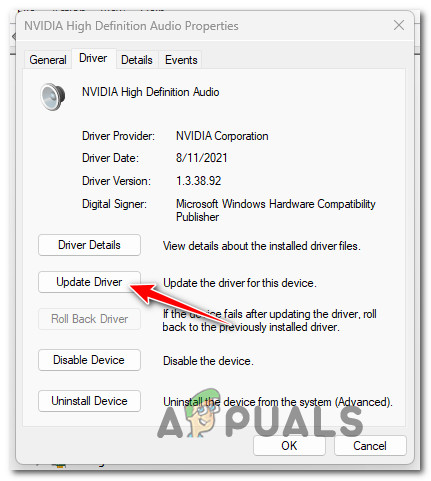
Accessing the properties menu - From the Properties screen, click on Driver using the menu at the top, then click on the Update Driver button.
Updating the driver - From the next screen, click on Search automatically for drivers.
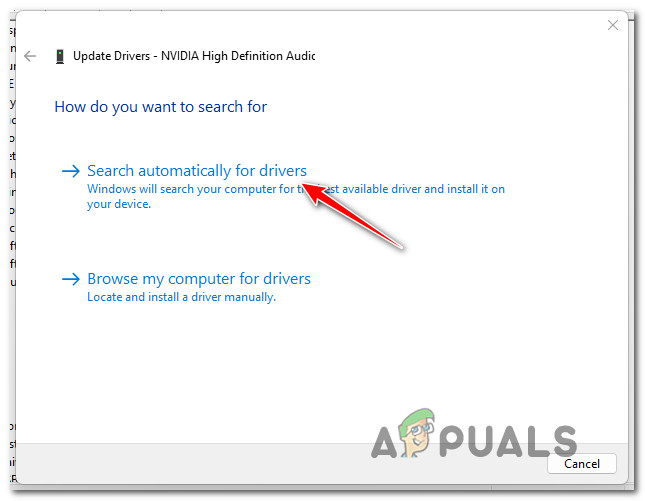
Searching automatically for drivers - Wait and see if a new audio driver version is identified. If a new version is identified, follow the on-screen instructions to complete the installation of the new driver version.
Note: In case Device Manager was not able to find a new driver version, click on Search for updated drivers on Windows Update. Sometimes this method yields results in situations where a simple driver scan via Device Manager doesn’t.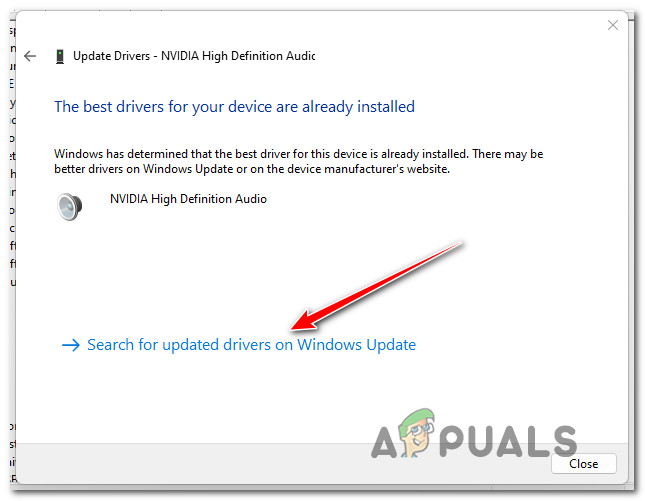
Search for updated drivers - If a new audio driver is installed, take the time to reboot your PC and see if the low audio problem is fixed the next time you boot up your Windows 11 computer.
If the same kind of problem is still ongoing, move down to the next potential fix below.
Install the dedicated Sound Card driver
If the method above didn’t work for you and you’re using a generic driver, the next thing you should do is install the dedicated sound card driver from the manufacturer’s website.
This is recommended in situations where you are using an MSI or Lenovo laptop – these manufacturers typically used audio hardware that will cause problems with generic drivers.
Note: Also stay away from generic drivers if you are using a dedicated sound card.
Keep in mind that the instructions for finding and installing the dedicated sound card driver will be different depending on the manufacturer that you’ll need to go through.
In order to provide you with a guide, we’ve checked out the instructions that you’ll need to follow when you want to install the dedicated sound card driver.
Here’s what you need to do:
- Open your preferred browser and navigate to the driver download page of your manufacturer.
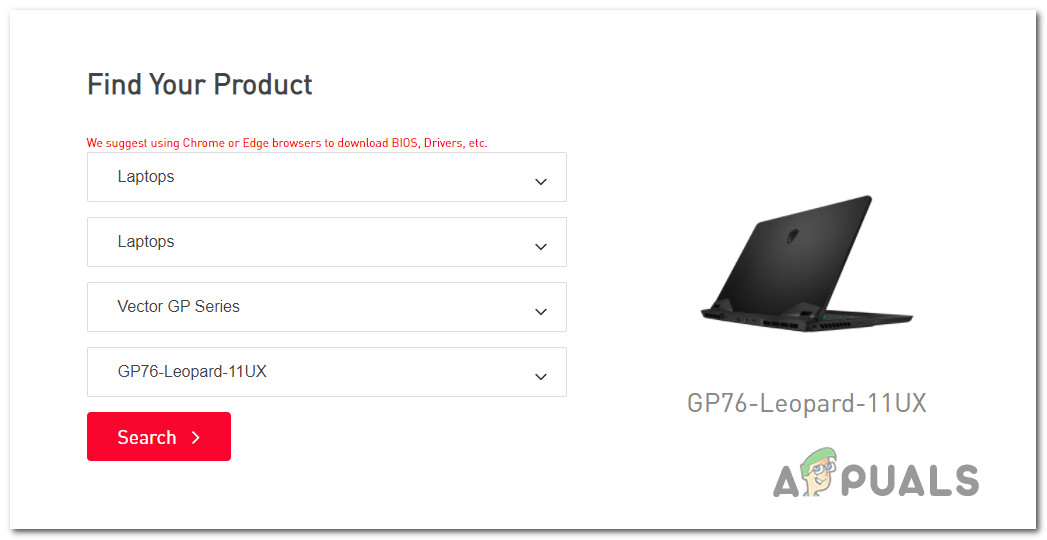
Searching for compatible laptop drivers Note: If you are experiencing this issue on a laptop, visit the download page and look for your particular model.
- Once you’re inside the download page of your laptop/motherboard model, access the Driver tab and download the recommended audio driver.
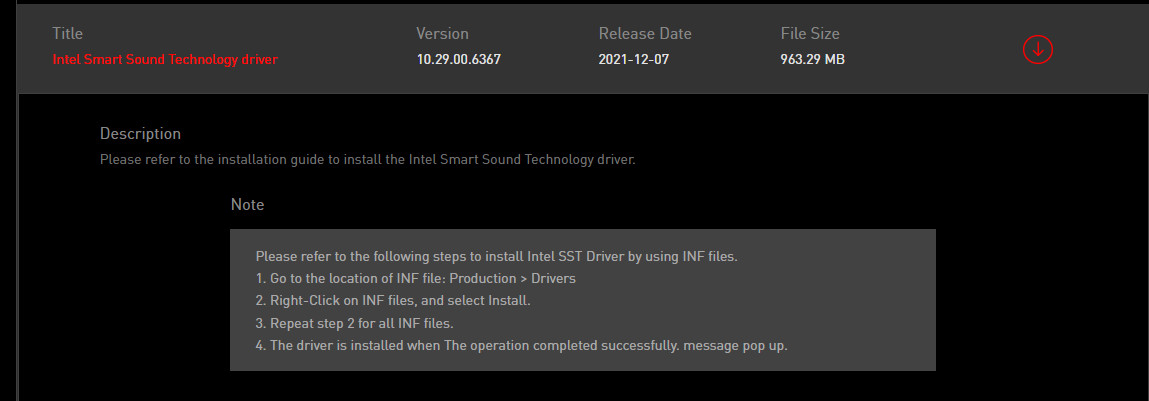
Downloading the smart sound technology driver - After the download is complete, unpack the driver and install it.
Note: Depending on the fire format, you’ll either need to right-click and click on Install (if it’s an INF file) or you can simply double-click (if it’s a .exe file) - Follow the on-screen instructions to install the dedicated audio driver, then reboot your PC and see if the issue is fixed once the next startup is complete.
In case you’re still experiencing low audio volume on Windows 11 despite updating (or replacing) your audio driver, move down to the next method below.
Uninstall audio driver (use a generic equivalent)
There is one more scenario that might be causing low audio volume on Windows 11. According to other affected users, you can expect to deal with this problem if you’re using a dedicated audio drive that was migrated over from Windows 10 or Windows 8.1 after you upgraded the OS to the latest instead of clean installing Windows 11.
In this case, chances are the dedicated driver you’re using is not fully compatible with Windows 11. To rectify this problem, you’ll need to uninstall the current dedicated driver and revert to a generic audio equivalent.
If you’re looking for specific instructions on how to do this, follow the instructions below:
- Press Windows key + R to open up a Run dialog box.
- Next, type ‘devmgmt.msc’ and press Ctrl + Shift + Enter to open up Device Manager with admin access.
Accessing the Device Manager tab - At the User Account Control (UAC) prompt, click Yes to grant admin access.
- Inside Device Manager, scroll down through the list of installed drivers and expand the drop-down menu associated with Sound, video, and game controllers.
Accessing your Audio adapter Device Manager listing - Right-click on the dedicated audio driver and choose Properties from the context menu that just appeared.
- From the Properties menu of your audio driver, go to Driver and click on Uninstall Device.
- At the confirmation prompt, check the box associated with Attempt to remove the driver for this device and click on Uninstall.
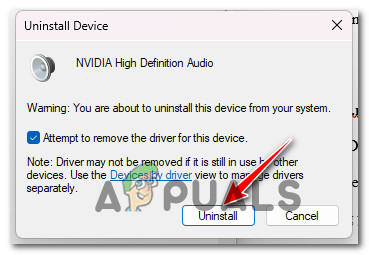
Uninstall the audio driver - Once the driver is uninstalled, simply restart your PC. During the next startup, your Windows 11 installation will notice that there isn’t an active driver that handles audio and it will automatically install and enable a generic driver.
- After your PC boots back up, see if the low audio issue is fixed.
In case the same kind of issue is still persisting, move down to the next potential fix below.
Disable all enhancements from Sound Properties
If you’ve come this far without a viable fix, the next thing you should investigate is the selection of Sound Enhancements that you currently have enabled.
A lot of different Windows 11 users complaining about low audio volume have reported that the issue was resolved after they disabled all audio enhancements.
If you want specific instructions that will allow you to disable all enhancements from Sound Properties, follow the steps below to disable them completely:
Note: If you’re using a dedicated audio card I will most likely come with its own audio enhancement options. In this scenario, you should disable them from the dedicated utility because disabling the Windows equivalents will not resolve the issue.
Note 2: If you’re using SRS Premium Sound or SRS Premium Sound, you’ll need to uncheck the box associated with Audio Enhancement inside the dedicated app to fix the problem.
- Start by pressing Windows key + R to open up a Run dialog box.
- Next, type “control” inside the Run box and press Enter to pop open Control Panel.
- Inside the Control Panel, use the search function in the top-right to search for Sound.
- From the next menu, click on Sound from the results.
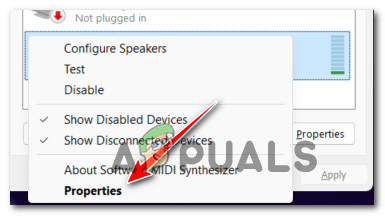
- Once you’re finally inside the Sound screen, make sure that the Playback tab is selected, then right-click on the playback device that you’re encountering the issue with and choose Properties from the context menu.
- From the Properties screen of your default audio device, select the Enhancement tab (from the horizontal menu) and check the box associated with Disable all enhancements.
- Finally, click Apply to save the changes.
- Reboot your PC and see if the issue has been resolved once the next startup sequence is complete.

In case you’re still experiencing low-volume audio despite the fact that you disabled every virtual enhancement, move down to the next potential fix below.
Change the BitRate sound format
If none of the other fixes above have been effective and you’re using a high-end sound system or headset, the low-volume audio issue you’re experiencing might be related to the fact that your Windows settings in regards to the stream format quality are insufficient to the active playback device.
In this case, you should be able to fix the problem by accessing the Sound settings and modifying the Default format so that it uses the biggest sample rate available (24 bit – 48000 Hz).
This fix was confirmed to be effective for a lot of users that we’re experiencing this issue immediately after upgrading to Windows 11 from Windows 10.
In the vast majority of cases, this problem was resolved after they boosted the default stream format to Studio Quality.
To do this, follow the instructions below for specific instructions on how to do this:
- Press Windows key + R to open up a Run dialog box.
- From the menu that just appeared, type ‘mmsys.cpl’ inside the text box and press Enter to open the Sound settings.
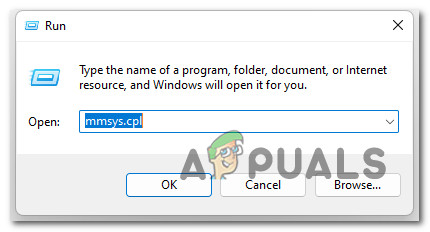
Accessing the Sound Settings on Windows 11 Note: If you see the User Account Control (UAC) prompt, click Yes to grant admin access.
- Inside the Sound settings, access the Playback device from the horizontal menu at the top.
- From the next menu, right-click on the audio device that you’re currently using and click on Properties from the context menu.
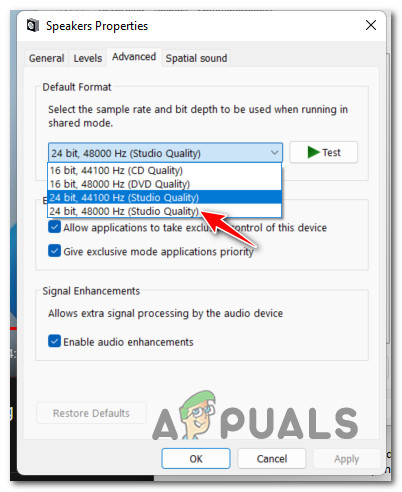
Accessing the Properties menu of your Sound device - Inside the Speaker Properties menu, click on the Advanced tab from the ribbon menu at the top.
- From the next screen, go under Default format and change the drop-down menu to 24 bit, 48000 Hz (Studio Quality).
- Click on Apply to save the changes.
Changing the sound quality - Once the sound quality has been adjusted, reboot your PC and see if the low-volume sound issues on Windows 11 are now fixed.
If the same problem is persisting despite following the instructions below, move down to the next potential fix below.
Use a system restore point
If you’ve come this far without a viable fix, another scenario that you should explore is a case of driver incompatibility (especially if this problem started occurring after you installed or updated an app).
If you only started to see this issue recently after you’ve enforced a particular change (a new driver installation, a driver swap, the installation of a new program, etc.), it wouldn’t hurt to start using System Restore to restore your computer back to a state in which this conflict was not occurring.
Note: System Restore is configured to create and save new restore snapshots at important system events. Unless you modified this default behavior, you should have plenty of restore snapshots to choose from.
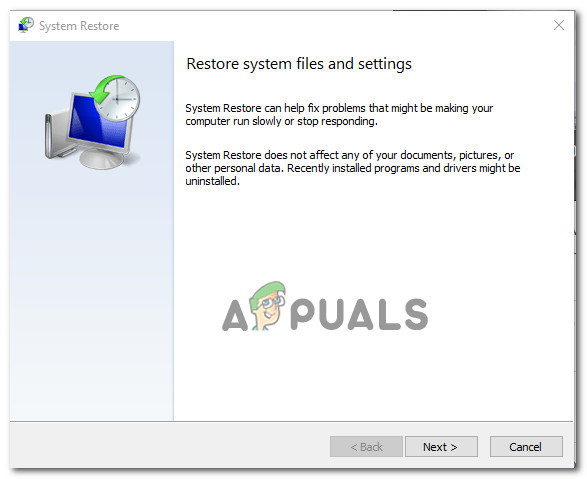
For specific instructions on how to deploy this fix, following this guide on mounting previously saved System Restore point will. This operation will allow you to bring back your PC state to a previous point in time when this issue was not occurring.
Once you used the above guide to restore your PC back to a healthy point, see if the low volume issue is still persisting on Windows 11.
If the problem is still not resolved, move down to the next method below.
Deploy SFC and DISM scans
In case you’ve come this far without a viable solution, the final thing you should do is investigate for a potential case of system file corruption that ends up affecting your audio outputs.
Unless you want to go for the third-party route, the logical choice would be to use a couple of built-in utilities (SFC and DISM).
Note: These two built-in utilities are capable of fixing the system file corruption that might be affecting your OS’s ability to address dependencies used by Windows Update.
Info: System File Checker and Deployment Image Servicing and Management are two built-in tools that are equipped to fix the most common corruption instances that might trigger this type of error.
Ideally, you should start with a System File Checker scan as it doesn’t require a stable internet connection.
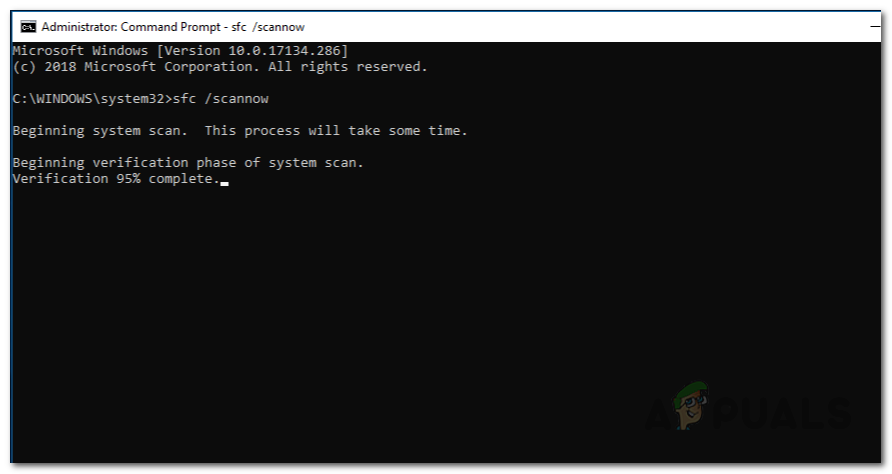
Note: System File Checker uses a locally stored cache to replace corrupted system file items with healthy equivalents. Don’t stop this process until it’s finished to avoid causing additional logical errors.
If you are using a traditional HDD instead of a more modern SSD, expect this process to take up to one hour or more (depending on your read and write speed.
Important: The System File Checker scan has a tendency to freeze temporarily. If this happens in your case, don’t close the window and wait for the real-time tracking to return.
After the SFC scan is finally complete, reboot your PC and see if the low audio issue is now fixed.
In case the same problem is still ongoing, proceed by initiating a DISM scan.
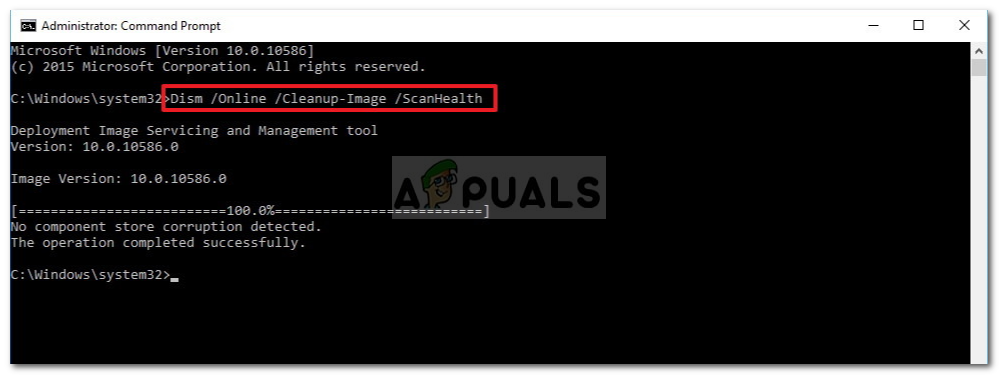
Note: DISM uses a sub-component of Windows Update to replace corrupted files with equivalents untainted by corruption. Ensure that your Internet connection is stable before starting this operation.
Once you complete both SFC and DISM scans, restart your PC and see if the audio issues with your Windows 11 computer are now fixed.
If the same problem is still ongoing, move down to the final potential fix below.
Revert back to Windows 10
If you’ve come this far without a result and you followed every method above, there’s a big chance you’re using some kind of legacy audio card that doesn’t have an equivalent for Windows 11.
If you’re still within the 10-day rollback period, you can simply revert back to Windows 10 by following this simple guide.
If this is no longer an option for you, there’s nothing you can really do to boost your audio volume on Windows 11.
The post How to Fix Low Audio Problem in Windows 11? appeared first on Appuals.com.


0 Commentaires