Recently, several users have reported that they have been experiencing a BSOD associated with the ‘PNP detected fatal’ error.

We had a look into the issue and discovered that it can be caused by a number of reasons, including:
- System File Corruption – This issue can also be caused by the corruption of system files. If the problem is superficial, you might be able to resolve it by running DISM and SFC scans via the recovery menu. The problem will likely need to be fixed by a clean install or repair install if it’s a problem rooted in the kernel data.
- 3rd party Antivirus Interference – Some 3rd party antivirus suites, including Norton, can cause this issue. The critical system crash is most likely caused by a kernel file being blocked by the active antivirus due to a false positive. If you’re experiencing the problem at hand, try temporarily disabling or uninstalling any 3rd party antivirus programs and see if those problems go away.
- Different 3rd party Interference – The issue is not limited to Antivirus Suites. You might also be facing the problem if two or more applications are interfering with each other’s processes. A clean boot is the best way of identifying this type of issue.
- DPTF Manager Driver – you are also likely to face the issue if your DPTF Manager driver is faulty or corrupt. If the issue started occurring after you updated this particular driver, you can roll back the update to fix the issue.
Now that we know the potential causes, let’s have a look at some effective troubleshooting methods.
Install Pending Windows Updates
It’s important that you make sure you’re using the latest Windows Updates available if you’re having this problem. In the case that your Windows installation is missing an important Windows security update, you are likely to encounter the issue at hand.
If this scenario is applicable, you can fix the issue by installing the pending Windows updates.
Here is what you need to do:
- Launch Windows Settings and click on Updates & Security from the list of options available in the Settings window.
- Inside the Windows Update screen, click on Check for Updates on the right side of the window.
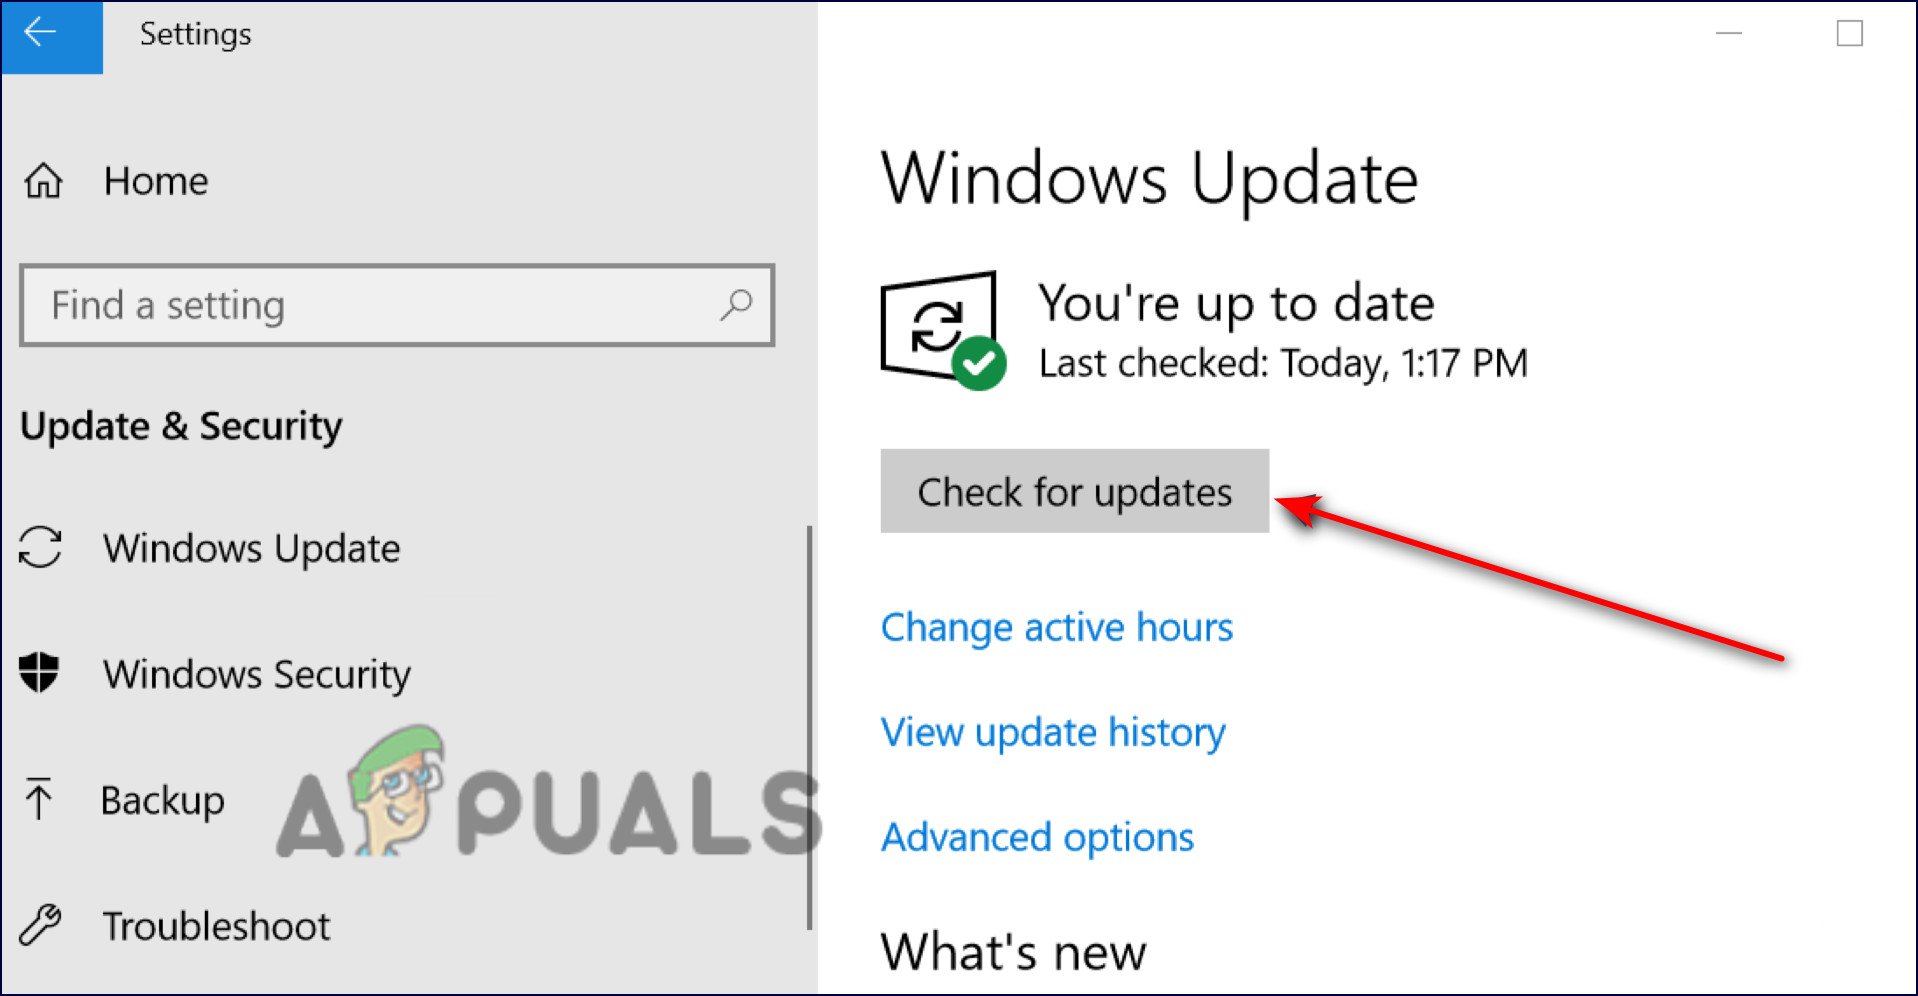
Check for updates - This should launch a scan that will check your system for pending updates. If any updates are found, install them one by one and check if this fixes the issue.
Remove Antivirus
An excessively protective antivirus program can also lead to issues like the one at hand. Such programs prevent legitimate processes of the operating system to complete successfully.
In the event you are using a third-party antivirus program on your system and think that it may be causing the issue, you can try uninstalling the third-party tool. This will help you identify if your antivirus program is the culprit behind the error. If it happens to be, you might want to replace it with another program.
Here is how you can do that:
- To open the Run dialog box, press the Windows key + R simultaneously.
- Type ‘appwiz.cpl’ in the text field of the dialog box and press Enter to open up the Programs and Features window.

Run Appwiz - Inside the Programs and Features window, locate your third-party antivirus program.
- Once you have located it, right-click on it and select Uninstall from the next context menu.
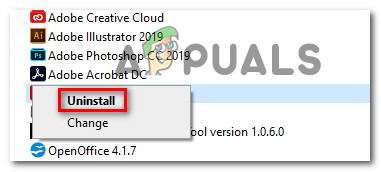
Uninstall Avast - To complete the process, follow the instructions on the screen one by one.
- Once done, restart your PC and check if the issue is resolved.
Rollback DPTF Manager Driver (If Applicable)
Several users have reported that the issue on their computers started occurring after installing an update of the Intel DPTF Manager driver. If you have this driver, then rolling the Intel driver to its previous version will do the trick for you. Follow the steps mentioned below to do so:
- Type Device Manager in the search area of your taskbar and hit Open.
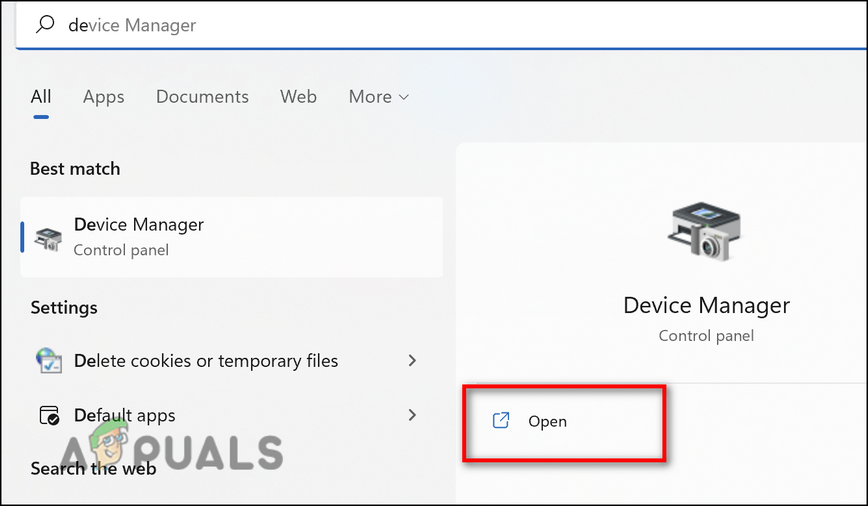
Open device manager - Inside the Device Manager window, right-click on your Intel DPTF Manager Driver and select Properties from the context menu.
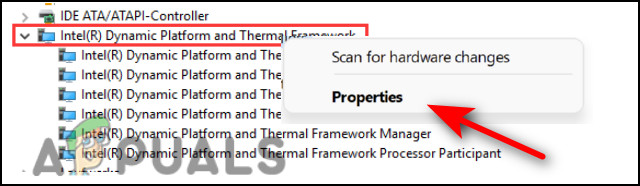
Right-click IDPTF - In the Properties window, head over to the Drivers tab and click on the Roll Back Driver button. To finish rollback, follow the instructions on the screen.
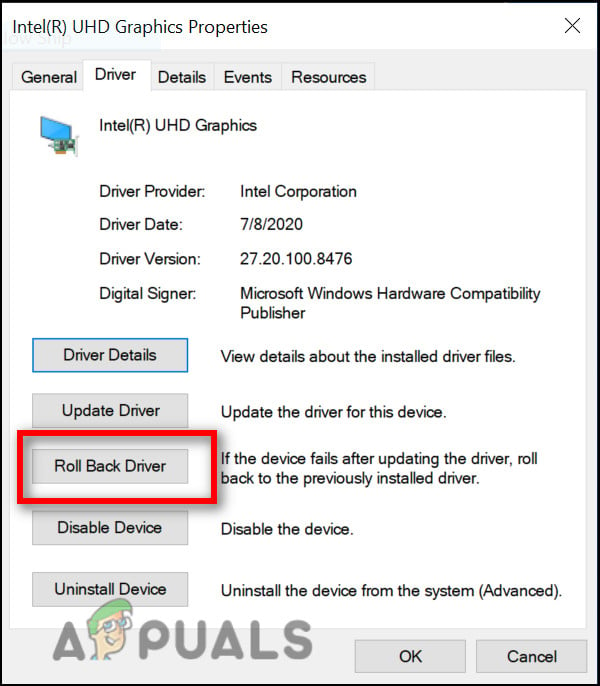
Choose roll back driver - Once done, restart your PC and check if the issue is resolved.
Run SFC and DISM Scans
In many cases, corruption or bugs in the system are responsible for errors such as this.
In Windows, several tools are included that help troubleshoot errors without much involvement from the user. The two tools required for this are Deployment Image Servicing and Management (DISM) and System File Checker (SFC). You can use each utility to scan your operating system for errors and fix them automatically.
Here is how you can run SFC and DISM scans on your Windows operating system:
- Type cmd in the search area of your taskbar and click on Run as administrator to launch Command Prompt with administrative privileges.
- Inside the Command Prompt window, type the command mentioned below and hit Enter.
sfc /scannow
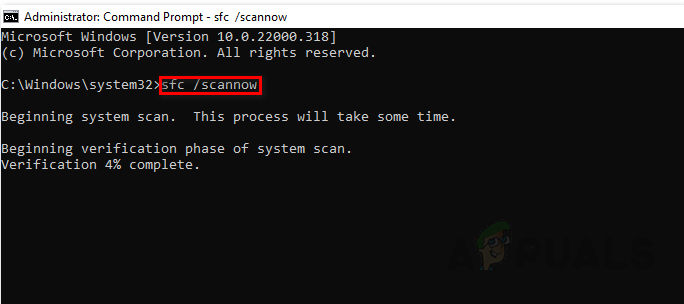
- Next, type the command mentioned below in the same elevated Command Prompt window. Do this regardless of the results.
DISM /Online /Cleanup-Image /RestoreHealth
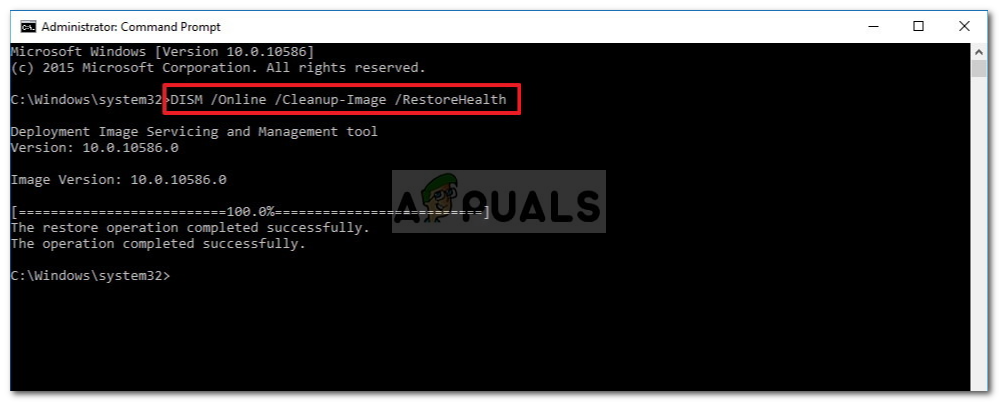
Restoring System Files - Finally, restart your PC and upon reboot, check if you can install the required update.
Perform a Clean Boot
Clean boot states help diagnose advanced Windows problems. If the fixes above are not working for you, you might want to try starting your computer in safe mode. In case the issue does not appear in Safe Mode, then we recommend you perform a Clean Boot of your operating system.
Here is what you need to do:
- Type System Configuration in the search area of the taskbar and click Open.
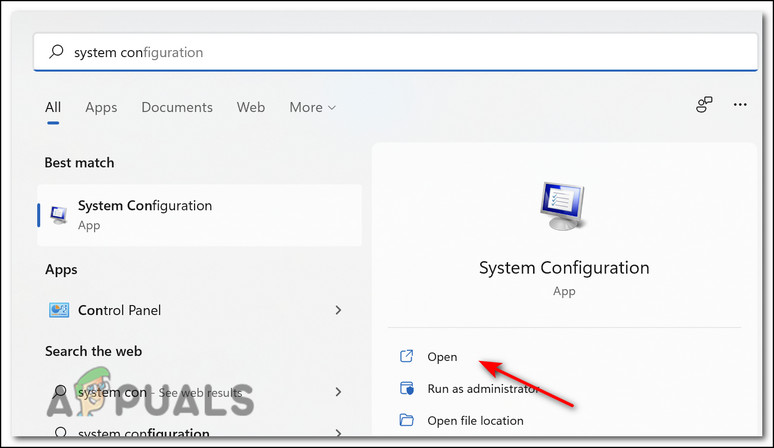
Open system configuration - In the newly launched window, head over to the General tab, select Selective startup and uncheck the box against Load startup items.
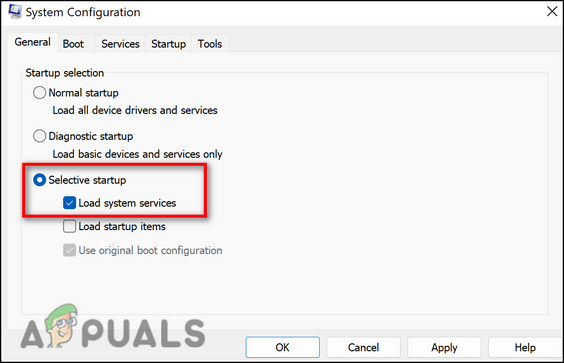
- Then, click on Normal startup and go to the Services tab.
- Check the box against Hide all Microsoft services and then hit the Disable all button.
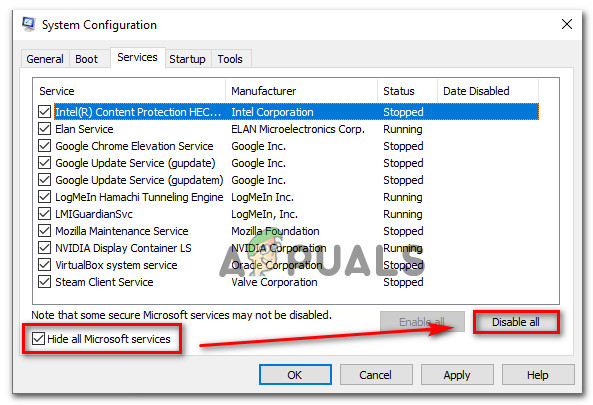
Hide all Microsoft services - Hit Apply and then OK.
- Finally, restart your PC and check if the issue persists.
Reset Your PC
As the last resort, you can also try resetting your PC to resolve the issue at hand. If you do this, your operating system will return to its original, error-free state, thus resolving the error in the process. While resetting your PC, you will be given the choice to either delete all your data or keep it. Proceed with the option that suits you the best.
Here is how you can reset your PC:
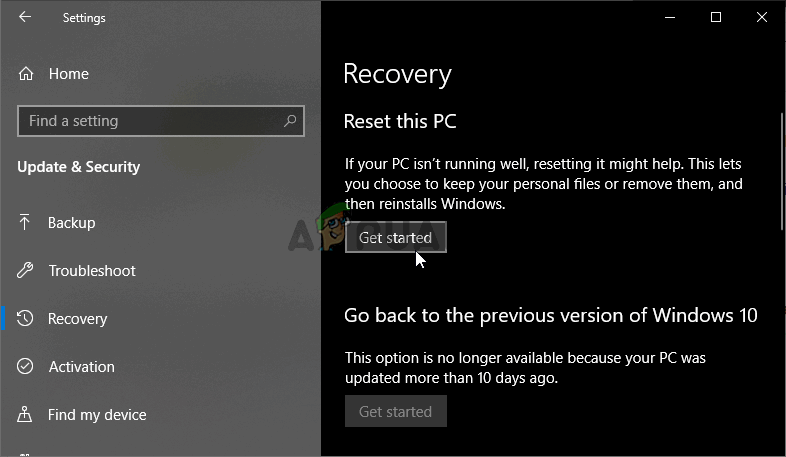
- Launch Windows Settings and select System from the list of options available.
- Then, select Recovery from the left pane and click on the Get started button under Reset this PC.
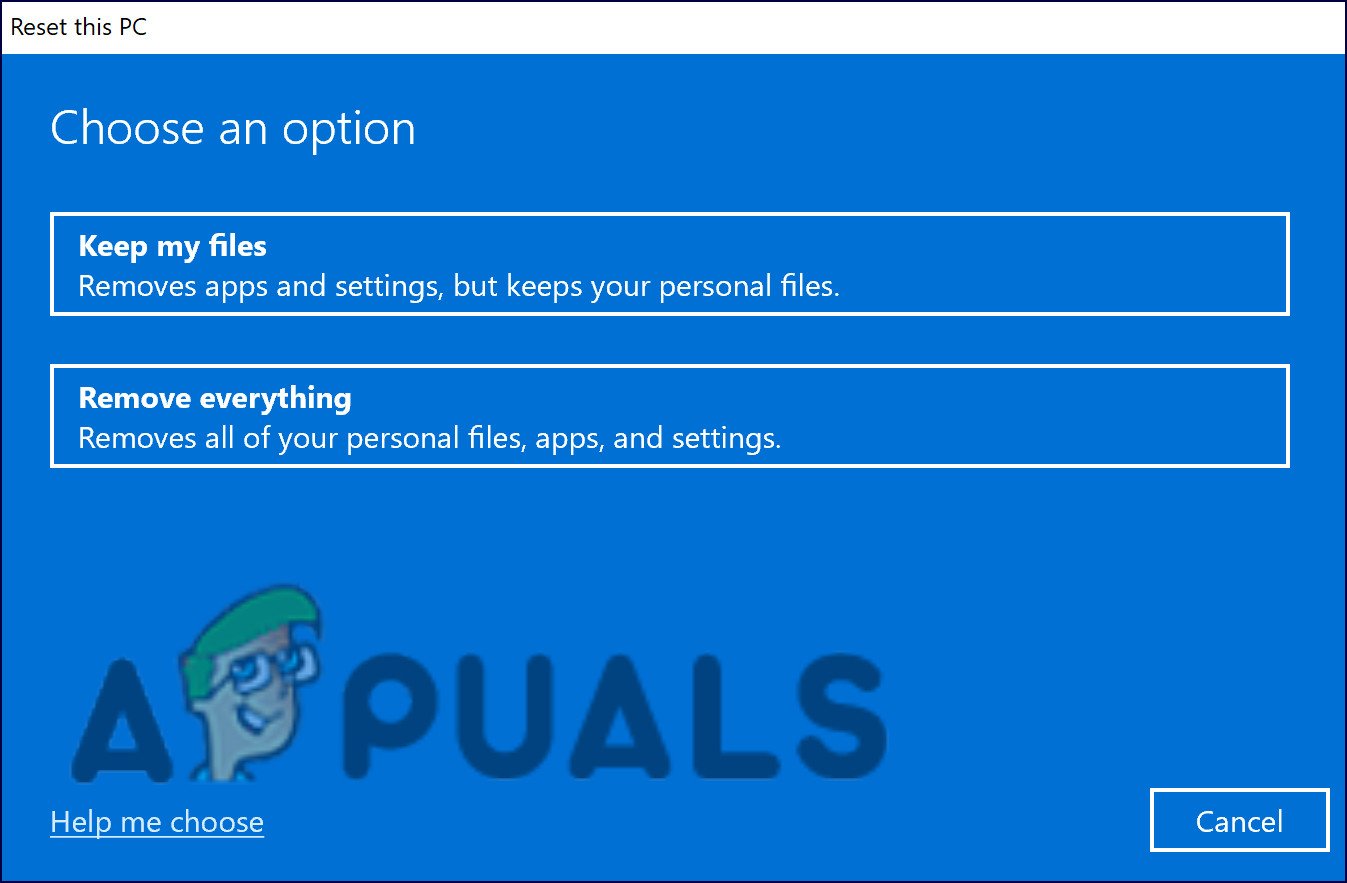
Reset this PC - Now either choose to Keep my files or Remove everything according to your preferences to proceed.
Keep or remove files - Next, choose between “Cloud download” and “Local reinstall”. To give you some context, ‘Local reinstall’ is the way to go when you just want to clear out your settings. If you think there is an issue with the system files, then
- Hit Next in the following window. This window should be displaying the particulars of reset.
- Finally hit the Reset button.
The post How to Fix “PNP Detected Fatal Error” BSOD on Windows 10/11? appeared first on Appuals.com.


0 Commentaires