What is UNEXPECTED KERNAL MODE TRAP?
The UNEXPECTED KERNEL MODE TRAP error is a Blue Screen of Death (BSOD) that can suddenly show up while you’re running an application or updating your Windows. In technical terms, this occurs due to the Kernel being unable to catch the trap generated by the CPU.
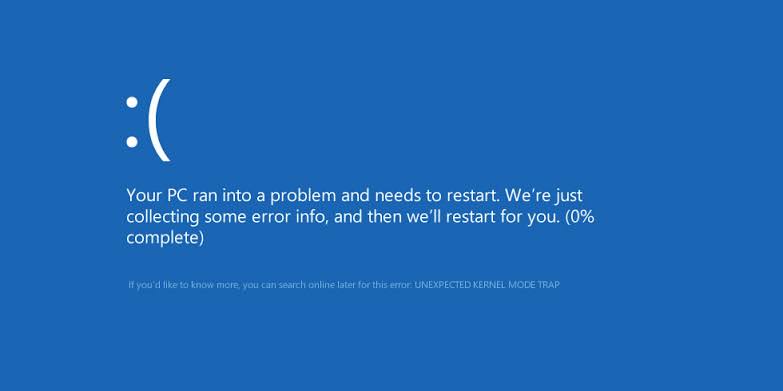
What causes this error?
Usually, the reason for this is a faulty RAM module or defective/out-of-service drivers. Here you should run the Windows Memory Diagnostic tool to repair any problems in the memory. Secondly, update your graphic cards and other drivers to the newest versions.
The dust in your CPU components can also be the cause of this problem. It makes the computer overheat and not perform up to its potential. Therefore, it’s recommended to clean your PC carefully after every 3-6 months.
How to fix UNEXPECTED KERNEL MODE TRAP error?
The issue surely is annoying especially when it starts to happen every time you try to start your computer. But no worries as we’ll be taking you through 9 different solutions to counter this BSOD.
1. Clean up your PC Thoroughly
Before going through any software solution, try cleaning your system and removing any dust. The CPU compartments can get grubby after a while and need some cleansing.
First, disconnect USB, printer, mouse, keyboard, and any other peripheral devices. Cleaning doesn’t mean scrubbing the PC with soap or shampoo. Simply take a cotton swab, microfiber rag, or a brush with soft bristles and start rubbing it over the different components. The help of an air blower can also be taken for quick work.
Begin with cleaning the CPU fan, RAM modules, hard drives, graphic drivers, and the rest of the sections. Once done, connect your peripheral device to power on the computer to see whether the error has been rectified.
2. Remove and Reconnect the Hardware
A newly installed hardware also causes this BSOD issue sometimes. If you recently installed a RAM module, hard drive, PCI/VGA cards, or anything else; try removing it and restarting your PC. If the error no longer shows up, that particular hardware component was the problem.
In case you haven’t got any new updates to the hardware, remove the pre-installed peripheral devices except the keyboard and mouse. Now boot up your system and start connecting the removed devices until one of them causes the UNEXPECTED KERNEL MODE TRAP error.
Now all you need to do is update the software of that particular device or change it completely.
3. Run the Hardware and Devices Troubleshooter
Running the Hardware and Devices troubleshooter will further identify the corrupt hardware device that is generating this error. This troubleshooter will determine the issue and will guide you about how to fix it.
- Press Win + R keys and enter: msdt.exe -id DeviceDiagnostic
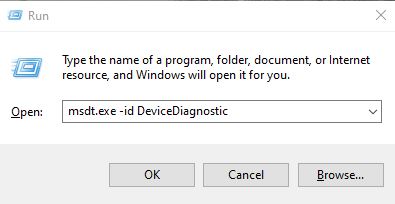
- Now click OK to open the hardware troubleshooter.
- Click Next to start the scan.
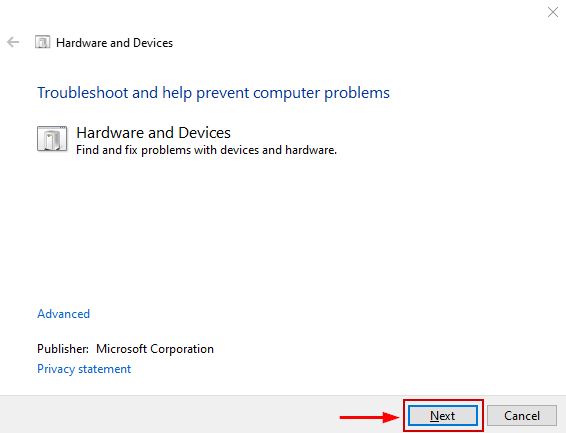
- Wait for the identification of the problem.
- Follow the onscreen instructions.
4. Run Windows Memory Diagnostic Tool
The Windows Memory Diagnostic tool runs the RAM through different tests and notifies the user if the memory module fails in any of them. If the RAM is unable to clear a test then it means it has to be changed. An inoperative RAM is one of the primary reasons for the error we are dealing with.
For this process, your computer needs to boot up correctly. If it is failing to start, then power it up in Safe Mode. Follow our complete guide on how to boot Windows 10 and Windows 11 in Safe Mode.
Once done, follow the instructions below.
- Open Run with Win + R keys.
- Paste the following and hit Enter: mdsched.exe
- Select the Restart Now option to start the process immediately. If you want to do it later, then select the second option.
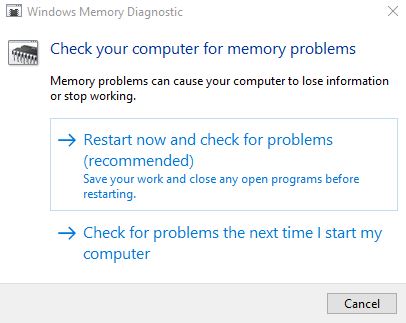
- The computer will now restart and start checking the memory.
- Once the diagnosis is complete, you can view the report to see if there are any issues with the RAM or not.
5. Update Device Drivers
It’s always recommended to update your device drivers if they have got new updates. Outdated drivers are a reason not only for the UNEXPECTED KERNEL MODE TRAP.
Here’s how to update a device driver:
- Start Run with Win + R keys and paste: devmgmt.msc
- Click OK or press Enter.
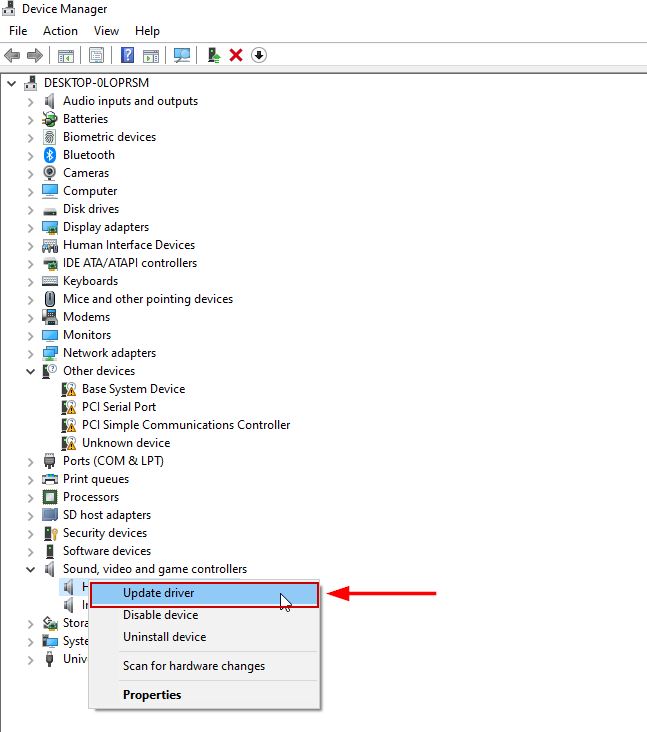
- Click on the small drop-down arrow next to the Sound, video, and game controllers menu to expand it.
- Right-click on the graphic card that you want to update and then click on Update driver.
- Select the option: Search automatically…software.
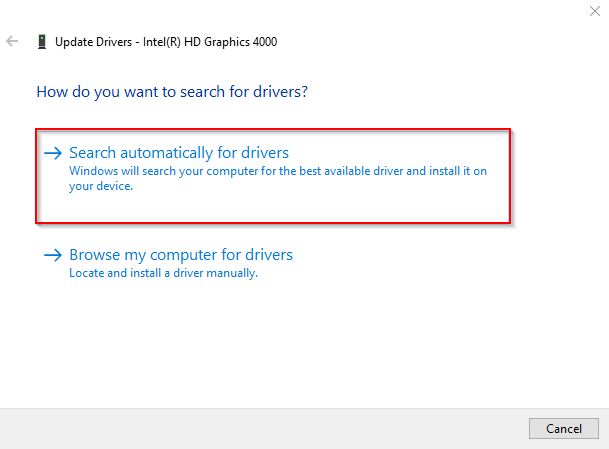
- Install if there are any updates available.
You can follow the same steps to update the drivers for network adapters, display adapters, disk drives, etc.
6. Disable Memory Caching in BIOS
Memory caching basically refers to the process by which applications and programs save a small portion of data in the RAM for quick access. Unfortunately, this can be another source for this blue screen of death error.
To disable this option, users need to boot into the BIOS menu as follows:
- Restart your PC and as soon as the BIOS prompt comes, enter the BIOS setup key. The key varies from model to model, however, some common ones are F2, F10, Del, and Esc. If these keys doesn’t open BIOS for you, try the ones mentioned in our dedicated article for accessing BIOS.
- If you’re unable to enter BIOS this way, then let your PC boot up completely and then open the Windows Start menu.
- Hold shift and click on Restart.
- Navigate to Troubleshoot > Advanced Options.
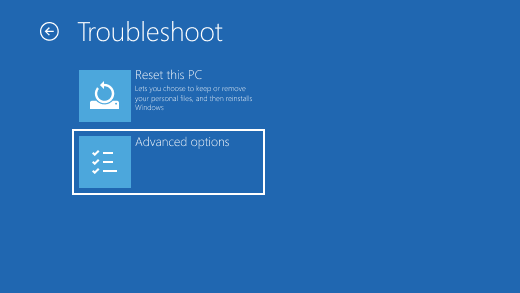
- Go to UEFI Firmware Settings > Restart.

- You’ll now be in the BIOS menu.
Now that you have booted into BIOS, follow the steps below to disable memory caching:
- Click on the Advanced tab.
- Navigate to Cache Memory and enter its settings.
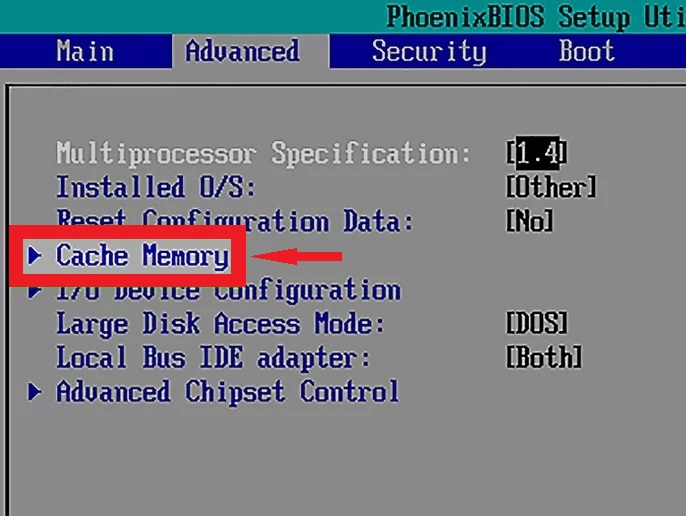
- Use the arrow keys to go to the Enabled option next to Memory Cache.
- Use the change key to toggle the option to Disabled. The change keys are usually the +/- keys but they can vary for different models.
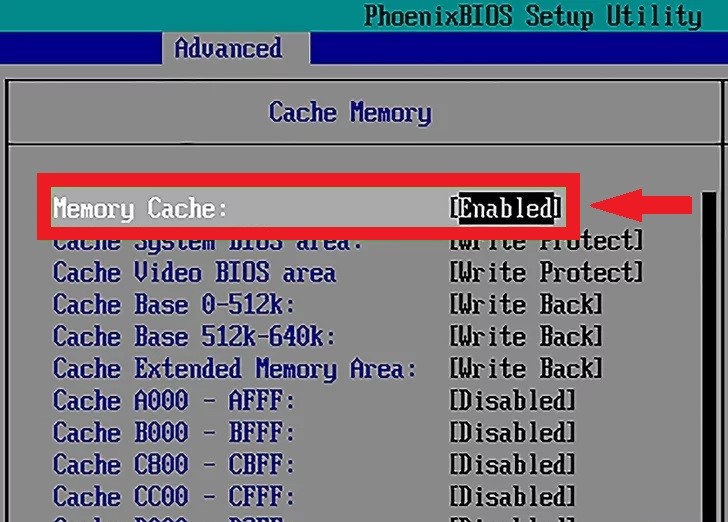
- Now go to the Exit tab.
- Click on Save Changes and exit BIOS. You can also directly press F10 for this purpose.
7. Run SFC and DISM scans
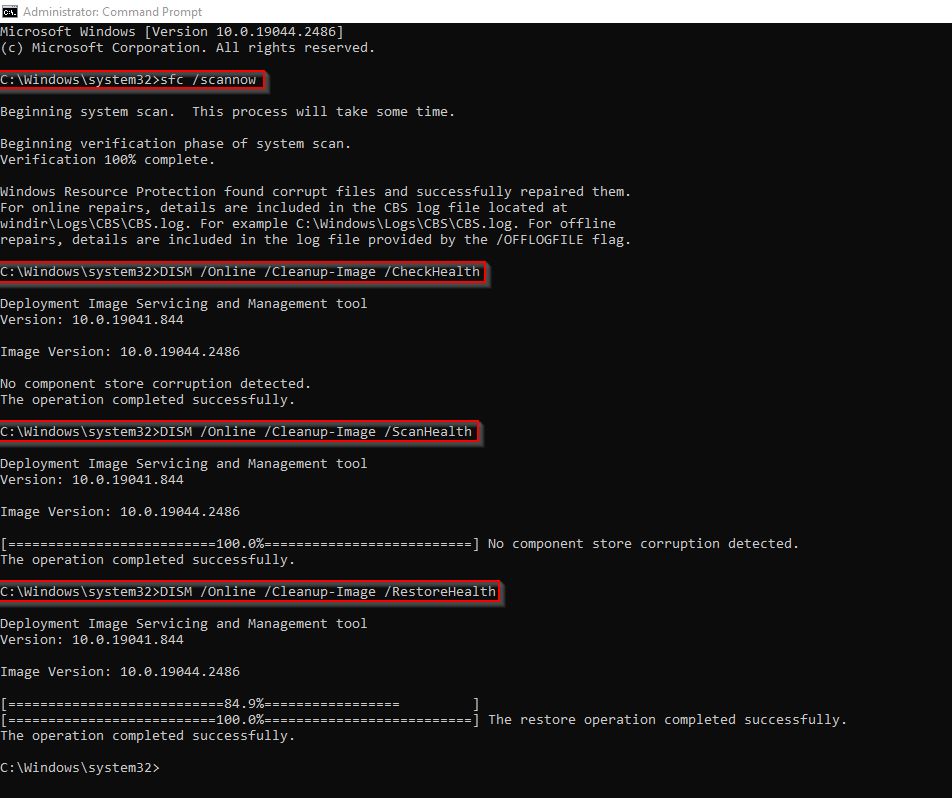
The SFC command will look for any faulty or corrupt files in the system and will fix them automatically. Secondly, the DISM scan will repair the image of the Windows operating system. In case there’s an internal problem on your computer due to a malfunctioned file that may be causing the UNEXPECTED KERNEL MODE TRAP; it won’t be long before these scans rectify it.
Here’s how to run SFC and DISM to repair Windows:
- Open the Start menu and type cmd.
- Run the command prompt as administrator.
- Now run the following commands in order:
sfc /scannow
exe /Online /Cleanup-image /CheckHealth
exe /Online /Cleanup-image /ScanHealth
exe /Online /Cleanup-image /RestoreHealth
8. Run the CHKDSK Scan
The Check Disk (CHKDSK) command can scan all of your hard drives and SSDs to repair or clean them up for better processing. In other words, it will fix all the bad sectors on the hard drives.
Here’s how to run CHKDSK:
- Run the command prompt as administrator.
- Type the following and hit Enter:
chkdsk C: /f
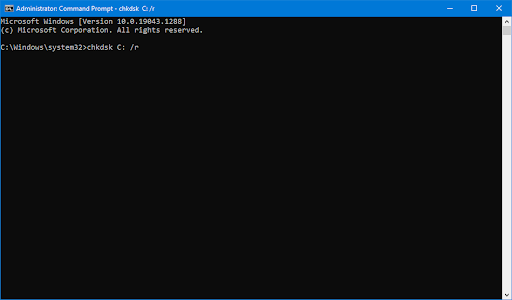
Note: This will scan the C drive. For scanning other drives, you have to make a little adjustment. For instance, to scan the E drive, change the command to chkdsk E: /f. For drive D, it will become chkdsk D: /f, and so on.
Now, wait for the scan to complete and look for any errors in the disk.
9. Perform a Windows Clean Boot
Performing a clean boot is equivalent to starting Windows with just the essential services and the default programs. Generally, when you start a computer in normal mode, many unnecessary programs and services start automatically and begin to eat up the RAM. This heats up the CPU, resulting in blue screens of death.
Therefore, it is recommended to clean boot your system every once in a while (2–3 months) just to make sure the performance of Windows remains at its highest.
Follow our detailed guide on how to clean boot Windows and carry out the prescribed steps.
The post How to fix Windows error: UNEXPECTED KERNEL MODE TRAP appeared first on Appuals.com.


0 Commentaires