If you have an HDR display attached to your Windows 11 PC, this is one feature you need to turn on.
While plenty haven't yet upgraded to Windows 11, for gamers, in particular, there are plenty of reasons to. One of these is Auto HDR, which when paired with an HDR display, can make even non-HDR-enabled games look better.
It isn't exactly proper HDR, but the feature uses the ability of a compatible display to boost colors in games with no performance hit. Auto HDR is part of the main Windows display settings, but if you were hoping you might be able to get some benefit without an HDR display, sorry, you're out of luck.
Windows 11 will detect whether you have a compatible display attached, and if you don't, you won't have access to the feature. If you do, here's how to turn it on.
How to enable Auto HDR in Windows 11
Enabling the Auto HDR takes mere seconds and a few clicks in the right place.
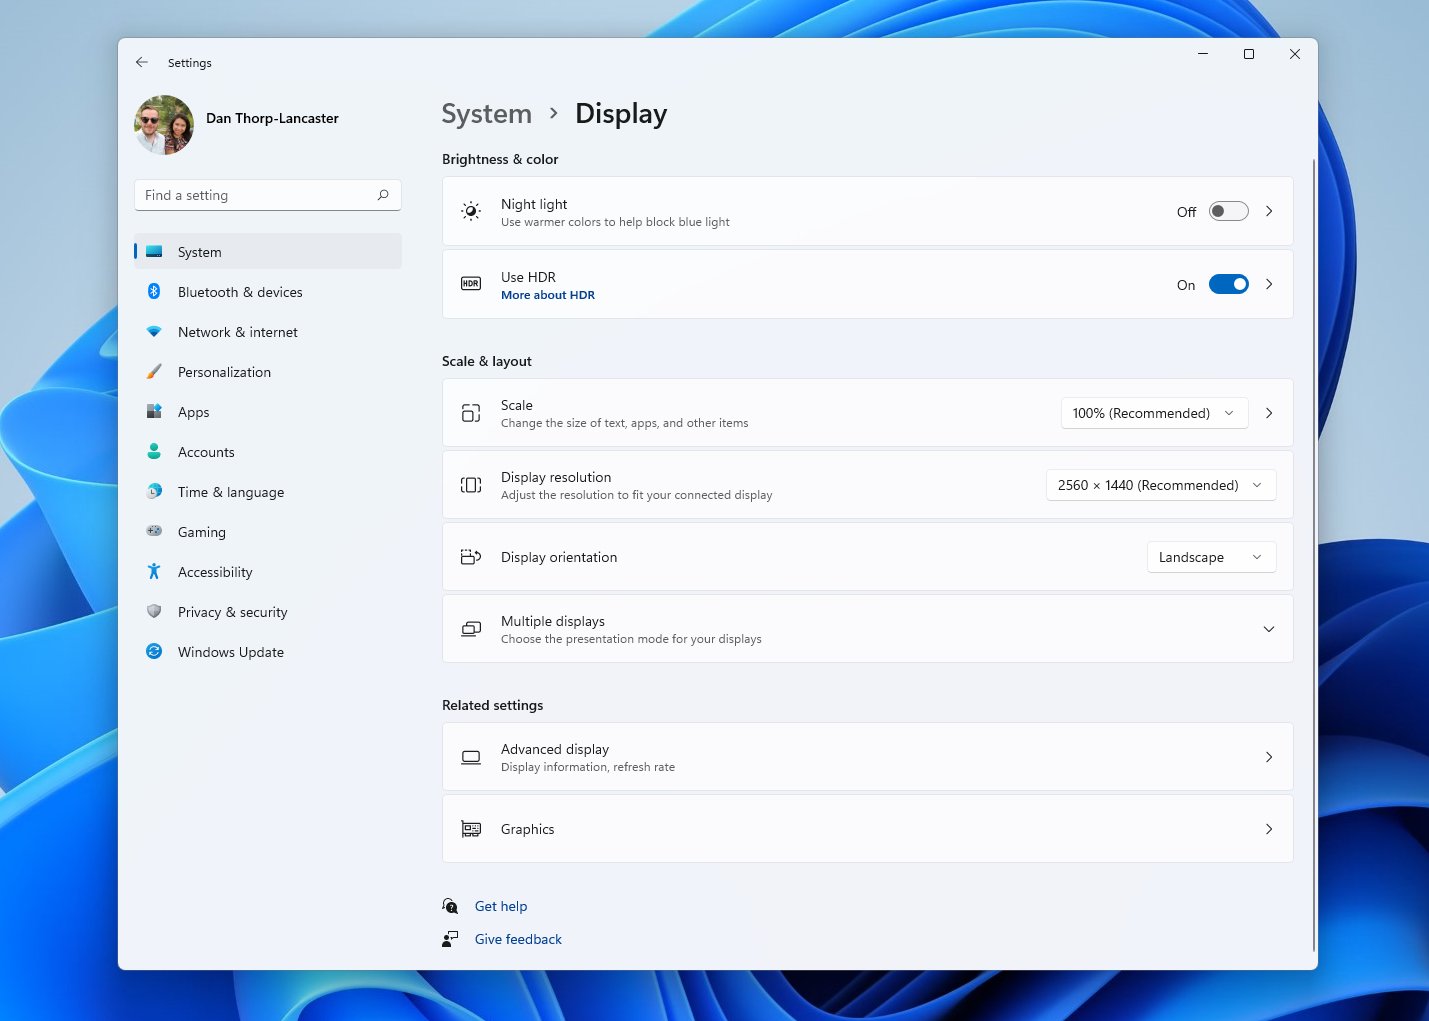
- Right-click on the desktop.
- Click Display Settings.
- Ensure Use HDR is enabled.
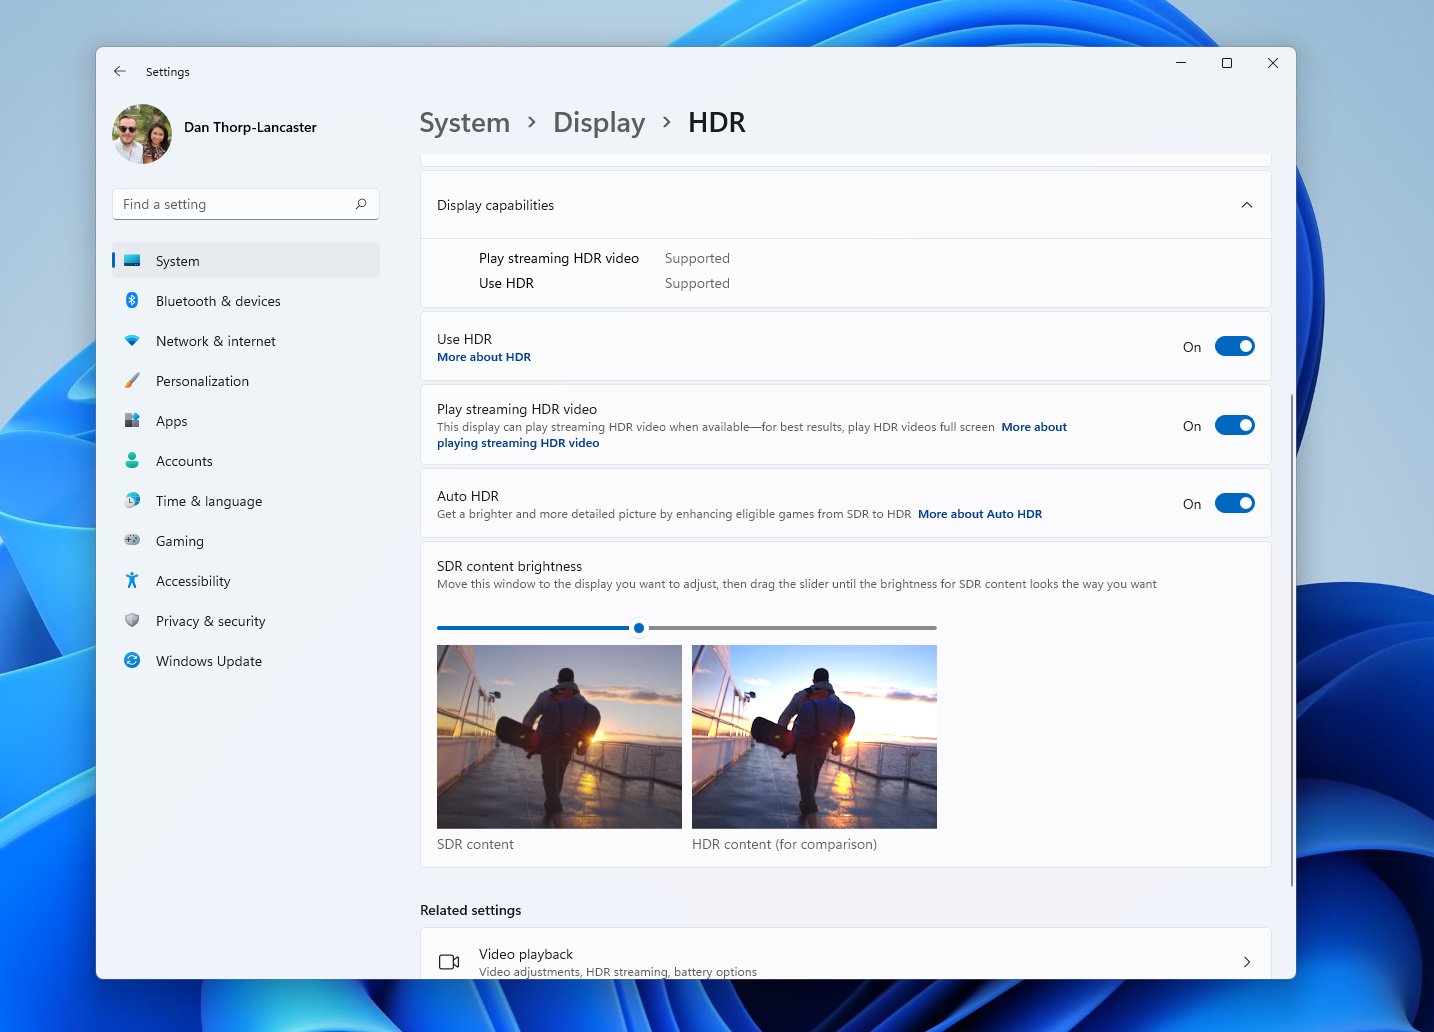
- Click User HDR to open the HDR settings menu.
- Ensure Auto HDR is enabled.
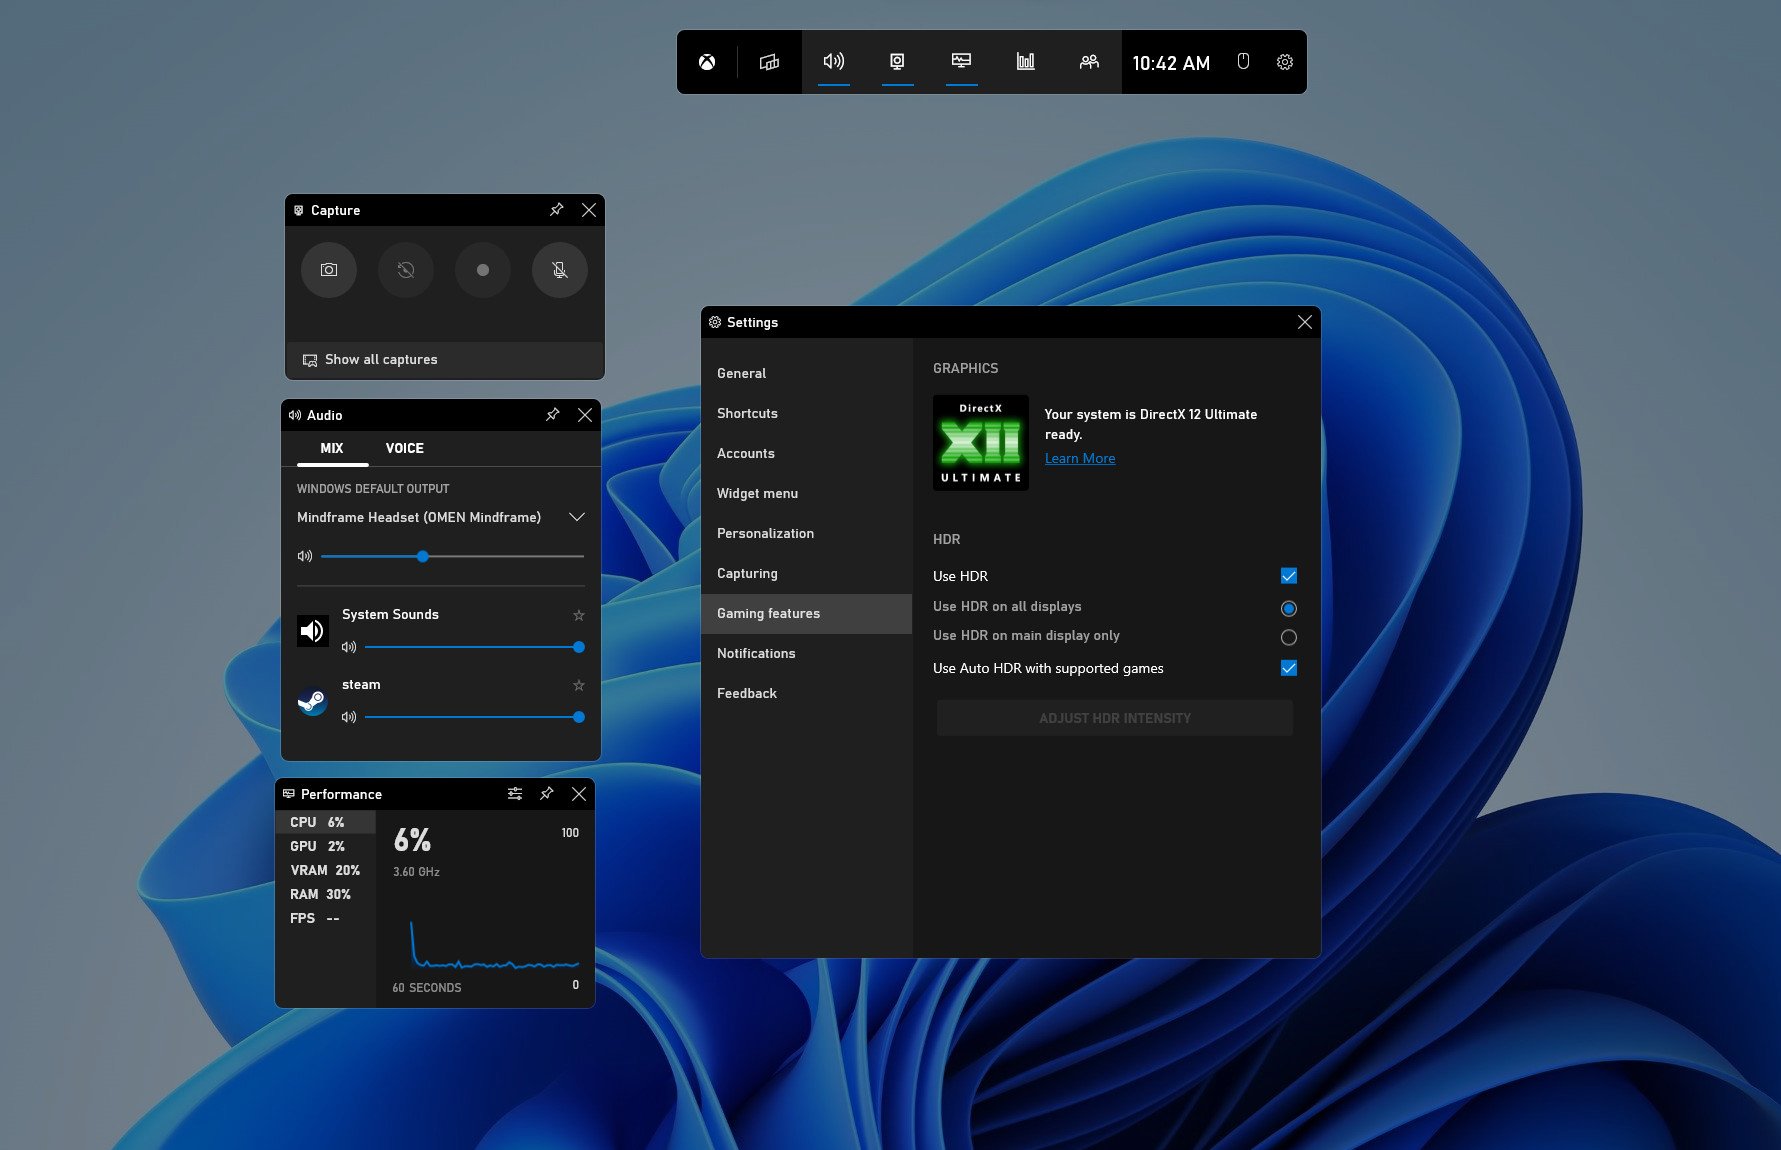
That's all there is to it. It's not the only way you can enable it, though, and if you're already in-game and want a friendlier way to turn it on without having to tab out of what you're playing, you can also enable Auto HDR from the Xbox Game Bar.
- Open Xbox Game Bar by pressing Win + G.
- Click on the Settings cog.
- Select Gaming Features from the sidebar.
- Check both boxes for HDR settings.
- Close Xbox Game Bar.
Additionally, when you use the Xbox Game Bar method you get access to an intensity slider, so you can adjust the strength of the Auto HDR on a game-by-game basis while you play.


0 Commentaires