Many users reported they are seeing the ‘Twitch mod tab not loading’ problem at the time they view the mods on Twitch. As per the users when they try loading the Mods tab in the Twitch the loading screen stuck and keeps spinning interminably but never load
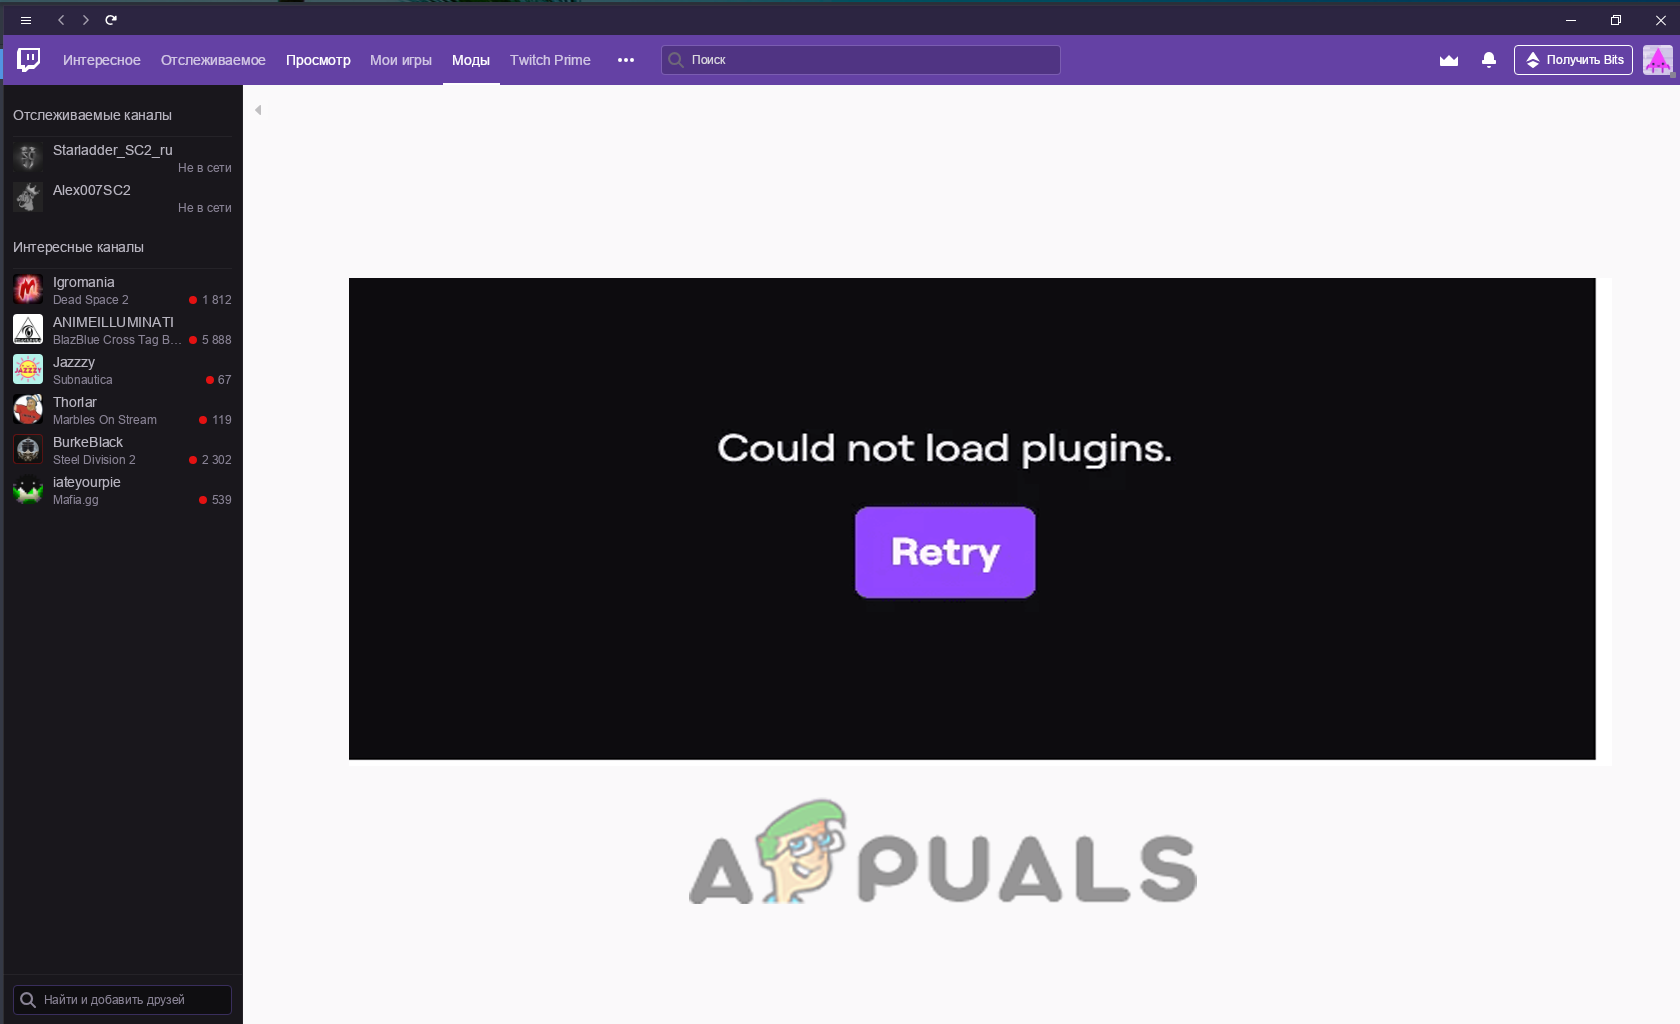
Whereas in some cases the users start seeing the error message:
Twitch mods tab could not load plugins

Twitch games tab not loading
Well, this is an irritating issue as the users are unable to use the mods on Twitch. But luckily many users managed to fix the error on Twitch and started using mods.
So, before heading towards the fixes it is suggested to learn the common culprits that trigger the error on Twitch.
What Causes the “Mods Tab not Loading on Twitch” Problem?
- Outdated Java version – Very first check if you are running an outdated Java version then this might cause the mods to not run properly on Twitch, so if this case is applicable in your case the updating the Java to the latest version might work for you.
- Poor or unstable internet connection – Sometimes the unstable or poor internet connection might be blocking the mods from not running properly on Twitch, so try different streaming applications like YouTube, Netflix to verify if your internet is working fine or switch to a different internet connection. Also, connect your internet service provider to fix the slow or unstable internet problem.
- Windows Firewall Interference – There are ample chances that the Windows Defender Firewall is conflicting or blocking the mods from running on Twitch. So, if this is applicable in your case then disable the Windows firewall as this might work for you.
- Running as a user account – If you are running without administrative rights as a user account then might be causing the problem in your case. So, try running with administrative privilege and check if the mod starts working on Twitch.
- Twitch Data Corruption – There is a possibility that some of the Twitch installation files get corrupted during the installation and cause problems while running. In this case, deleting the Appdata or reinstalling the application may work for you to solve the problem.
As you are now well aware of the common culprits that stop mods from running on Twitch here it is suggested to follow the solutions that worked for several users to get past the Mods Tab not Loading on Twitch.
Preliminary Fixes
Before starting with the given tricky solutions, here it is suggested to start with the quick fixes to solve the problem in your case:
Restart Twitch – Sometimes due to minor glitches and bugs Twitch starts causing issues and among them, the one is ‘mod tab not loading’ on Twitch. So, reboot your Twitch application and after launching try loading the mods tab and see if the problem is resolved.
Check your Internet Connection – If your internet connection is not working properly or unstable then this might be causing the problem. Many streaming platforms like Twitch require specific internet speed to run properly. So here it is suggested to test your internet bandwidth meets the twitch network requirements or not.
Moreover, if you are connected via WIFI then try connecting via ethernet cable connection as this allows you to use the internet without any interruption and network bandwidth limitation.
Moreover, if this won’t work for you, to resolve the problem then start following the solutions given one by one:
Logout and Login to Twitch
In some cases, the users are seeing the problem after updating the Twitch applications with the latest update. So, check if you have recently updated Twitch with the latest update. In this case, log out from the Twitch account and then again logging after 10-15 minutes to solve the problem.
But if in case you are still seeing the problem, then upon restart the application check the addons running.
Also, follow the below-given steps:
- First, launch the Twitch app on our Windows system
- And then on the top left side of your window go to the hamburger icon and click on it.
- You will now see a new window where you need to click on the ‘File’ option after that select the Logout
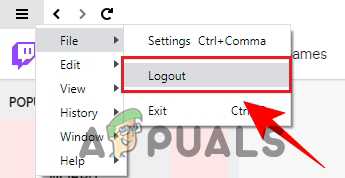
Click Logout option - Then, close the Twitch application as clicking the ‘X’icon won’t close it completely. So, in this case, you need to head to the File option by clicking the hamburger icon, and then you need to click on the Exit
Alternatively, try closing twitch through Task Manager, and close it completely.
- Press Ctrl + Alt + Delete keys altogether to launch the Task Manager
- Search for Twitch application and right-click on it and choose End Task
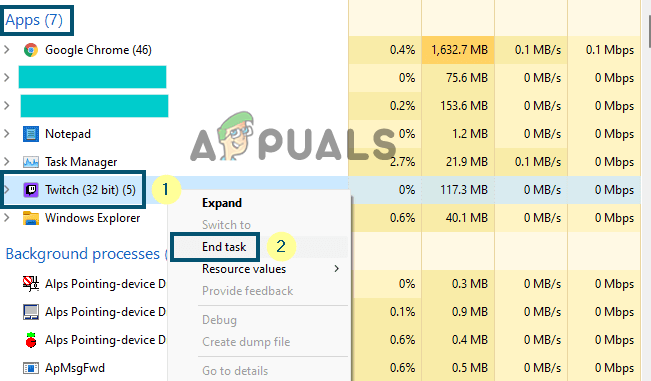
Close Twitch in Task Manager - After that, try reopening the application after some time and you need to type your twitch credentials to log in. So type your ‘Username’and then ‘Password’ and hit the ‘Login’
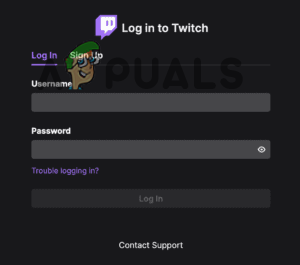
Type your ‘Username and ‘Password’ - Now, the Twitch applications may require entering the Verify login code.
- Then you need to check your inbox for the code.
- And you need to go to the Mods tab on Twitch and see if it starts working.
If in case the issue is not yet resolved then try to restart your Windows as well as macOS. Hope this works for you and check if Twitch mods or other gaming mods start working again.
Try to Run Twitch as an Administrator
If you are unable to find your mods or the games in the Mods and the Games tabs in the Twitch application, then there are ample chances that your Twitch app has lost the write permissions, so you need to grant the administrative permissions to the executable file and check if the mods tab start loading or not.
Here follow the steps to do so:
- First right-click on the shortcut Twitch application icon and select the Properties option.
- Then go to the Compatibility tab in the Properties window and checkmark the box names as Run this program as an administrator.
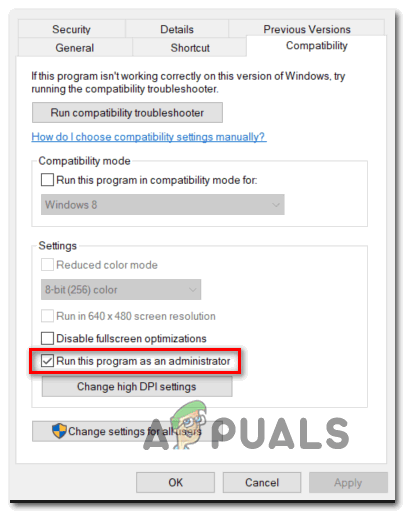
Run this program as an administrator - Next, click on the Apply option and then click the OK button for saving the changes.
Launch the Twitch application and see if the issue is not yet resolved.
Delete the AppData
In a few cases, the application formations and the setting files and may get corrupted and start causing issues during the mods tab loading. Therefore, here it is suggested to remove the config files inside the AppData folder and then start seeing if the problem is resolved.
Follow the steps to do so
- PressWindows+ R key and in the Run box that opens
- Type %AppData% and hit the Enter key

Run %appdata% command - Now launch the Twitchfolder and then remove the entire settings files available there.
Now start Twitch again and verify if the problem is resolved.
Reinstall Java
If you see the ‘Games’ or the ‘Mods’ tab is revolving endlessly even after restarting the Twitch application, then there is the possibility that the outdated Java version is causing the problem, so check the Java version.
So, updating the Java or reinstalling it might work for you. Try the steps given to do so:
- First, check if Java is installed on your computer or not. If you find Java is installed then uninstall it using the “Java Uninstall Tool” application by opening the link in the browser.
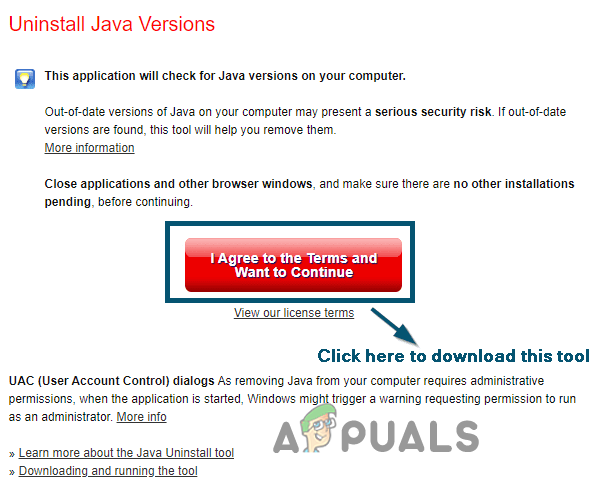
Download Java Uninstall Tool - And as the tool is downloaded double-clicking on the executable file to launch it.
- Now click on the button Agree on the welcome screen.

Click on the Agree button - If after clicking on Agree button check if you see a popup window Java is not presented in the system.
- For installing Java, launch the official website or hit the Get Java button, your computer will take you to the essential webpage.
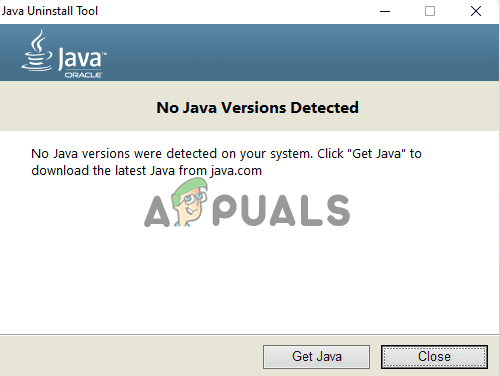
Click on the ‘Get Java’ button - Then click on the specific button for downloading Java and once it is downloaded, then double click on the downloaded file.
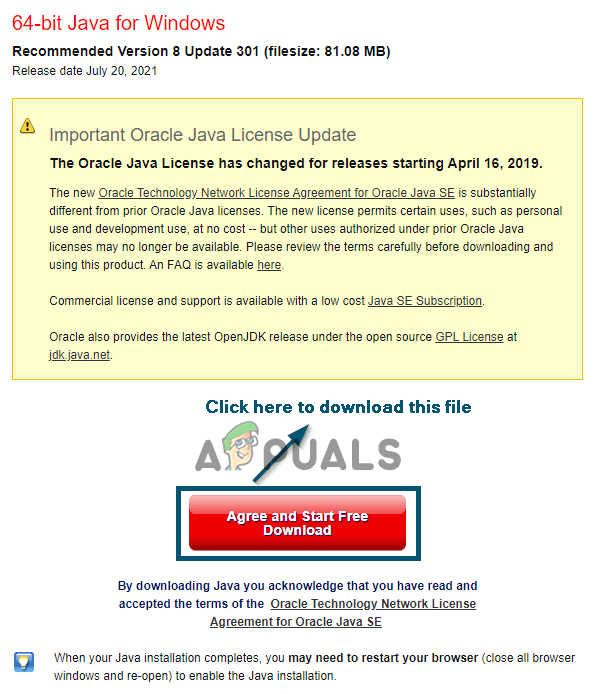
Downloading Java - Next, allow the Java SE Runtime Environment by clicking on the Yes button for making changes to the device.
- Here click on the Install button for starting the installation process.
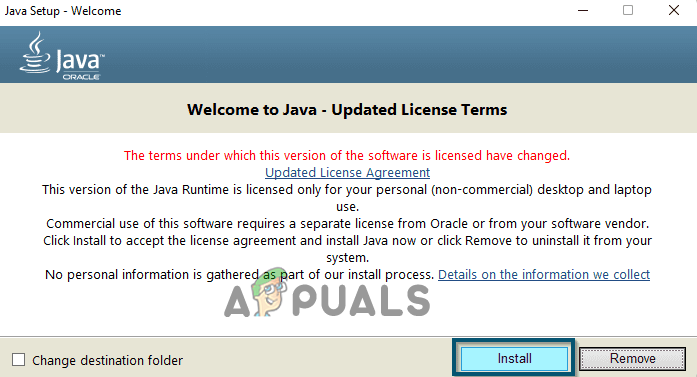
Click the ‘Install’ button - Wait for the installation process to complete and click the close button
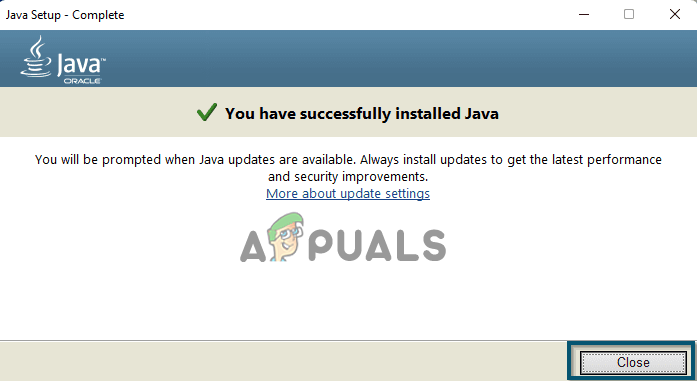
Click the ‘Close’ button - Now reboot your PC and as the system starts check if the problem is fixed.
Add Twitch to Windows Firewall Whitelist
Many times, the Windows Firewall blocks some files and features of many applications, so, there is a possibility the firewall is blocking the mods on the Twitch app. Therefore, here it is suggested to whitelist the Twitch application on Windows Firewall.
Here follow the steps to do so:
- Press the window key and in the search box type Defender Firewall
- Launch the Windows Defender Firewall
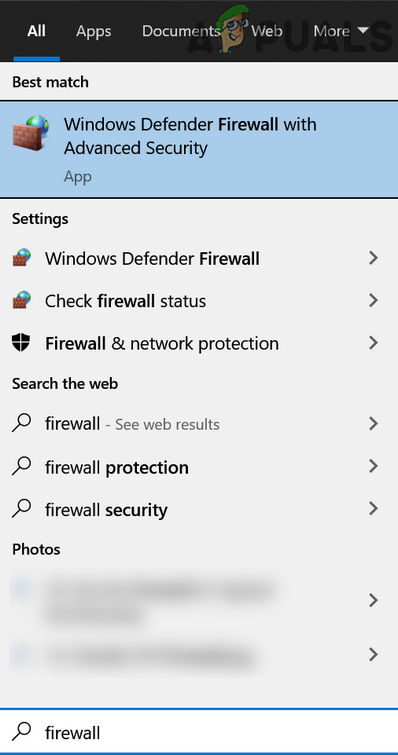
Open Windows Defender Firewall - And select the option ‘Allow an app or feature through Windows Firewall Defender’
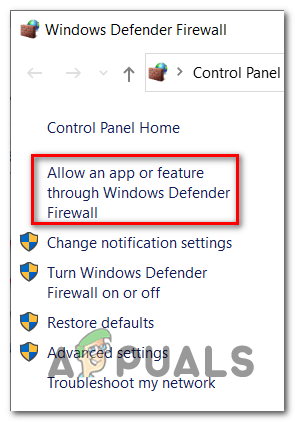
Allowing an app or feature through Windows Firewall - Now in the window that opens press the Change Settings option.
- And in front of the Twitch application tick mark the public and private network boxes.
- Then reboot your PC or laptop for saving the changes.
Check if you are still seeing the Mod Tab not Loading on Twitch problem or else head to the next potential fix.
Install Microsoft .NET Framework
Many users suggested that installing the .Net framework software on their Windows PC works for them to solve the problem. So, if your Windows system is not containing the software the try installing the latest version in your system.
Follow the instructions given:
- Download the .NET Framework tool from the official website.
- And once it is downloaded start it to launch and then finish the installation process.
Then restart Twitch, now see if the problem is fixed or not.
Now, relaunch Twitch and see whether you can load the Mods Tab on your PC.
Modify the Access Mode Via Terminal (For Mac)
This solution is especially for Mac users, who are facing the ‘Twitch mod tab not loading’ problem while downloading the mod pack via the Twitch application.
So here follow the steps to do so:
- Hit the Command + Space bar keys on the macOS.
- Next, you need to type the terminal after that double-click on the icon for opening the Terminal
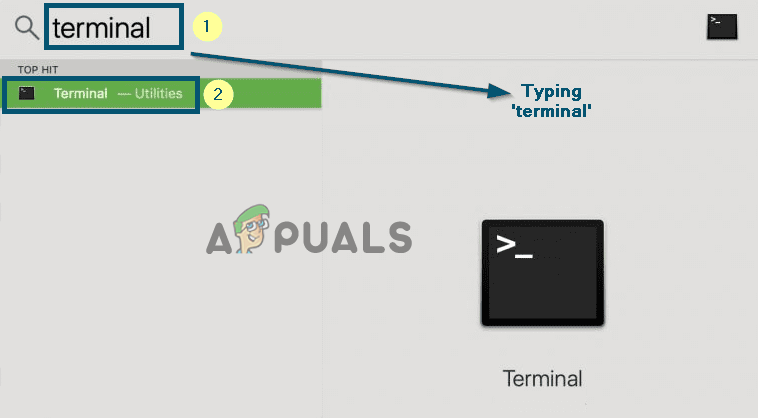
Launch the Terminal application - Now in the Terminal window, type the below-given command and then hit Enter to run the command:
chmod +x /Applications/Twitch.app/Contents/MacOS/TwitchAgent.app/Contents/MacOS/TwitchAgent
- Then restart your Twitch application and check if your plugins start loading in the ‘Mods’ tab.
If in case this solution won’t work for you, then try reinstalling the application to solve the issues.
Reinstall the Twitch Application
If none of the above-listed solutions works for you then the only option left is to try uninstalling and then reinstalling the application. Here follow the steps for the Mac and well as Windows OS:
For Windows Users:
- First, open the Windows icon and then click on the search box and type Control and open Control Panel
- Now click on the category Programs and then click the Uninstall a Program option
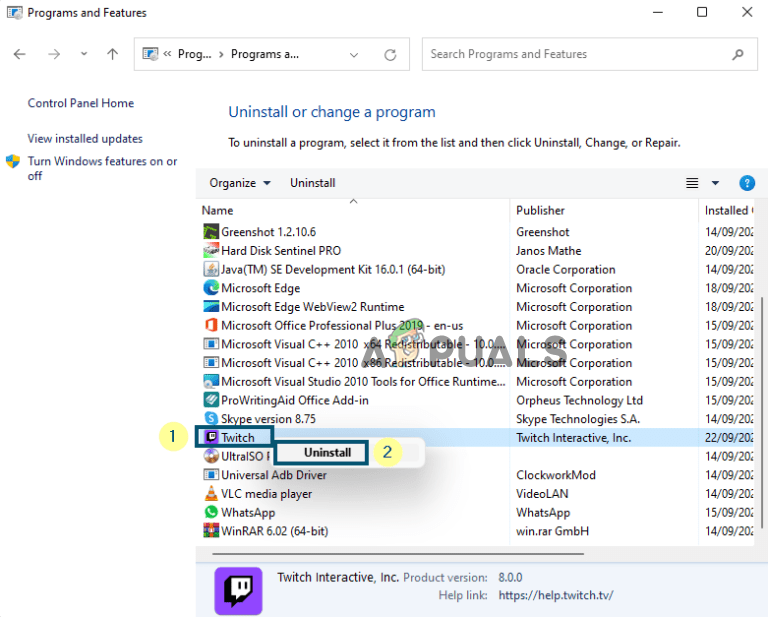
Uninstall Twitch - Then locate the Twitch application and as you locate the app right-click on it and from the drop-down menu click on Uninstall option
- As your system starts the uninstallation process wait to finish the process.
For Mac OS users
- First, you need to open the Finder and hit the given keys command + Up-arrow + G keys
- Then in the search box that opens type the ~/Library
- Now find the folders related to the Curse or Twitch and then delete them.
Please Note: If you are unable to delete the file in your macOS, then try to drag the Twitch application and then drop it into the Trash folder.
Hope now you can and uninstall the Twitch for MacOS, once you uninstalled it then try to reinstall it.
Re-install the Twitch
And as the uninstall process is finished, open the Twitch app setup and try to install it. But if in case you won’t have the setup and then to do a fresh install in your system. Visit the official website and try to install the application as per your operating system.
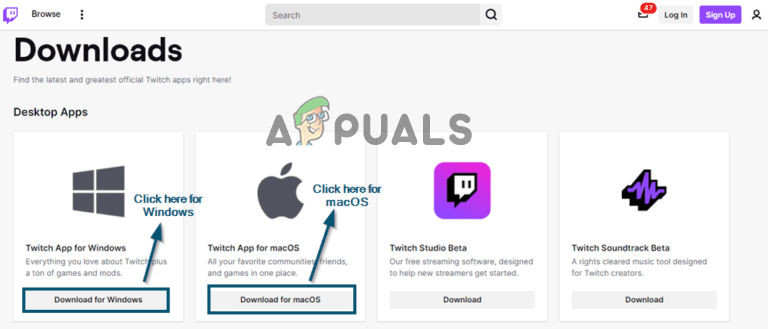
Please Note: Avoid changing the application installation directory from the earlier install. Or else you may lose entire installed data and mods. So make sure to reinstall it on its original disk drive
For Windows Users:
- As soon as the download is complete, double-click on the TwitchSetup.exe file named file and start it
- And as the new window popups then click on the Install button for starting to start the installation process.
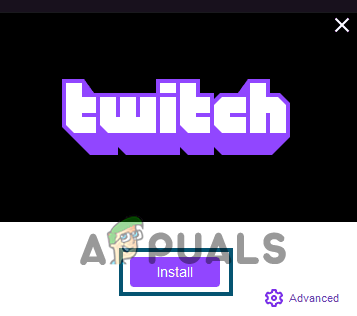
Click on the Install button - And as the installation process is started, try to complete the installation process.
Please Note – If in case you see any installation problem, then make sure to download the file with administrator privilege.
For macOS:
- As the download process and is finished then launch the Twitch named ‘.dmg’file and double-click on it.
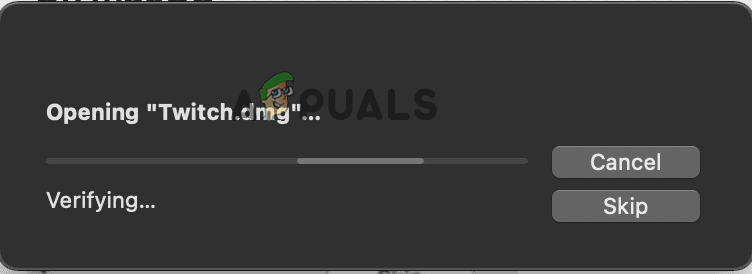
Open the ‘.dmg’ file - Now your MacOS confirm the downloaded file and after that, a new window appears showing the directions for installation of the Twitch setup file.
- And drag the ‘Twitch’file in an Applications folder, now the system will start the process.
- And as the process is finished then exit the instructions window and head to ‘Launchpad’for opening the Twitch
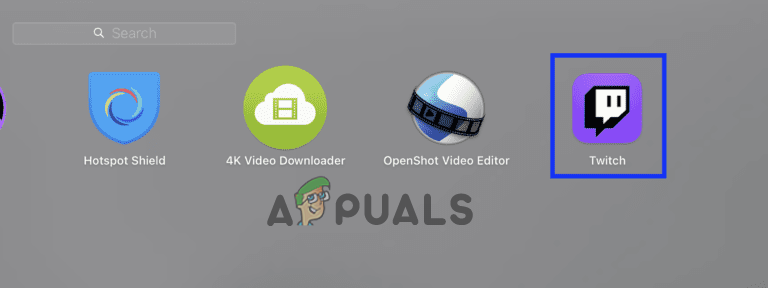
Open Twitch application from Launchpad - Then the system will start verifying the files and in some time your system starts prompting you whether you need to launch the file or not. Then click on the Open option for updating the particular application from the particular network and start validating the files.
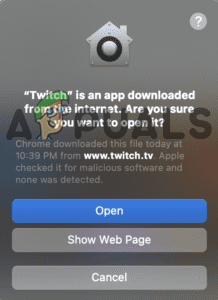
Click on the Open button - Once you see the Twitch login window, then type the credential for login into the application.
- Then go to the Mods tab again and see if now the Mods tab not loading on Twitch is resolved.
So, these are the solutions that you need to try and circumvent the mods tab not loading on Twitch launcher problem on Windows and macOS.
The post Twitch Mod Tab Not Loading? Here’s How to Fix appeared first on Appuals.com.

0 Commentaires