Google Pixel smartphones have been out for a few years now and they are known worldwide. Most users that have not used these Pixel smartphones are wondering how the screenshot works on these particular devices. Like any other Android device, Google Pixel also has several different methods through which screenshots can be taken. In this article, we will show you methods that you can use to take screenshots on your phone.

All the below methods will not be the same for each Google Pixel phone. Some old Google Pixel phones will have much simpler and fewer ways of taking screenshots than the new ones. Google Pixel is a Google device and that is why your screenshots will be automatically synced to your Google account. You can view them anytime from any device as long as you are logged in to your Google account. We have provided several different methods that you can try and be comfortable with the one that you like.
Taking a Screenshot through Power Button
The classic power button screenshot is known by many users. Most phones work the same where you can take screenshots by pressing the power button with one of the volume buttons together. It is the same for Google Pixel phones too. Check the below steps and learn to take screenshots through the Power button on your phone:
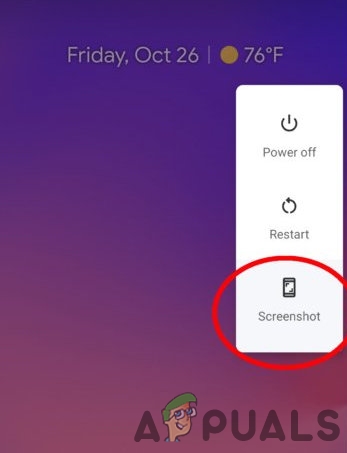
- Press and hold the Power button on your phone and you will see a drop-down menu at the top right corner that appears next to the power button. Here you can just tap on the Screenshot icon and it will take the screenshot.
Note: You can also press the volume down button to choose the Screenshot option from the drop-down list.
Screenshot through Power button menu - Another alternative to the above step is to press both the Power and Volume Down buttons together. On some devices, you may need to press and hold the buttons for a while until a screenshot is taken.
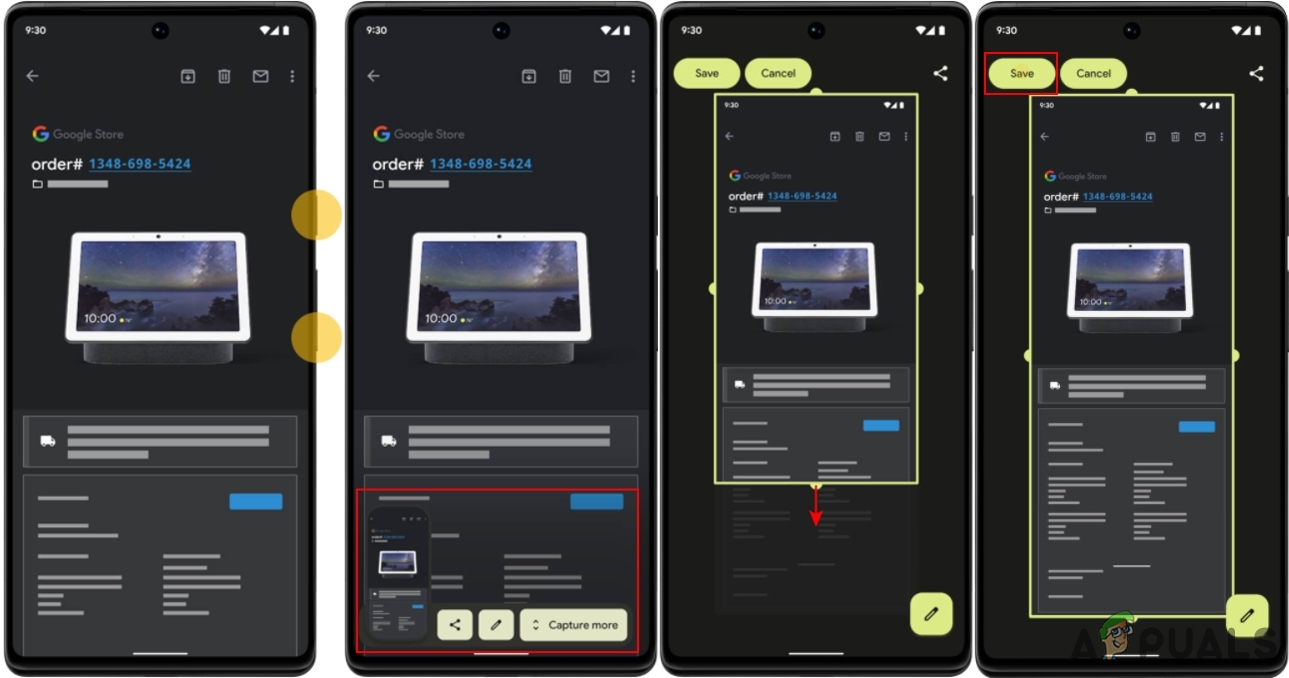
- Once the screenshot is taken you will see a small preview at the bottom corner of your phone. You can tap on the screenshot to view or edit it further.

Taking Screenshot and using different features - Some applications will provide the Capture more option. If you tap on that you can expand and take a Scrolling screenshot.
- Once you are done with editing or taking scrolling screenshots, you can tap on the Save button to save screenshots to your gallery.
Taking a Screenshot through the Recent App Menu
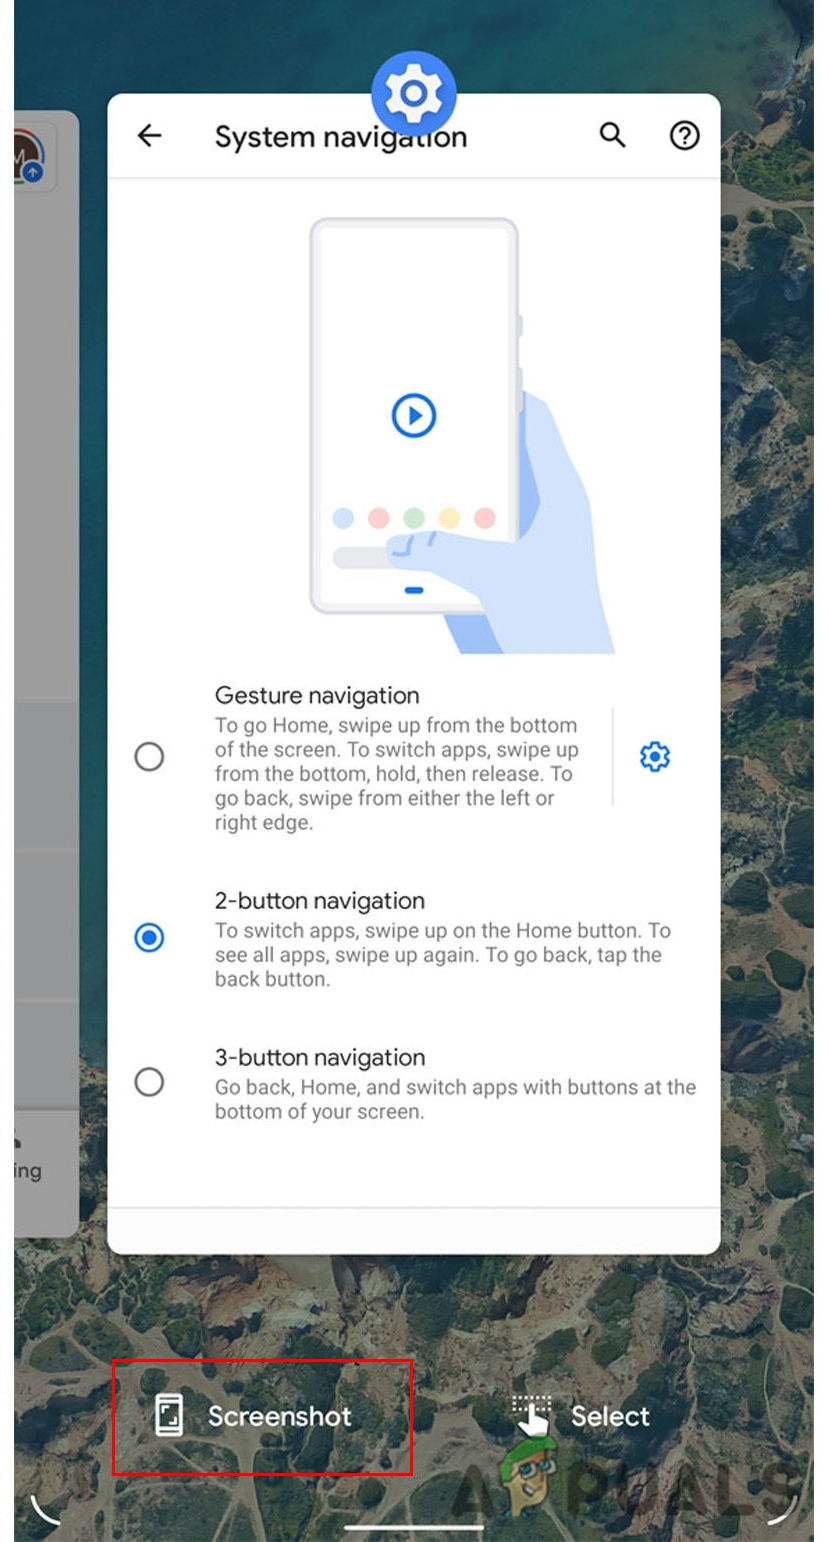
In the latest Google Pixel device, you can also take screenshots through the Recent App menu. Tap on the Recent App button and you will see a screenshot option that you can use to take a screenshot of any recent application showing. It will also provide a preview of the screenshot through which you can edit the screenshot as in the above method. Follow the steps mentioned below to use the screenshot feature through the Recent App button:
- Tap on the Recent App button on your phone. If you don’t have the Recent App button, then just Swipe up to see recent applications.
- You will see the opened apps that you can swipe left and right to select any.
- Select the Application and then tap on the Screenshot button below to take the screenshot.

Screenshot option in Recent Apps menu - It will take a screenshot of the selected application and provide the preview at the corner of your phone. You can further edit or share the screenshot through the preview options or simply let it be saved to the photo gallery automatically.
Taking Screenshot through Google Assistant
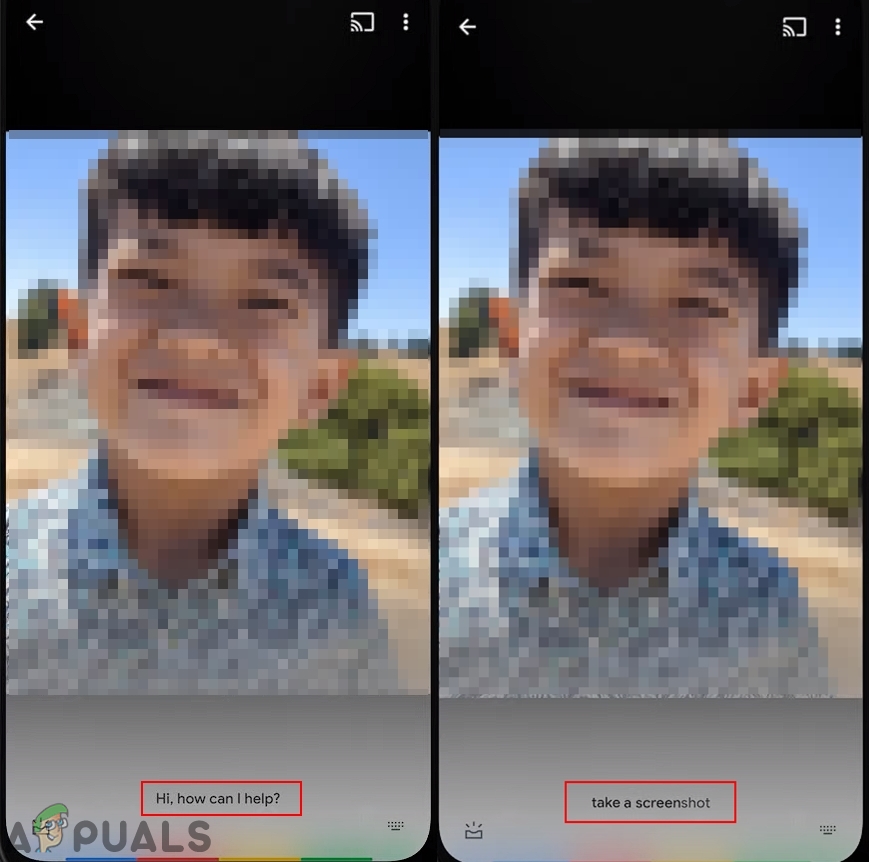
Google Assistant can also help in taking a screenshot. You can just call Google Assistant and ask to take a screenshot for you. If Google Assistant doesn’t take a screenshot for you, then you need to check your settings. Follow the below steps to check how to start:
- Go to the screen for which you want to take a screenshot.
- Now you can open Google Assistant by saying “Hey Google” or by opening it through a shortcut.
- Tell the Google Assistant to take a screenshot by saying “Take a Screenshot” to it.

Screenshot through Google Assistant - It will automatically take the screenshot on your phone without pressing any buttons.
The post How to Take Screenshot on Google Pixel? appeared first on Appuals.com.

0 Commentaires